Making the leap from a dumb phone to a smartphone, or even a wearable can sure feel futuristic.
That is because it is.
The decades of 2G cell phones with actual buttons are gone. Today, “smart” technology lives up to its name.
NFC stands for Near Field Communication. It is a key feature on Android and iOS and a host of wearable fitness gadgets.
While it used to be used for a variety of functions on smartphones, recent times sees NFC utilized for one core purpose.
For contactless payments.
File sharing used to be done with NFC using Android Beam. That has been replaced by Google’s proprietary “Nearby Share” technology.
If you want to use your smartphone, or an Android smartwatch to pay for goods using Google Pay, Samsung Pay, or any other banking app that you have installed on your device, you need to know how to turn NFC on and off on Android.
How to enable NFC on Android
Step 1: Go to Settings
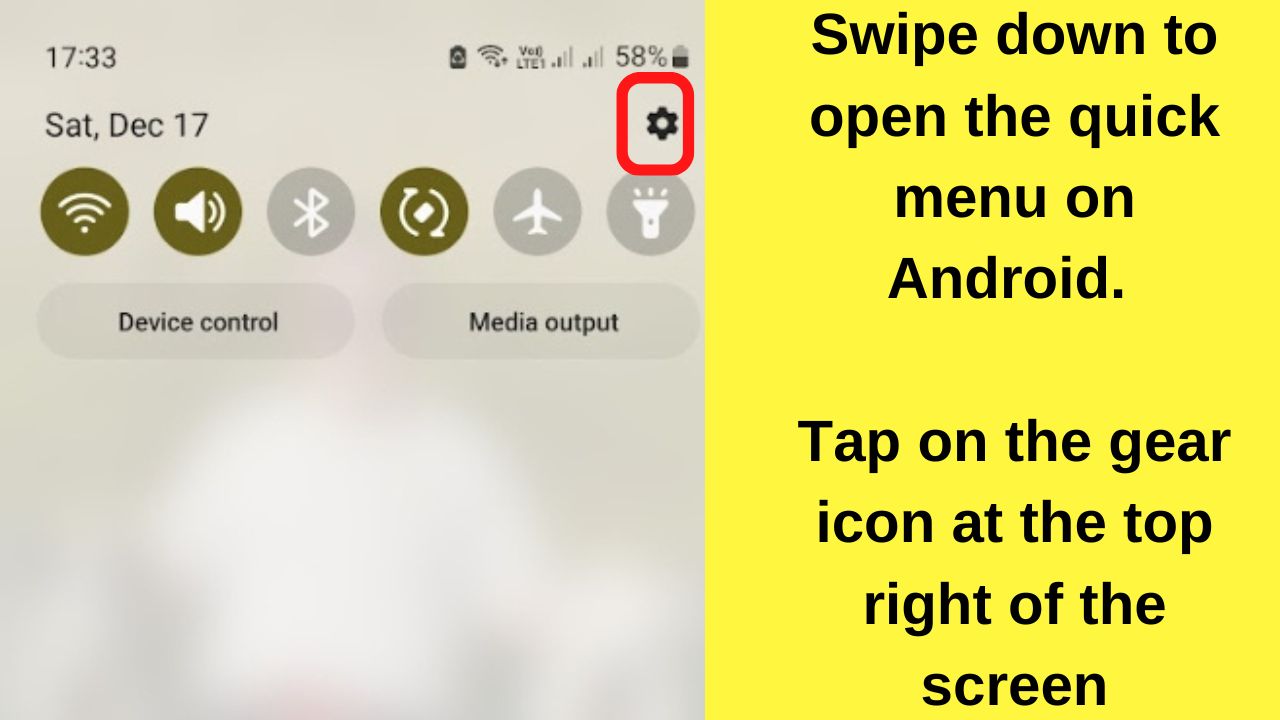
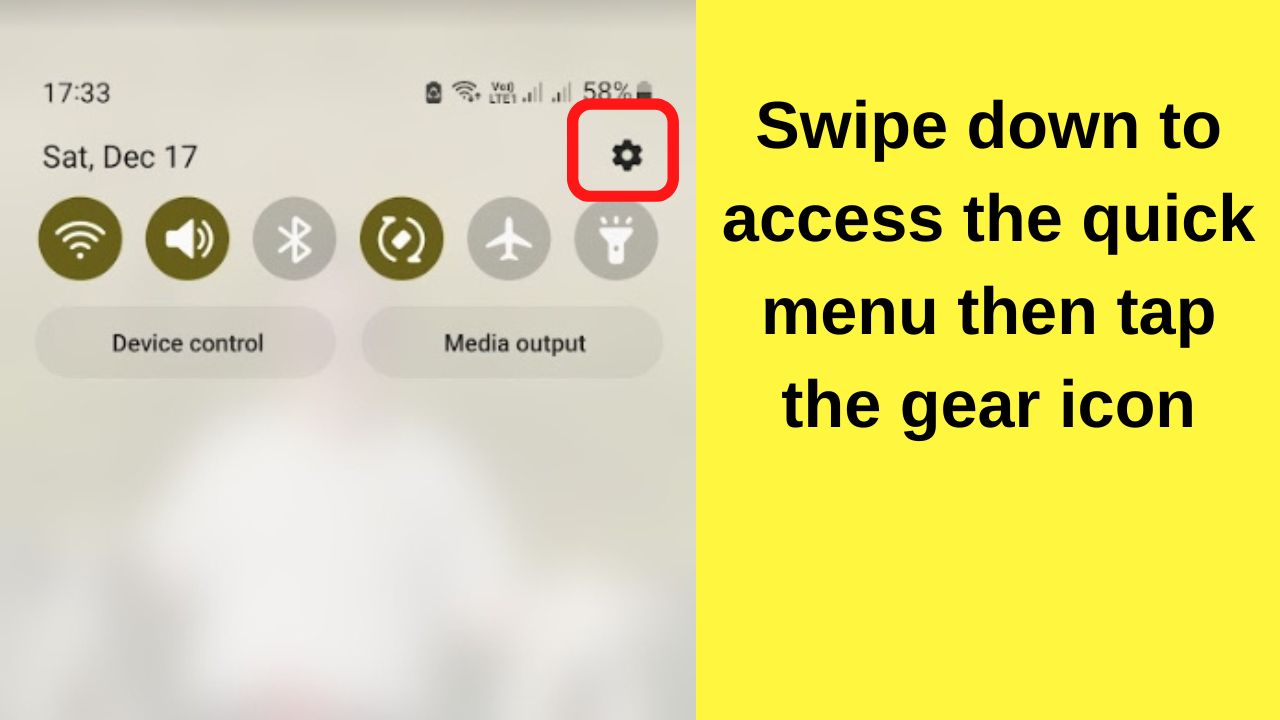
Swipe down from the top of the screen, then tap on the gear icon located on the top right.
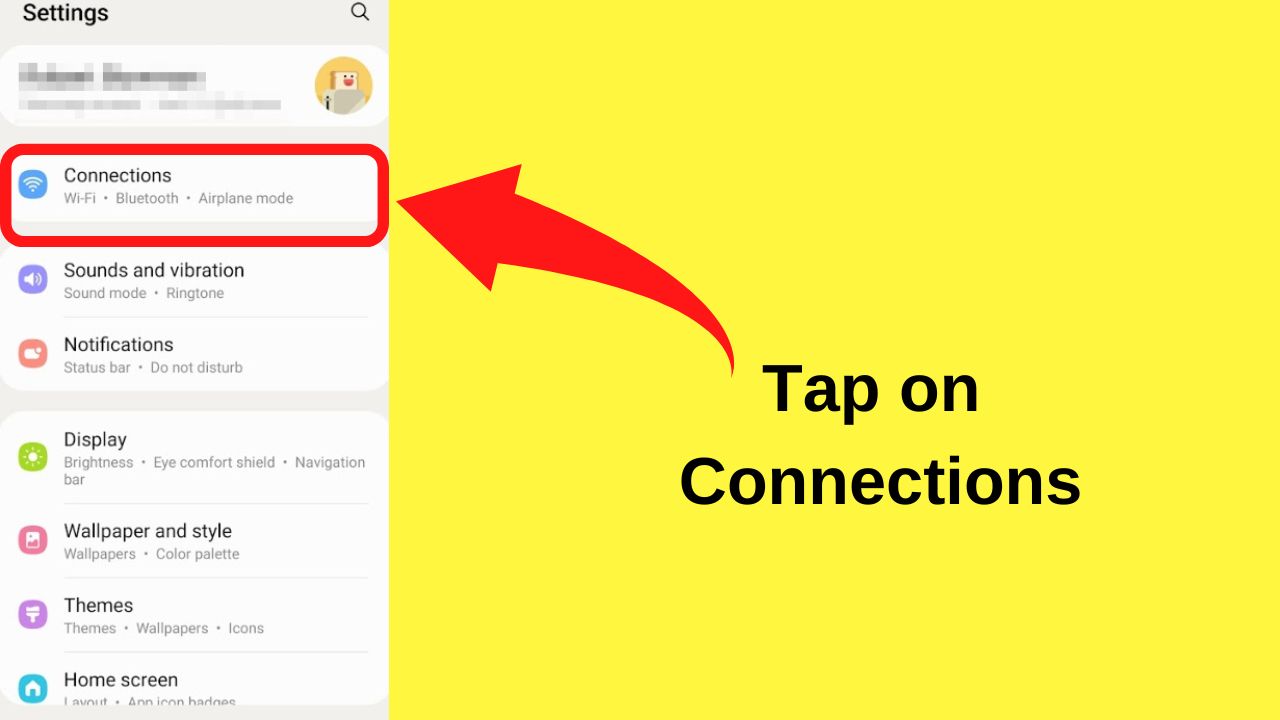
Step 2: Tap on Connections
Step 3: Toggle on “NFC and contactless payments”
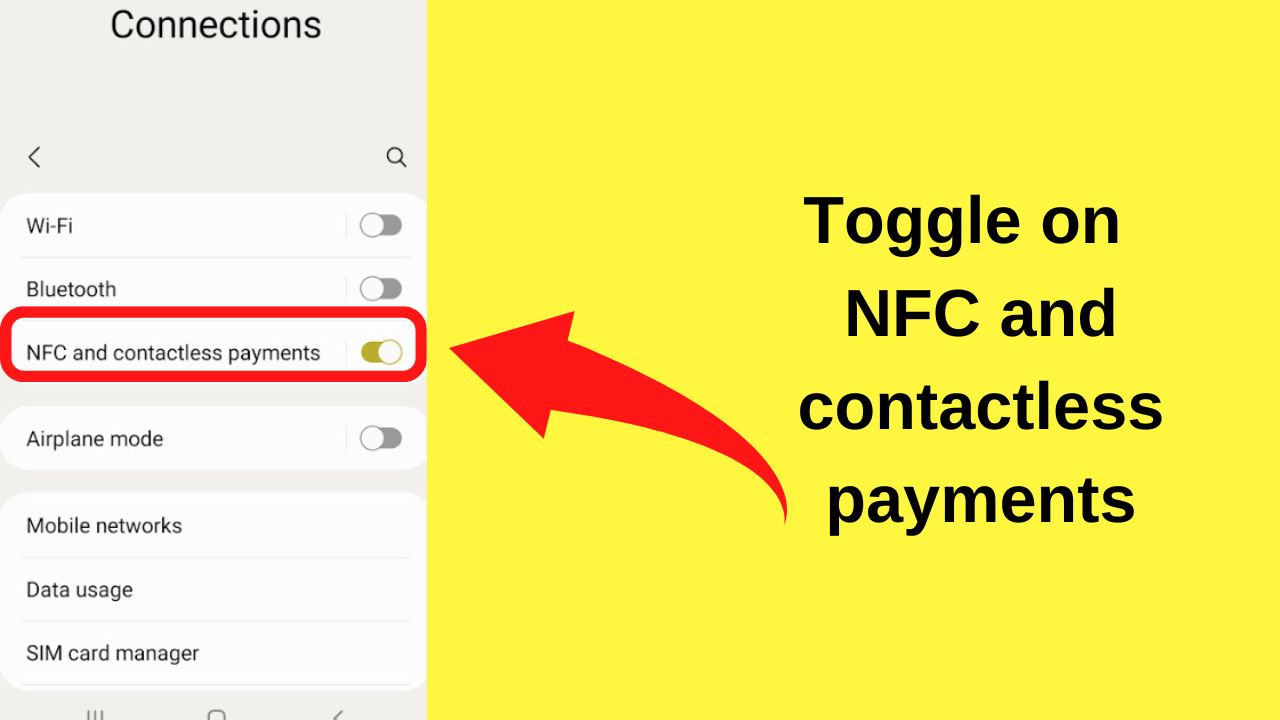
If you have used contactless payments on your device before, toggle it on and you can carry on to make a contactless payment.
If this is your first time making a contactless payment, or you want to use a service different from your current default, tap on the words “NFC and contactless payments” instead of the toggle button.
The next screen is where to set your default payment apps.
Step 4: Select your options for contactless payments
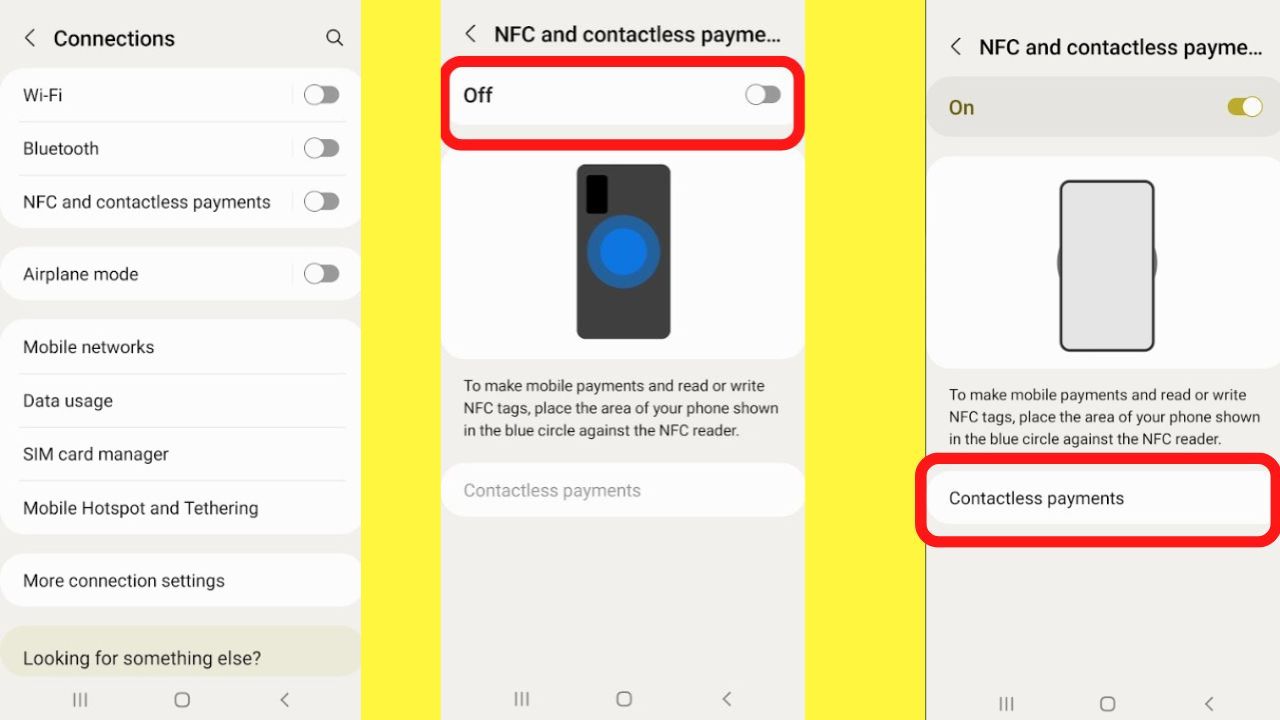
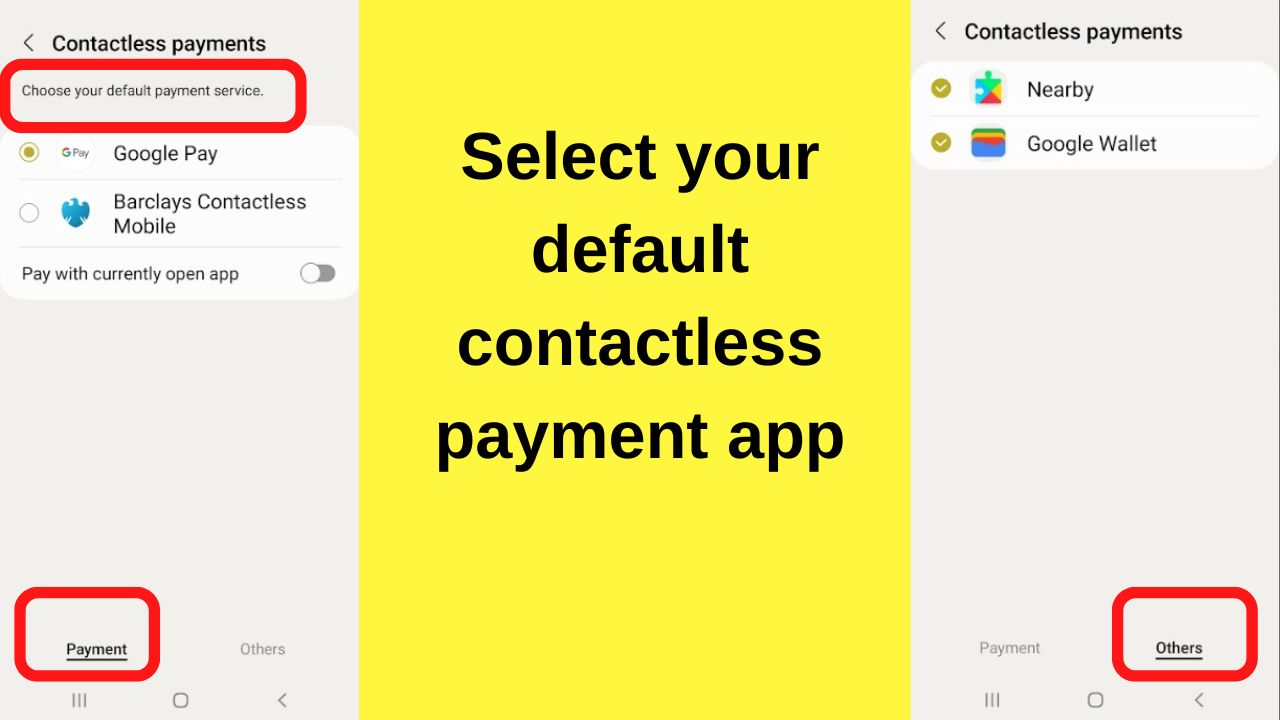
Step 5: Select your default contactless payment app
On the next screen, your payment apps with NFC functionality will show.
The first screen shown will show you the available payment services you can use.
If you want to set a different default payment service for contactless payments, tap on “other”.
All of the payment apps installed on your device that can process payments via NFC should be shown.
If that does not show you the app that you want to be using, you can select the option to “Pay with currently open app”.
What you will not see is an option to use the PayPal app. PayPal does not directly support contactless payments. They are partnered with Google though.
To use PayPal for contactless payments, go to pay.google.com and add your PayPal account as a payment method. Then set Google Pay as your default contactless payment service.
Once you have made your selection, tap the back button and ensure that NFC and contactless payments are toggled on.
The toggle button will be in color when it is turned on. When it is off, the color is gray with the white button for the slider on the left.
How to get faster access to toggle NFC on/off from the Quick Menu on Android
Contactless payments are not something you ought to keep on permanently.
It does not consume a lot of power, but still, you do not want to risk bumping into a cybercriminal with an NFC reader that can copy the data from your device.
The risk of NFC interception attacks is negligible, but nevertheless, possible.
For that reason, it is wise to toggle it off when you are not intending to make a contactless payment.
For convenience, most phones have the NFC button available within the quick menu on Android. This is the menu that shows when you swipe down on the screen.
Not all Android phones have the NFC button shown in the quick menu, but all of them can have it added.
Step 1: Swipe down from the top of your screen then tap the gear icon

Step 2: Swipe right to see if NFC is already there
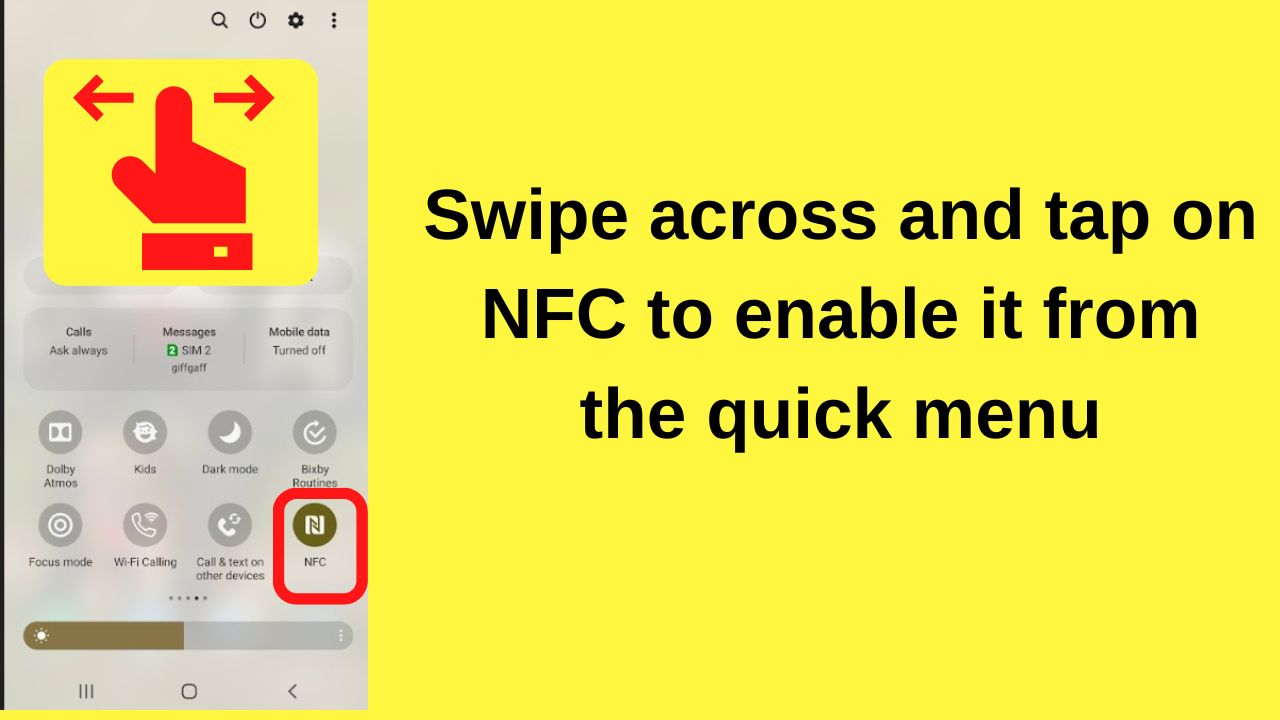
If you have this already active in your quick menu, you can toggle it on and off with a couple of taps.
If not, swipe right until the very last button that lets you add more settings to your quick menu.
Step 3: Add the NFC quick access button
Scroll to the end and tap on the plus icon. Available buttons show at the top of the screen. Tap on “NFC”, hold to select, then drag it to an available slot in your quick menu.
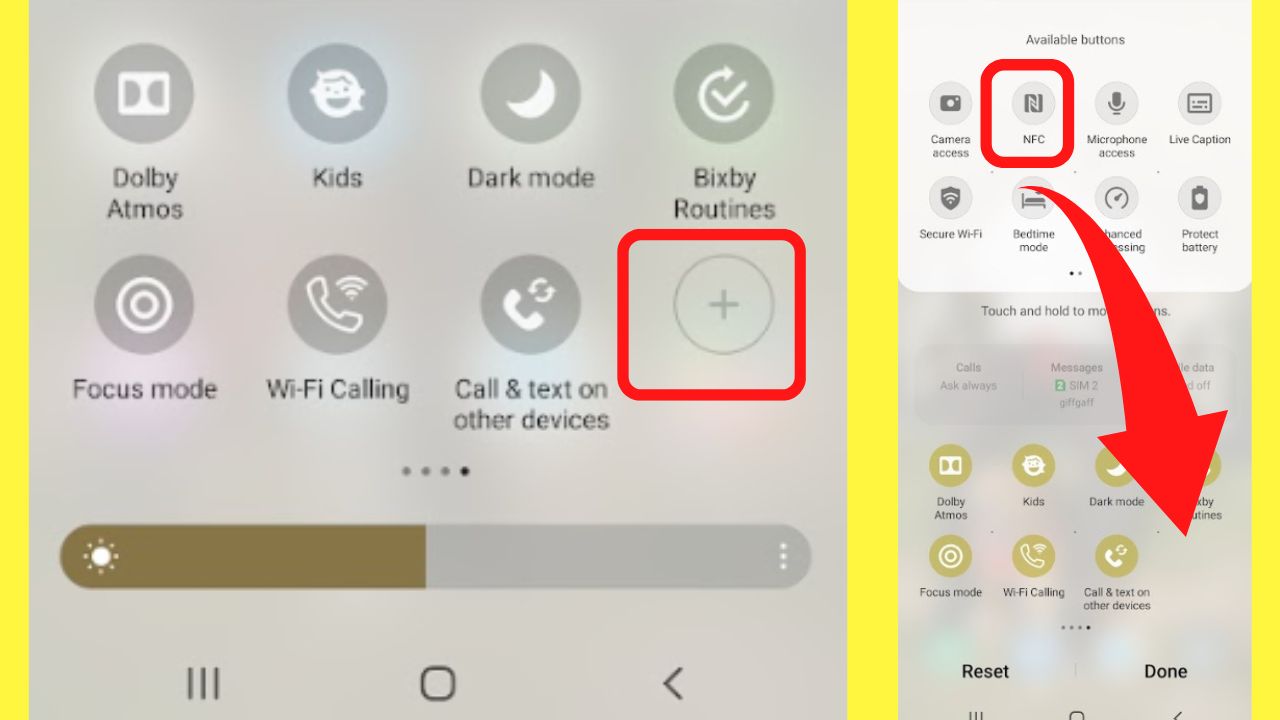
Tap on the NFC button to toggle it on, and again to turn it off once your transaction is complete.
About Android Beam and Nearby Share
For those who have recently upgraded to a new Android device from one that was running Android versions lower than 10, you may have noticed that Android Beam has gone.
Android Beam used to be used to share files, audio, video, documents, and photos with nearby devices.
The setting was located in a sub-section of the NFC in the settings menu. That was deprecated in Android version 10 and will be gone entirely from Android version 14 towards the end of 2023.
Nearby Share is what is now used to replace Android Beam. It does all the same functions and uses NFC and Wi-Fi, rather than using NFC to enable the power-hungry Bluetooth to pair devices, then turn off Bluetooth once the file transfer was complete.
If you want to use NFC to transfer files, use the Nearby Share setting on Android. The NFC setting is now solely for contactless payments.
How to turn on Nearby Share on Android
Step 1: Swipe down to open the quick menu 
Step 2: Swipe across until you find the Nearby Share button
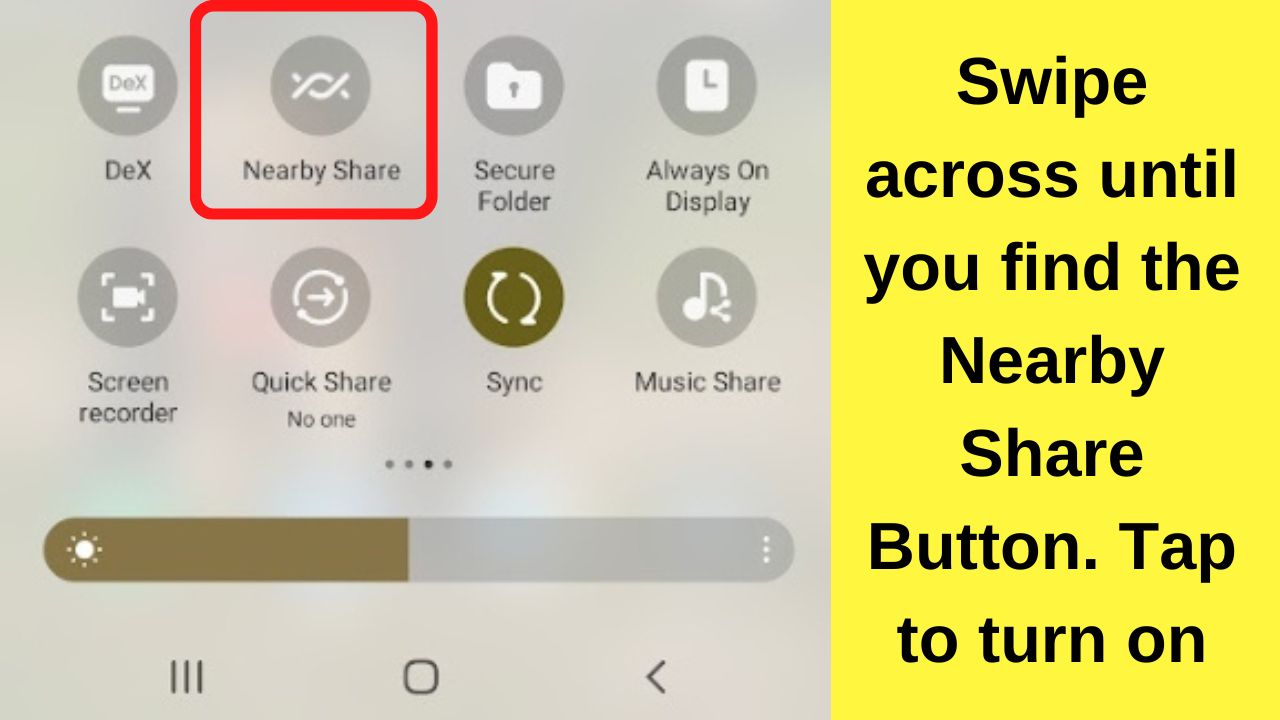
Step 3: Tap on Turn on

When you turn on Nearby Share, it will use Bluetooth, Wi-Fi, and your location data. A combination that is likely to drain your battery faster.
Furthermore, the location setting that is used is provided by Google Location Service.
Nearby Share is a proprietary feature by Google that is built on top of the Android Open-Source Android Project (AOSP).
You cannot use Nearby Share without a Google account and sharing your location data with Google. This was not the case with Android Beam. All good things come to an end!
As soon as files are shared, repeat the process to disable Nearby Share, whereby, you will conserve more battery power, and retain a little more privacy.
How to enable security for NFC on Android
With the rise of cybercrime and sophisticated methods being deployed, it is wise to stay alert to dangers.
Unlike iOS which requires security settings to be enabled before a contactless payment can be made, Android differs. You can make NFC contactless payments with no screen lock enabled.
Imagine if you made a contactless payment, then dropped your phone on the way out of a store, what could be done? Not only would all your data be visible to the person to find your phone, but with a single tap, make a contactless payment.
Prevent that by enabling screen lock security.
Step 1: Go to settings
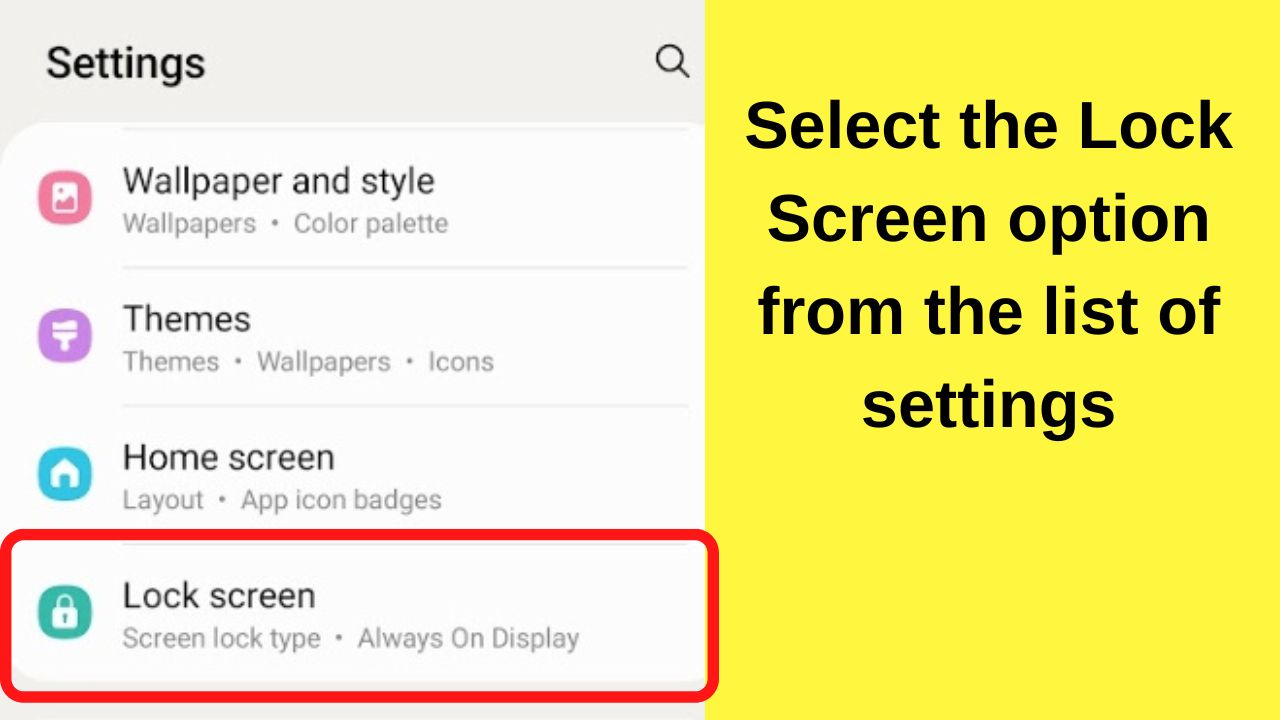
Step 2: Tap on the Lock Screen
Step 3: Tap on Lock Screen Type
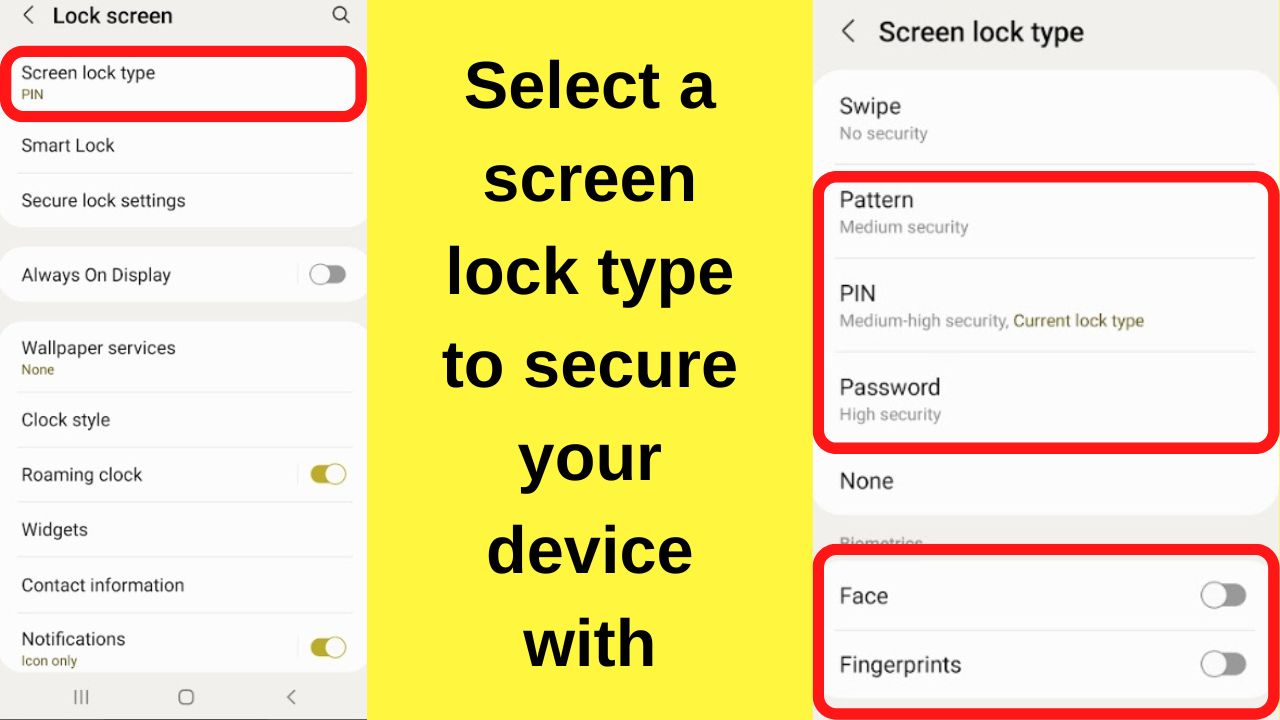
Select something that you will remember easily.
A pattern, PIN, or password. Some devices have biometric security settings that let you protect your phone with a fingerprint, facial recognition, or an iris scan.
Select whichever is convenient for you, other than a ”swipe” gesture which is convenient for anyone, offering no security.
Now that you solved the mystery on how to enable NFC on Android, here’s another challenge for you:
Do you know how to open a .TIF file on Android?
Frequently related questions on NFC on Android
Is NFC safe?
NFC is secure because it only works within very close proximity of a maximum few centimeters. It is safer than RFID (its predecessor), however, it is still recommended that NFC be turned off when not in use as a safeguard against interception attacks, particularly in public spaces.
Do NFC contactless payments work when the phone is locked?
In the US, all transactions require the device to be unlocked by the user for a contactless payment to be authorized. In other countries, small payments may be allowed without unlocking, but the security details will be required for higher-value payments. The amounts differ by region.