Is planning posts for your Instagram feed such an arduous task?
Do you feel like you’re drained with creating individual Instagram posts daily?
If you know how to use Canva for Instagram, you definitely will know that you can create an Instagram puzzle feed with this graphic design tool.
How to Make an Instagram Puzzle Feed with Canva
First, create a project with the dimensions of 3024 x 3024 px. Then, add a 3 x 3 grid from Frames. Activate the rulers and guidelines to add divisions on the canvas. Then, delete the grid and add images, elements, and text to the puzzle. Download the file and split the image using Pine Tools.
Creating Instagram Puzzle Feed with Canva — Top Tips!
Instagram puzzle feed is one of the most ingenious ways you can use to pique your Instagram followers’ interest in your brand.
Puzzle feeds allow you as the business owner to display your brand’s personality creatively and professionally.
Plus, puzzle feeds give a fresh twist on your posts by making an impactful first impression while saving time when creating them.
So, here’s how you do it in Canva.
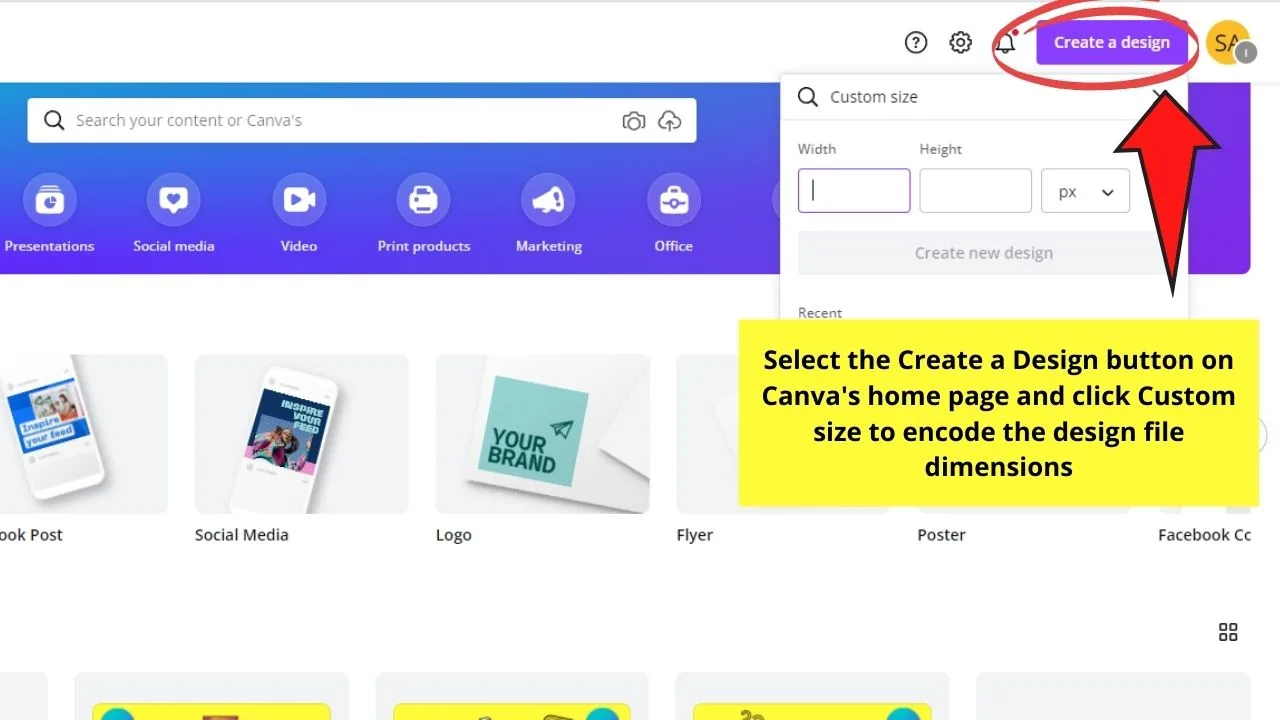
Step 1: Open a new design file by selecting the Create a Design button on Canva’s home page. Then, head to Custom Size and type 3240 x 3240 px.
You can also directly click the Custom size button.
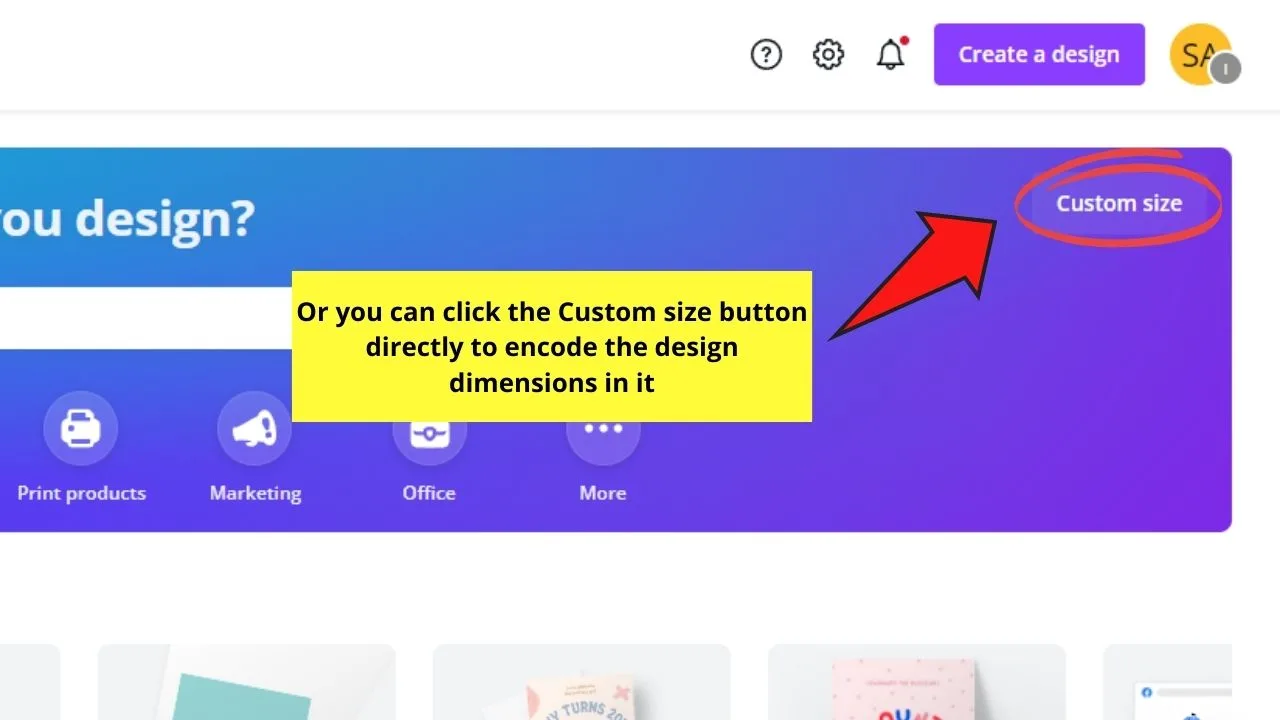
Technically, the pre-assigned dimensions for a regular Instagram puzzle feed template are 1080 x 1080 px.
But, since we’re creating a 3 x 3 grid, 1080 x 1080 px isn’t simply enough, hence the need to multiply it by 3.
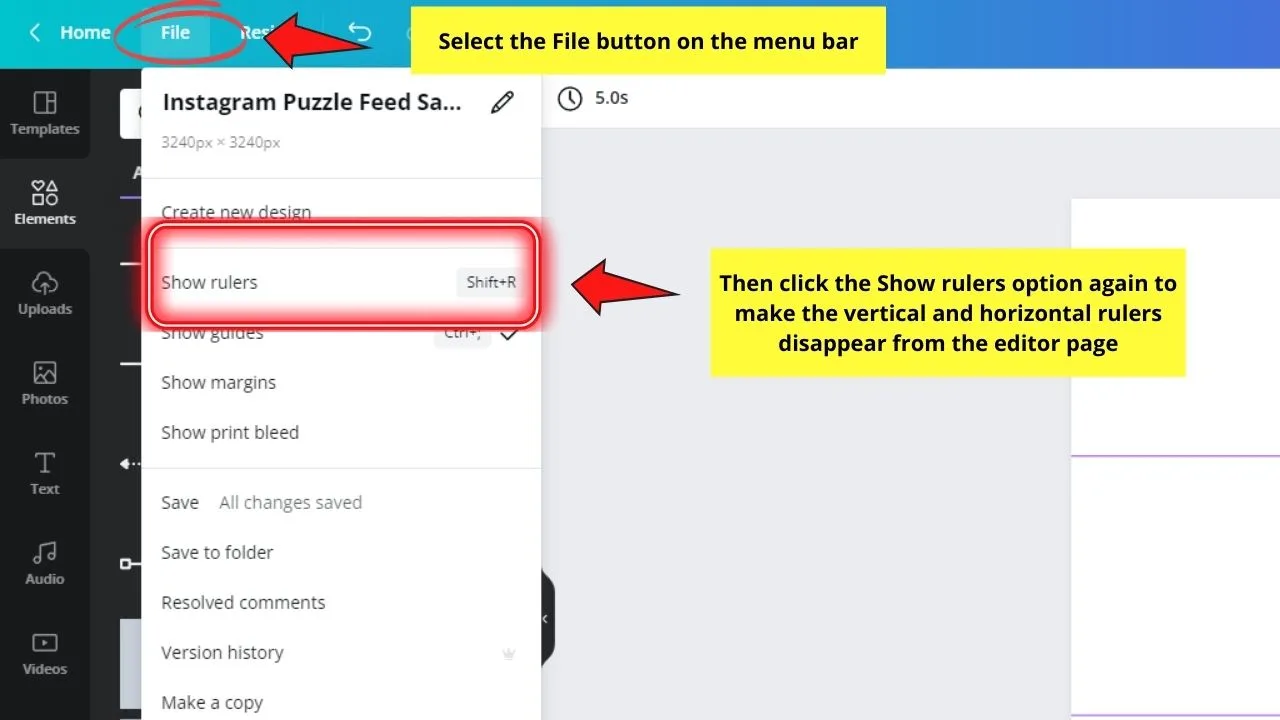
Step 2: Once you’re on the editor page, go to the File button on the menu bar first and click it.
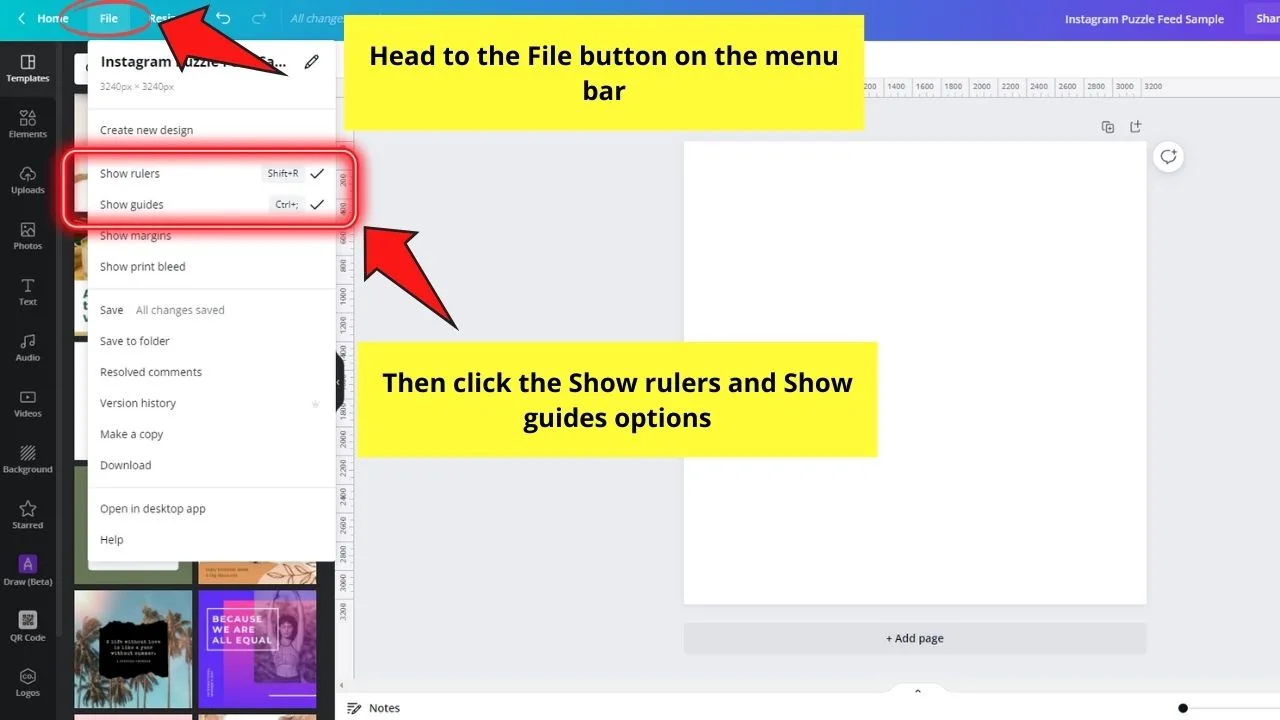
Then, select the Show rulers and Show guides options first.
These will make the vertical and horizontal rulers appear on the upper and left sides of your editor page.
You can also read about how to use rulers in Canva for a more detailed guide with the said feature.
Step 3: Now, it’s time to set the guidelines for your puzzle feed design.
But first, search for grids through the search bar function by heading to the Elements tab on the left side panel.
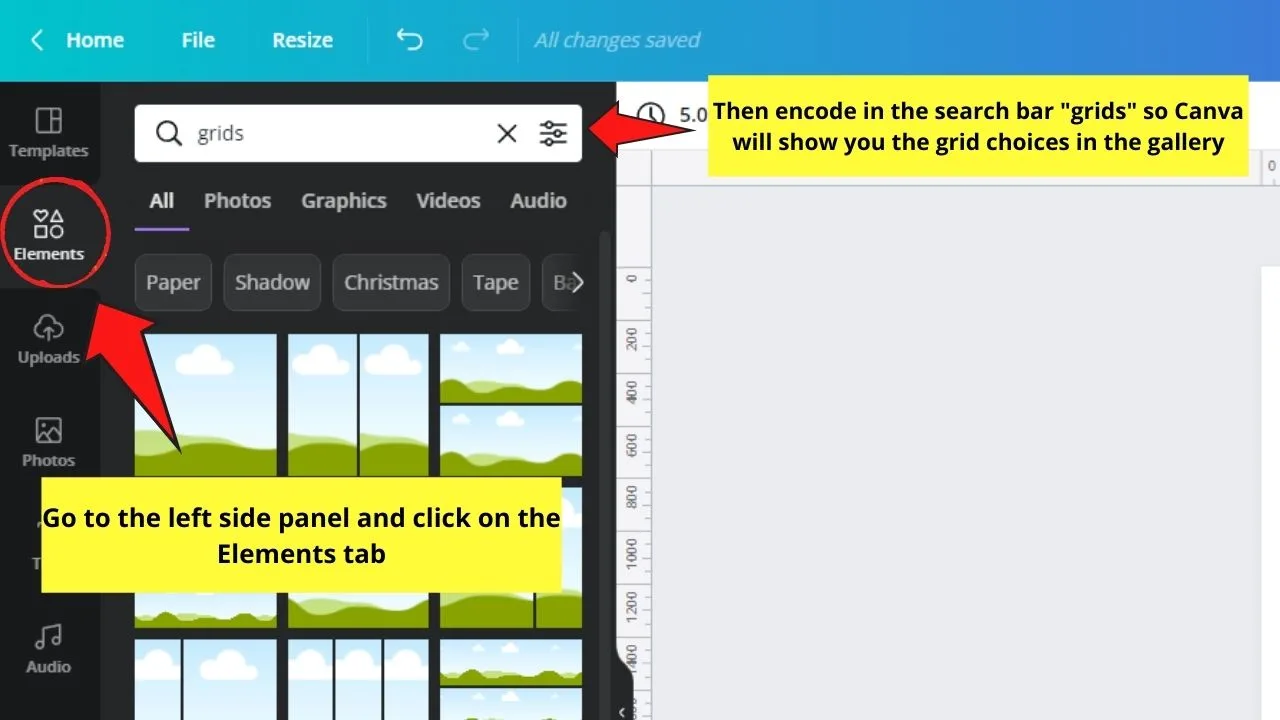
You can also opt to scroll down the Elements gallery and head to the Grids section instead to activate this feature.
Then, scroll down until you see a grid with a 3 x 3 design. Click and drag it to the canvas.
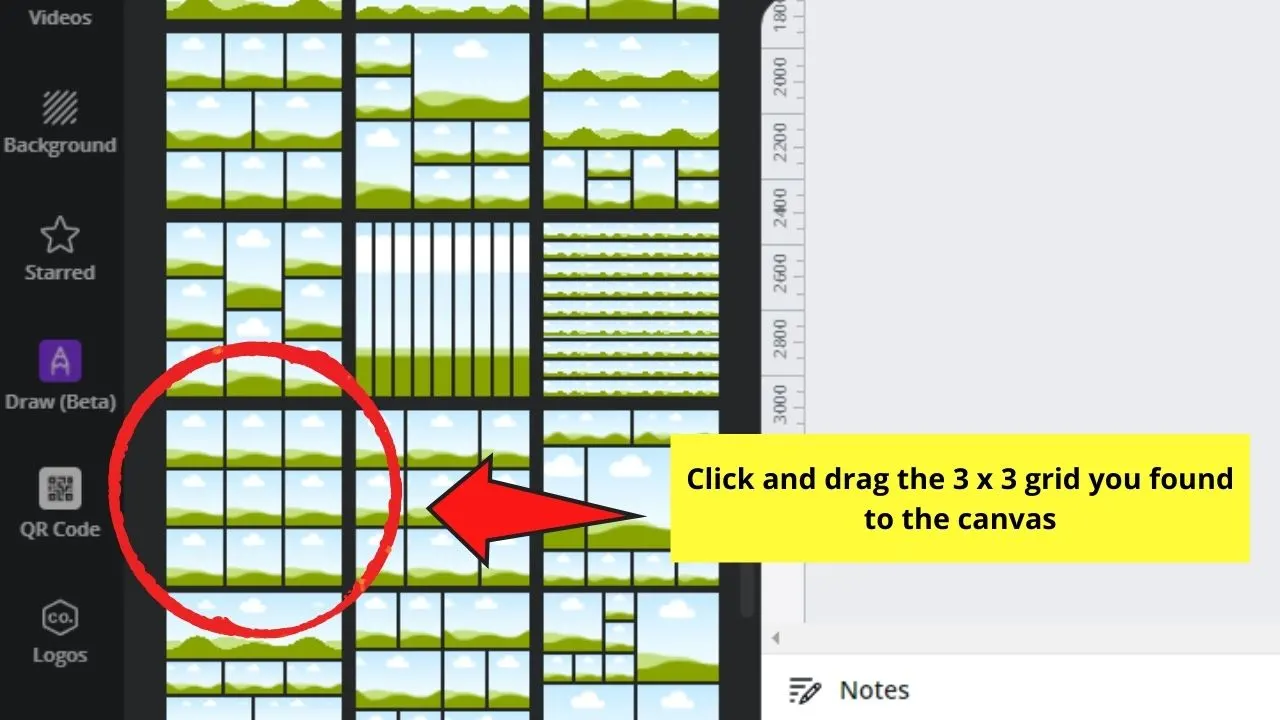
Step 4: Once the grid’s in place on the canvas, you can now begin setting the guidelines for your puzzle feed.
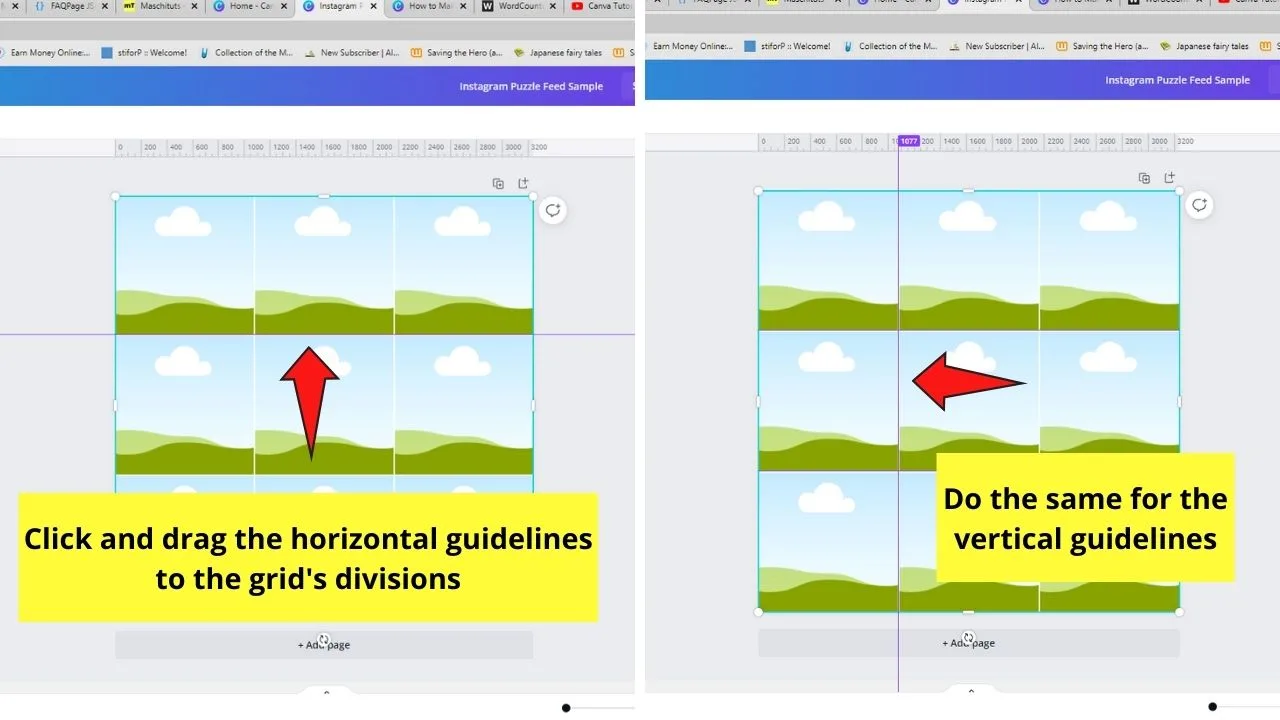
You can choose to start either with the vertical or horizontal rulers. Whatever you choose, make sure you hover the icon first on the ruler until it becomes a double-arrow icon.
Then, click and drag the guideline down and align it on the natural divisions on the grid. Continue with this step until you set all the guidelines based on the grid.
Step 5: After setting the guidelines, select the grid again and press the Delete key on your keyboard.
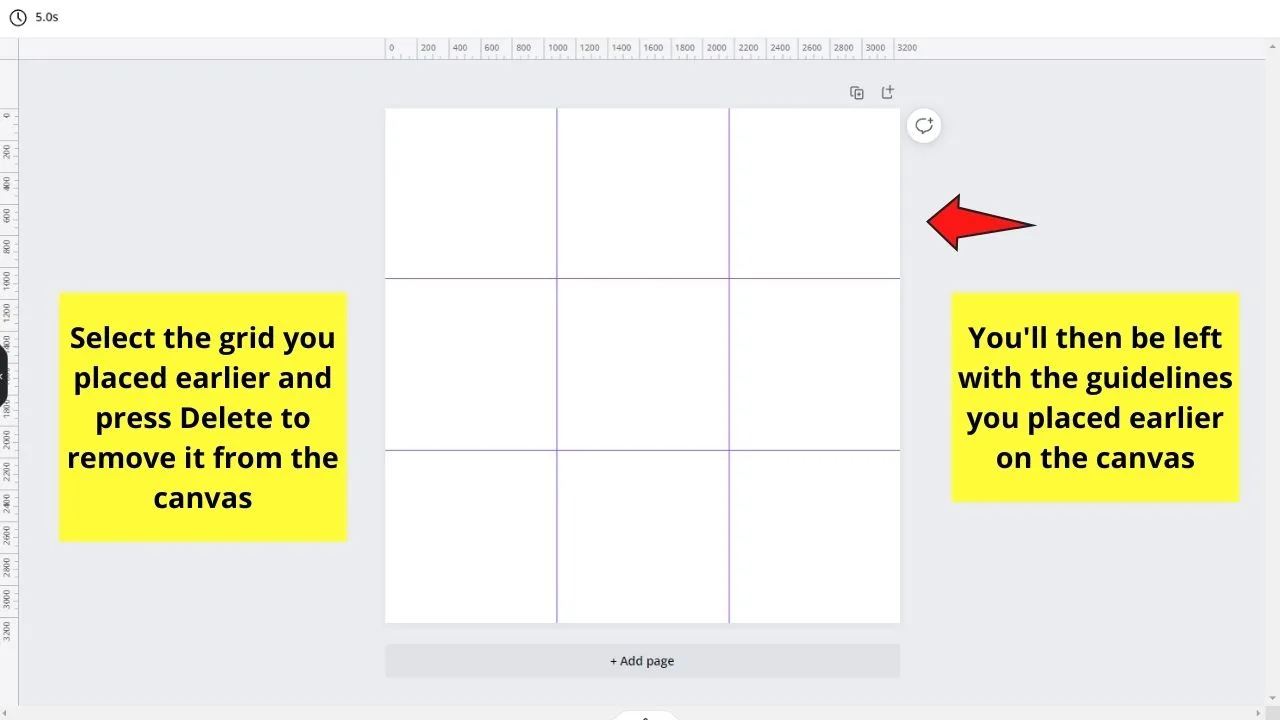
What you will then see are the guidelines you placed earlier.
You can choose to leave the canvas with the guidelines as is, or you can add lines instead.
If you opt for the latter, simply head to the Lines & Shapes section in the Elements gallery and select the line style you want to use.
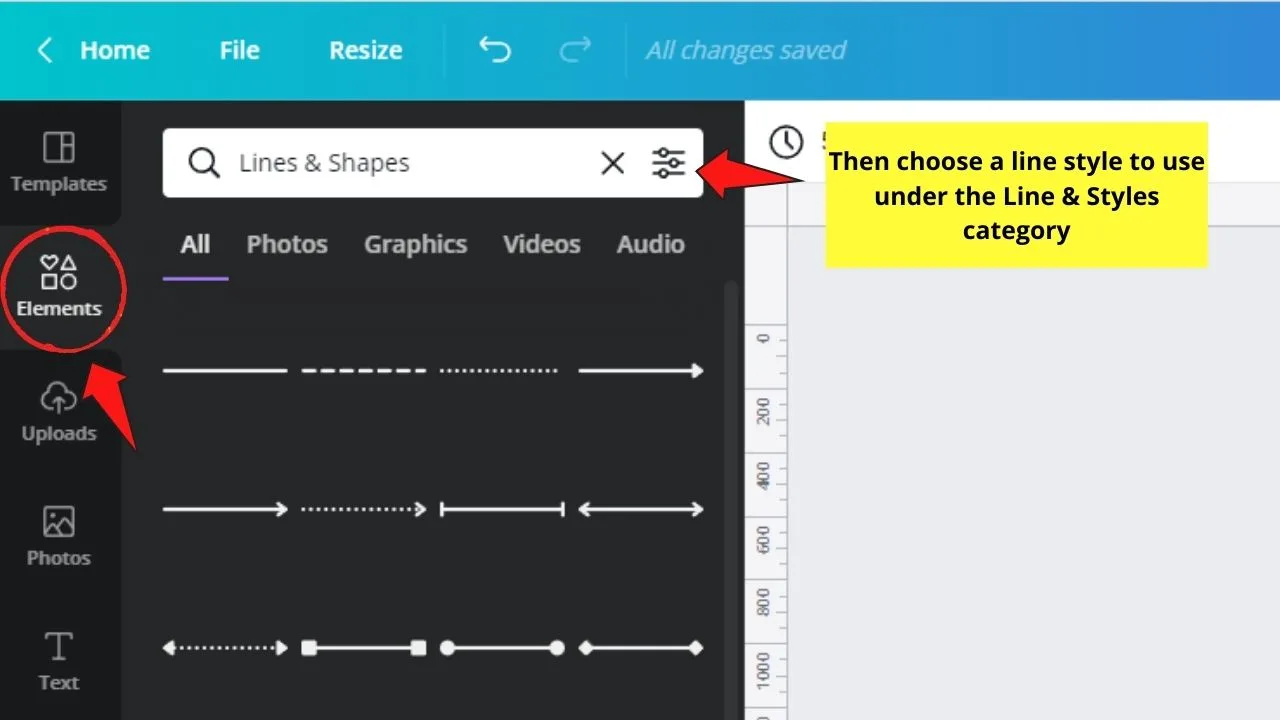
After which, you can now head back to the File button and deselect the Show rulers button to make the rulers disappear.
Step 6: Now, it’s time to begin designing your puzzle feed.
You can opt to add images from the Photos gallery and turn it into a background image, but it’s recommended to select one from the Instagram post templates instead.
Go back to Canva’s home page (but do not close the editor page) and head to the Instagram post gallery.
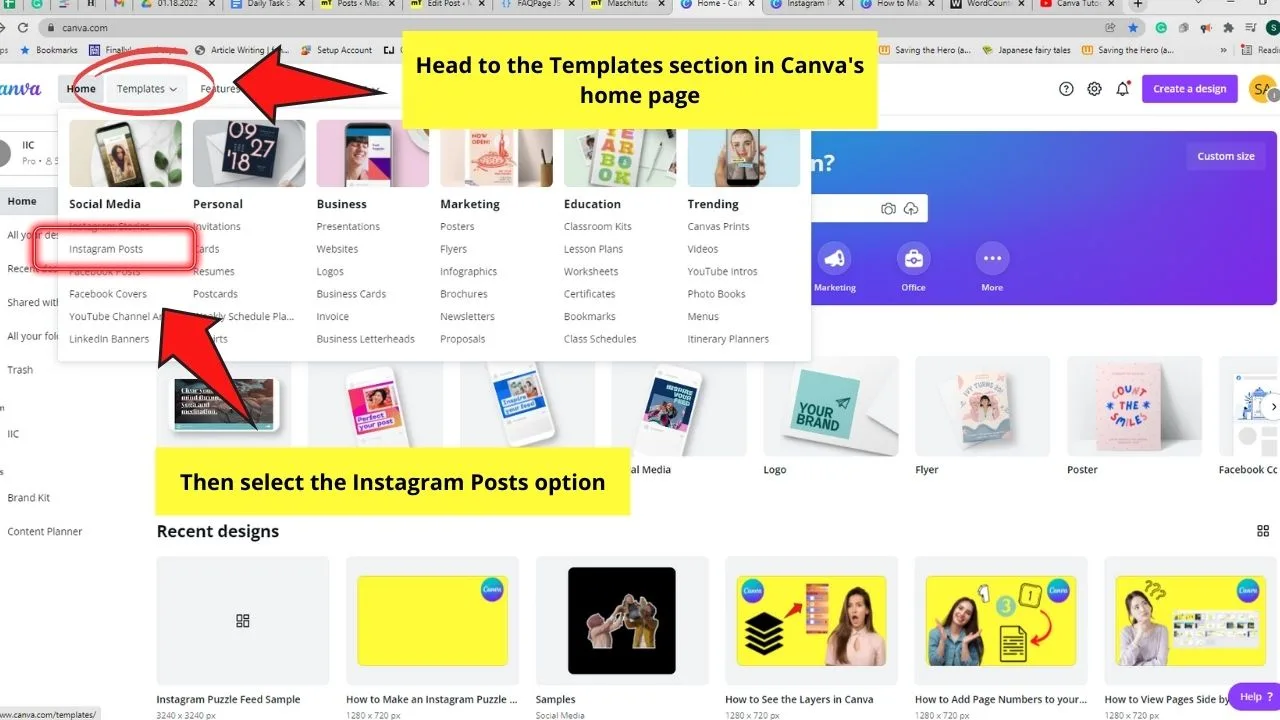
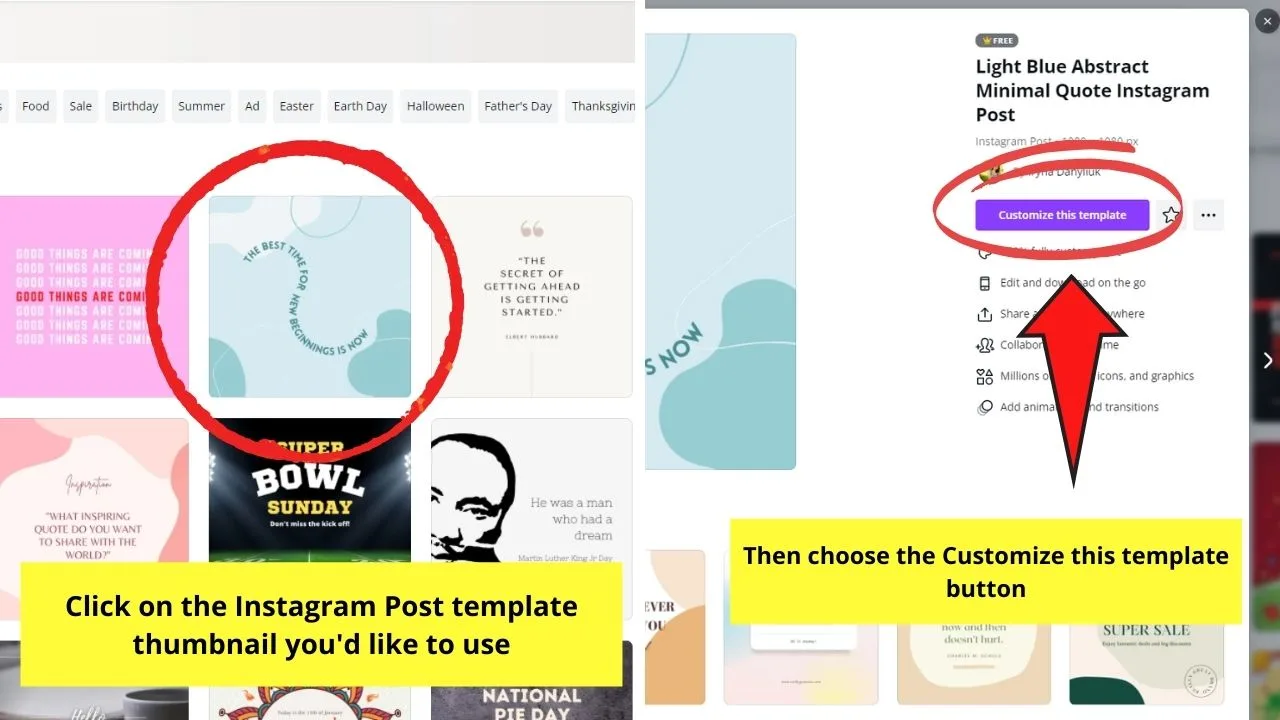
Select what template you’d use from the Instagram Post templates available. Click on it and select Customize this template for it to open up to another editor page.
Step 7: Choose all the elements you want to use by dragging the cursor over them. Then, press the Ctrl + C buttons on your keyboard to copy those design elements.
Then, head back to the puzzle feed document and paste the elements using the Ctrl + V buttons.
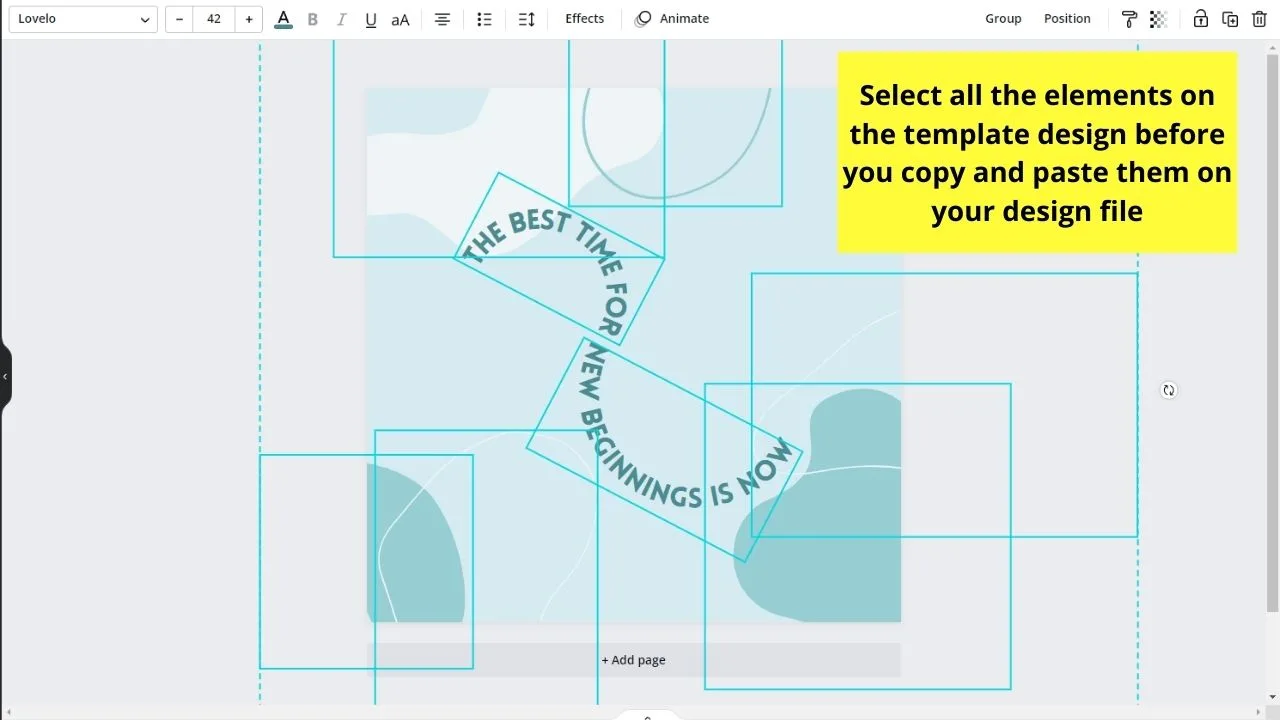
Resize and reposition the elements by dragging the white circles across the canvas. Continue adjusting them until they occupy the entire puzzle feed you made.
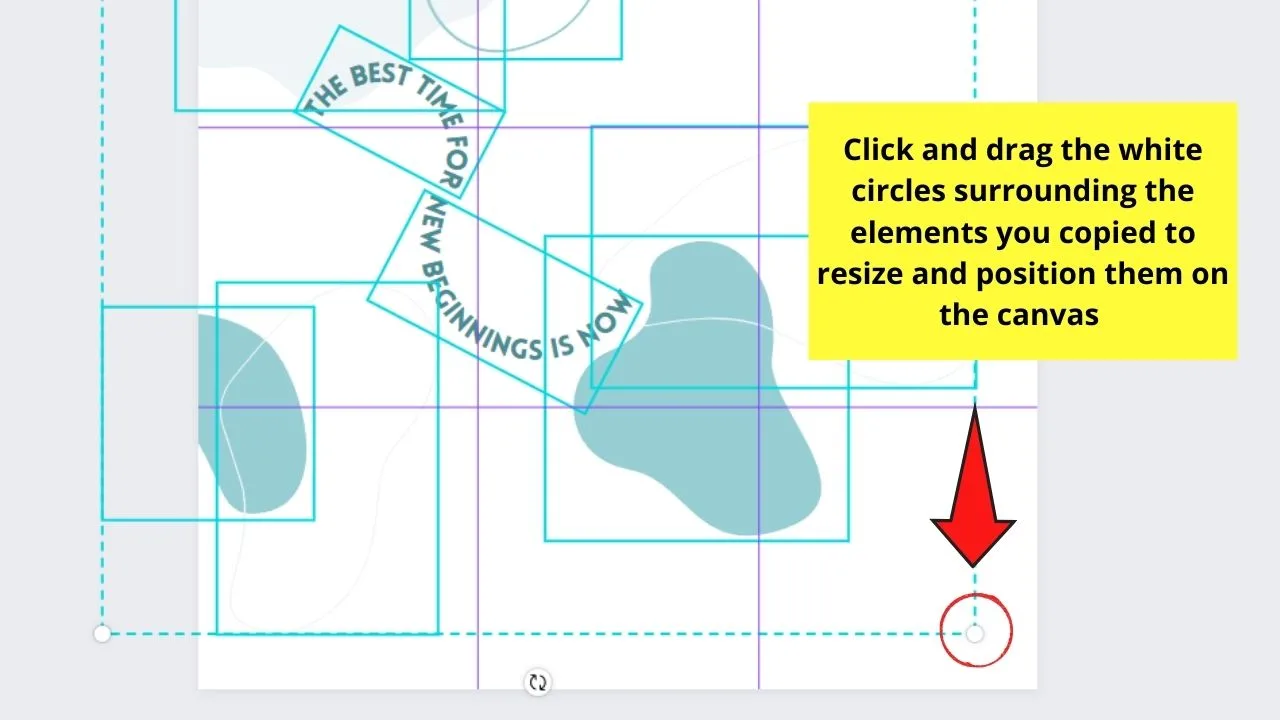
Step 8: Now, you can begin customizing your puzzle feed design.
You can start by changing the elements’ colors. Click on them, and if the color picker tile appears on the editor toolbar, select it to choose from the Default colors available or add custom ones.
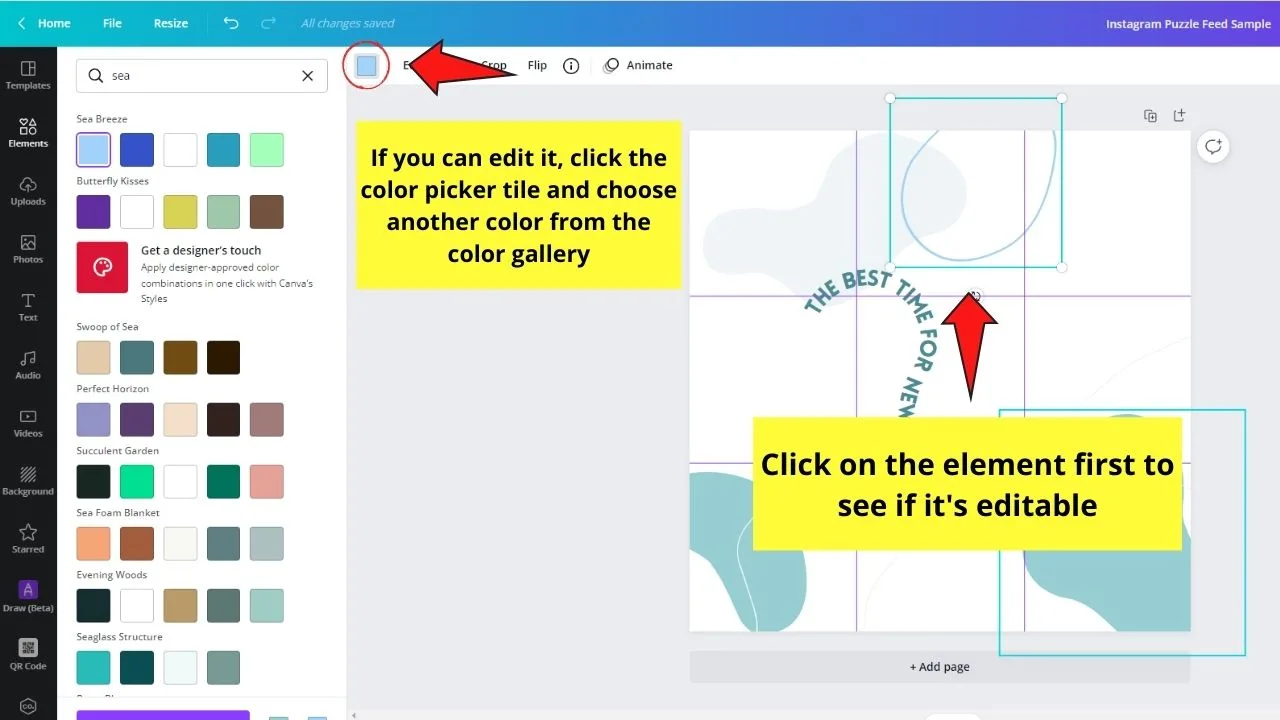
Step 9: Add more elements fitting to the design you’re thinking of by heading to the Elements tab. Use the search bar function to narrow down your search quickly.
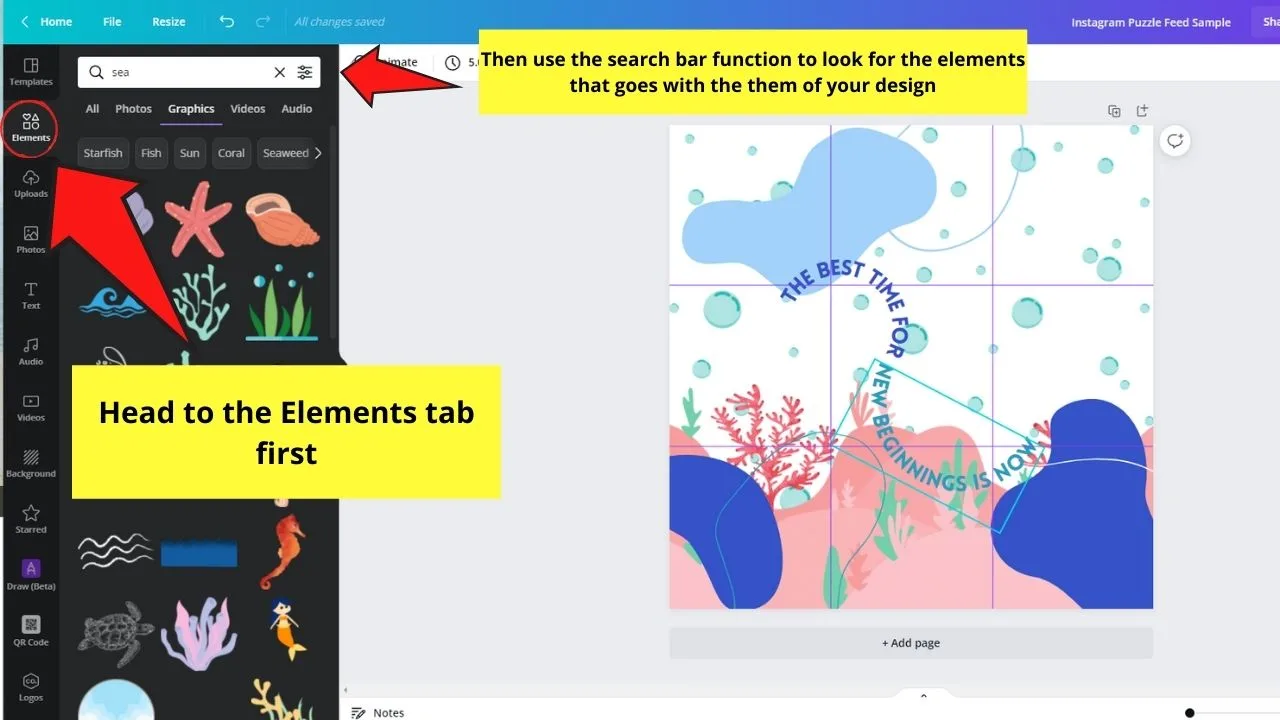
Click and drag those design elements you chose, resize, and position them accordingly on the canvas.
Continue to add elements until you finally have the look you want to achieve.
Step 10: Another component of the Instagram puzzle feed is the quotes. To add these quotes to your design, simply press T on your keyboard to add a text box.
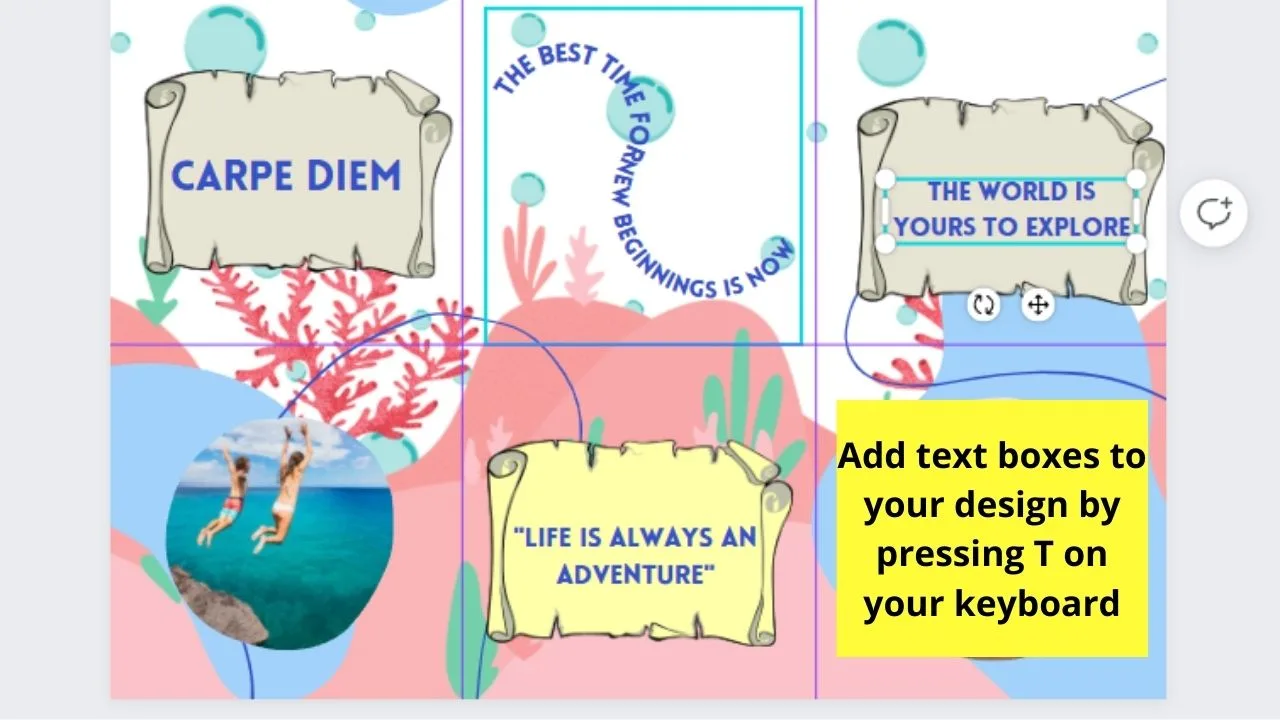
Resize the text box and position them accordingly on your design. Edit the message in it by double-clicking on the text box before typing in it.
Carry on editing the text components by changing their font styles, colors, and sizes accordingly. Just make sure they’re still readable even if you placed them on an image-rich backdrop.
Step 11: Once you’re satisfied with your puzzle feed design, click the Download button, select the file type, and export it to your device.
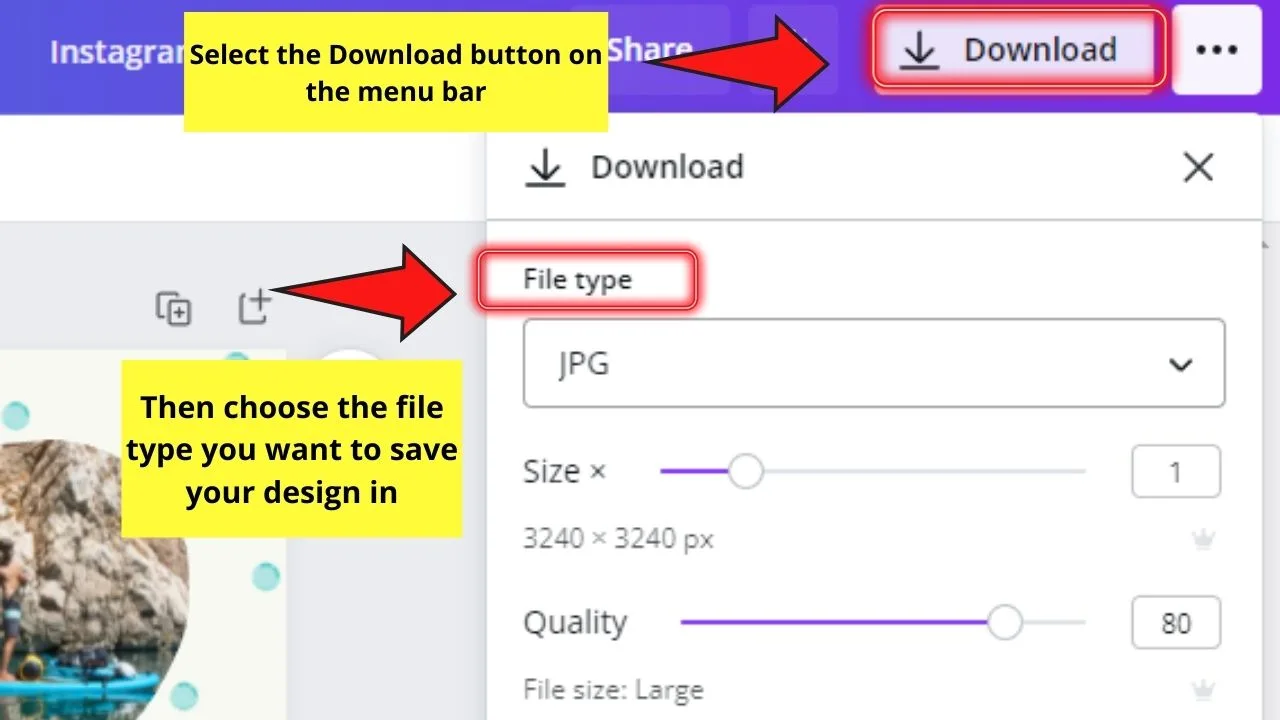
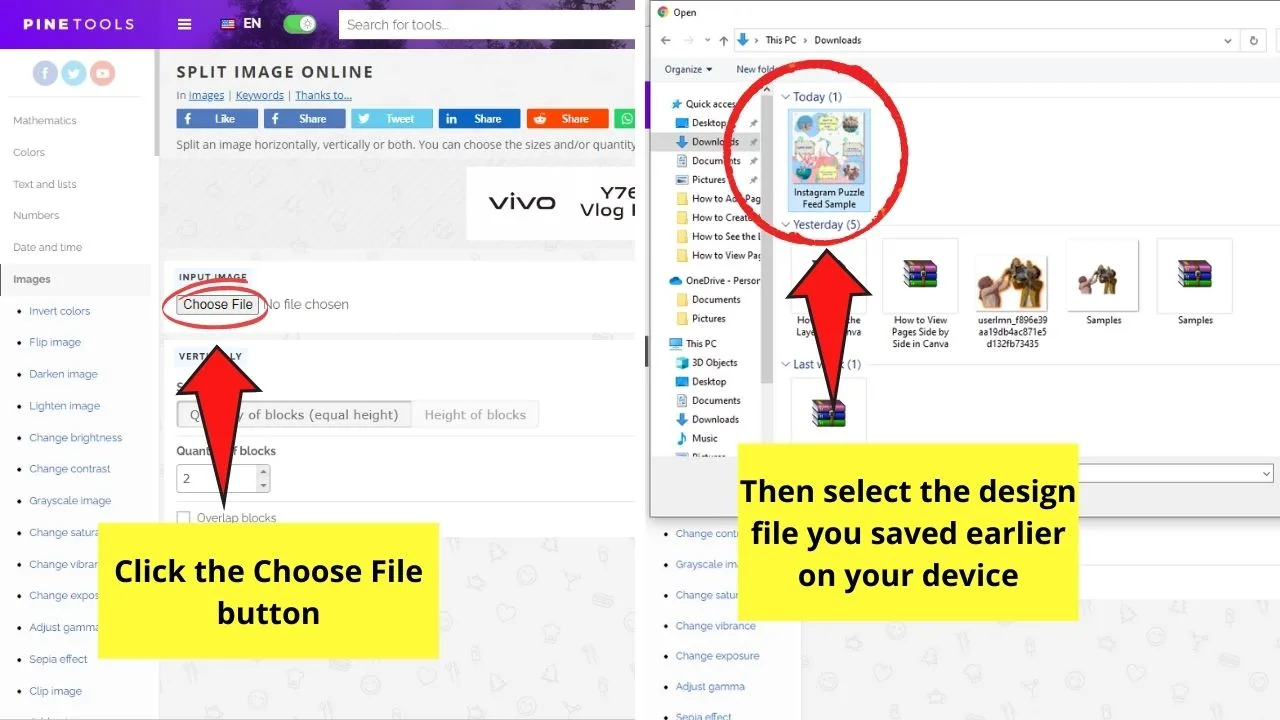
Step 12: After saving your Instagram puzzle feed image on your device, open Pine Tools on your browser.
You can also simply type on your navigation bar pinetools.com/split-image for you to jump directly to the section you’ll use to split your image.
Step 13: Open the image you created earlier by clicking the Choose file button on the Split Image Online page of the tool.
Step 14: After the photo uploads into the tool, set the parameters on how the image will be split.
First, head to the right-side panel and choose the Both option on the How to split the image section.
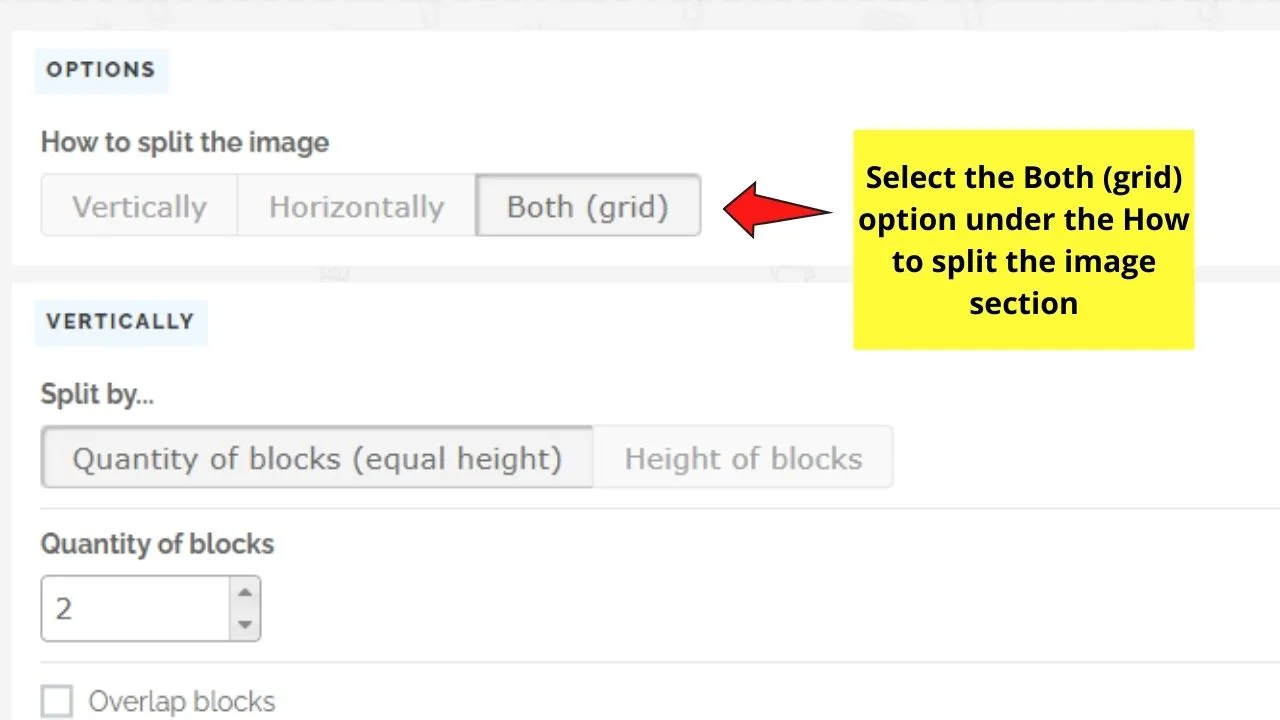
Then, select the Quantity of blocks options in the Split by section under Vertically.
After which, set the number of blocks by typing inside the box accordingly.
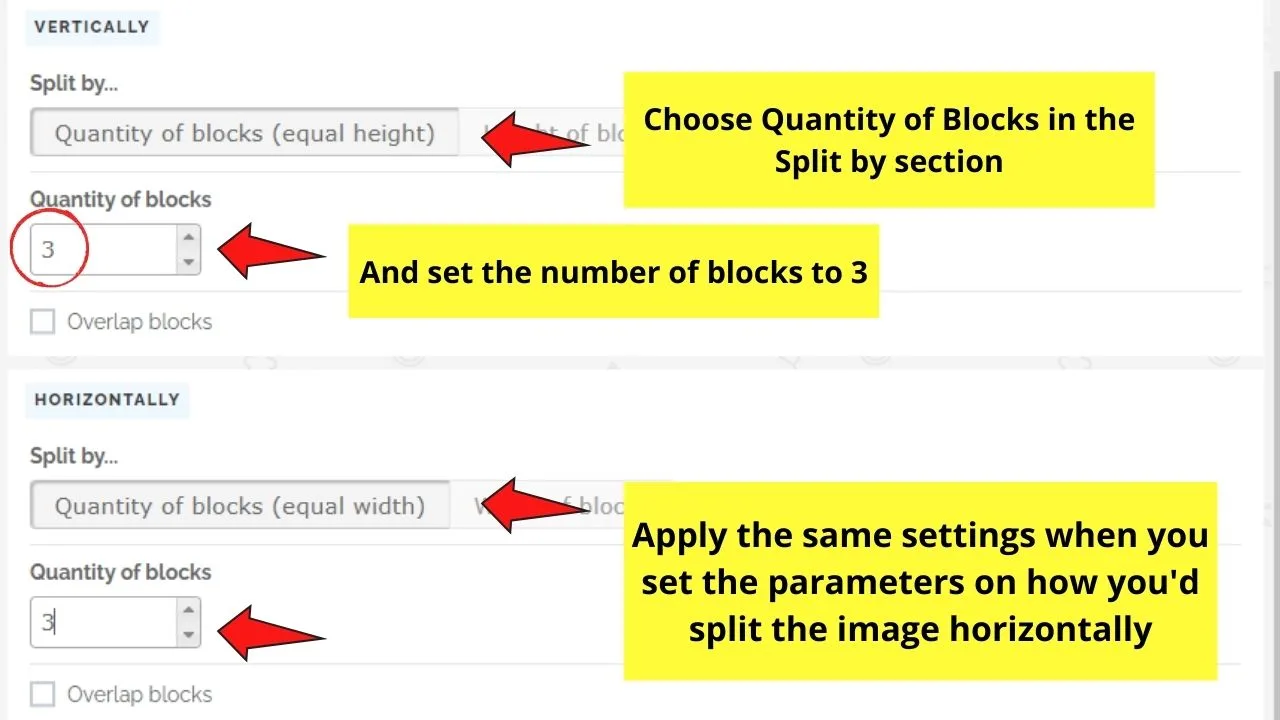
Do the same procedures when you reach the Horizontally part of the settings.
Step 15: Review your grid settings before clicking the Split Image button.
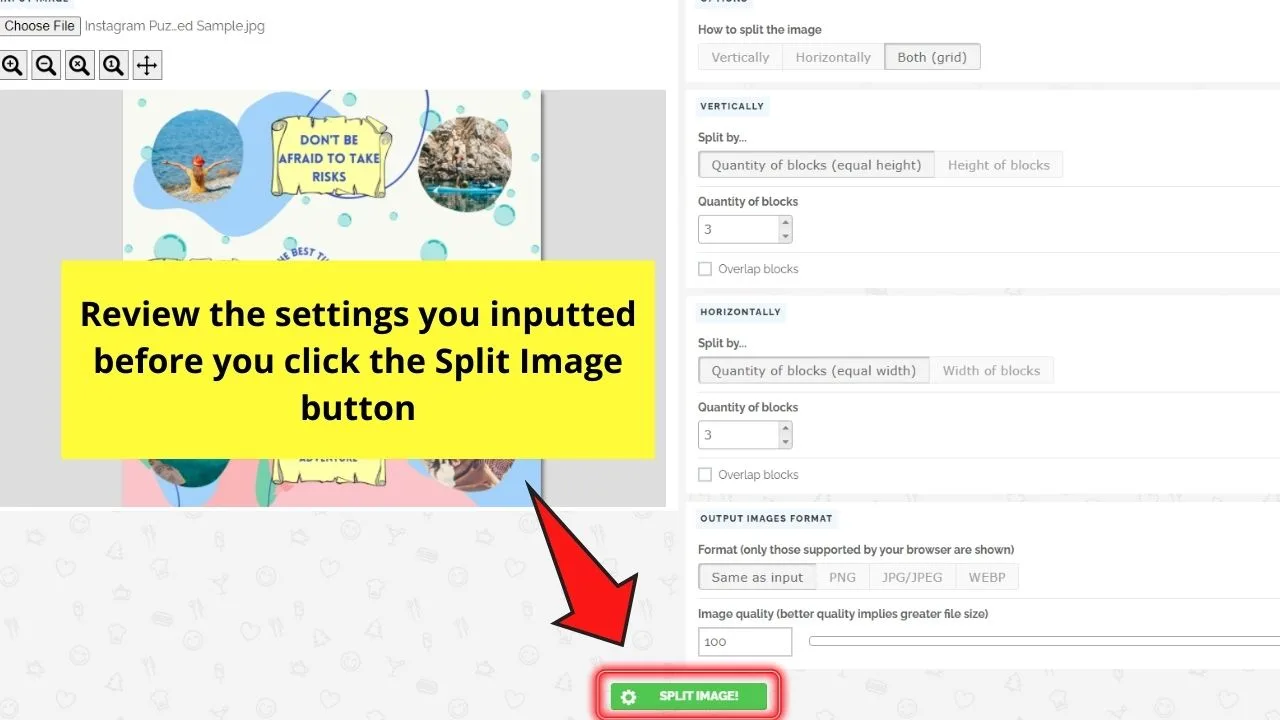
Once you’ve selected the Split image button, wait for the program to split the images individually.
Download them on your device. But, to keep your downloaded images organized, keep in mind that the bottom right image is the first one you’ll upload later on.
Step 16: Now, upload your puzzle feed images on Instagram.
Simply open your Instagram account on your phone (or laptop or PC if you prefer using the web version) and select the images you’ll publish.
Be very attentive in this step as you need to publish the images in the correct order, otherwise, you’ll have a jumbled look on your feed instead.
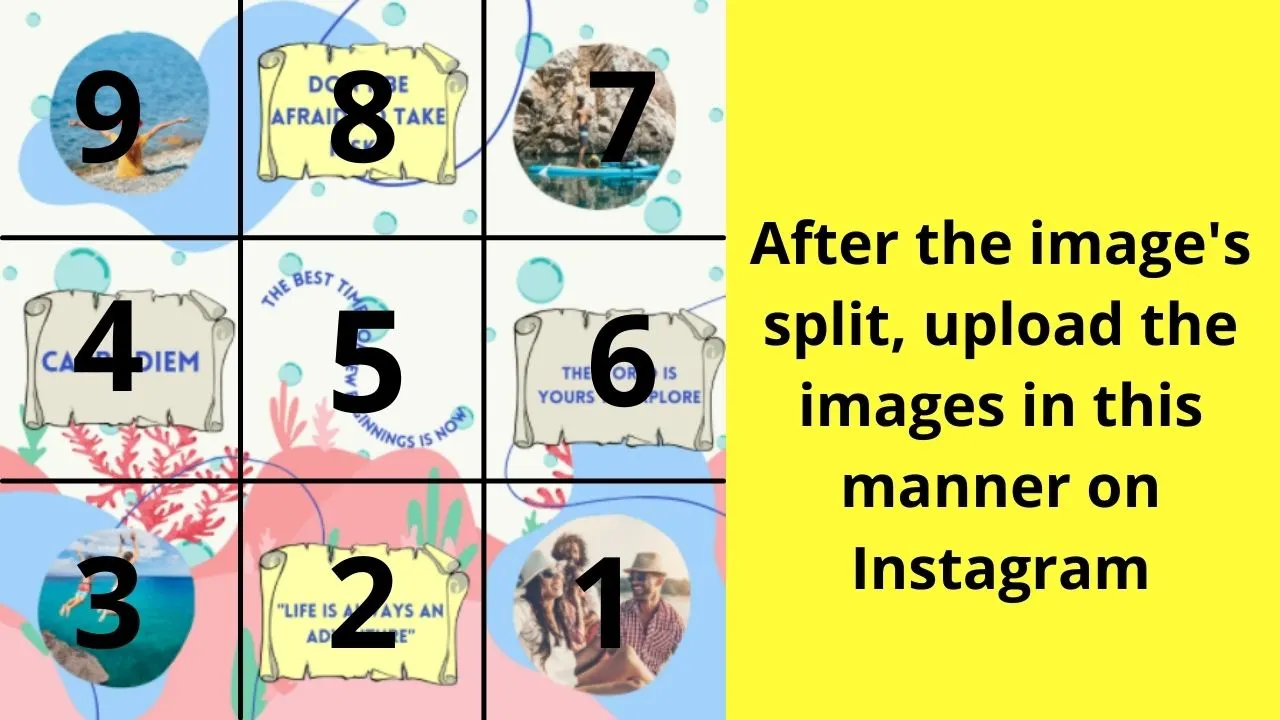
The first image you’ll upload is the bottom right photo, followed by the one to its left, then make a clockwise turn to the 2nd row and counterclockwise one in the 1st row.
Repeat this step for the next consecutive days (or minutes depending on your posting schedule) until the puzzle’s completed.
And, wallah! You just uploaded your first Instagram puzzle feed!
You’ll think it’s such a tedious process, but it only takes a few minutes of your time compared to when you create posts individually.
Frequently Asked Questions about How to Make an Instagram Puzzle Feed with Canva
Can you create Instagram puzzle feeds on Canva even if you’re on the free account?
You definitely can create Instagram puzzle feeds even if you’re using Canva free only. Just make sure to avoid using premium design elements so you won’t have to pay for anything when you download the design.
Is it possible to split the image inside Canva itself?
Currently, Canva doesn’t feature a split image so you can divide the puzzle feed you designed. But, in the meantime, just head to the Pine Tools website mentioned earlier and follow the steps to splitting the images accordingly.
What’s the biggest advantage of making an Instagram puzzle feed?
The biggest advantage of creating Instagram puzzle feeds I would say is the time saved when creating posts. With a single image split into 9 (or even 15) parts, you already have content made for the next 9-15 days. If you’re expert enough, you can make 15 days worth of posts in under 5 minutes.

Hey guys! It’s me, Marcel, aka Maschi. On MaschiTuts, it’s all about tutorials! No matter the topic of the article, the goal always remains the same: Providing you guys with the most in-depth and helpful tutorials!


