
Testing changes on a WordPress site locally before implementing them on the live site can prevent damage.
Creating a WordPress staging site allows for testing without affecting real visitors.
Anyone can create a local copy of their site using a local server.
Follow the steps as laid out in this article to create a live copy of your WordPress site.
How to create a local copy of a live WordPress site
An alternative: Manually migrate WordPress to Local
How to create a local copy of a live WordPress site
To create a local copy of a live WordPress Site, you need LocalWP, or XAMPP. The All-in-One WP Migration plugin can handle exporting and importing content between servers. The manual method is to export the SQL database, WP Contents folder, zip them together and import them to your localhost server.
Step 1: Install a local server to run the WordPress software on your computer
For this tutorial, the software used is LocalWP for Windows. There is a version for Mac, too. Both are free to download but require user registration.
The software is developed by the team at WP Engine and Flywheel. Both are the same company now and experts in the WordPress hosting space.
Among the many local server options available, Local is a preference in the WP community because it is specifically optimized for local WordPress development.
1. Go to LocalWP.com, click the “download for free” link, then select your operating system. Windows, Mac, or Linux.

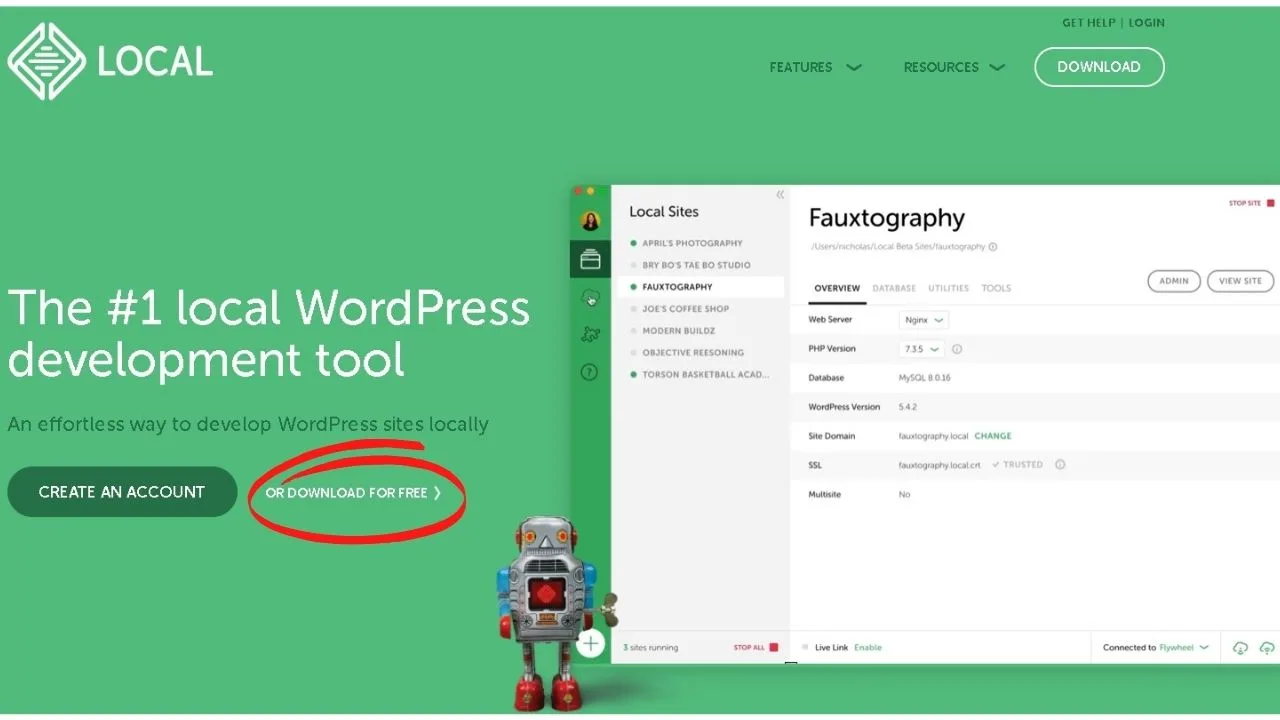
The difference between the free download and the online account is the additional features to push and pull between live and staging sites.
Since Local WP is owned by Flywheel, a hosting company part of WP Engine, if you host with either of those services, this software is used to push and pull between staging sites and live sites.
Choose which option to use. You do not need to register for an online account to download and use the software.
2. Once installed and you run the software, it will show a prompt to “create a new site.” Click that link and then give your site a name.
Click “Continue,” leave the “preferred” option selected, or choose “custom” if you need different options, such as an older version of PHP or a different server like Apache instead of Nginx.
3. Click continue, give your website a username and password, then click “Add Site”.

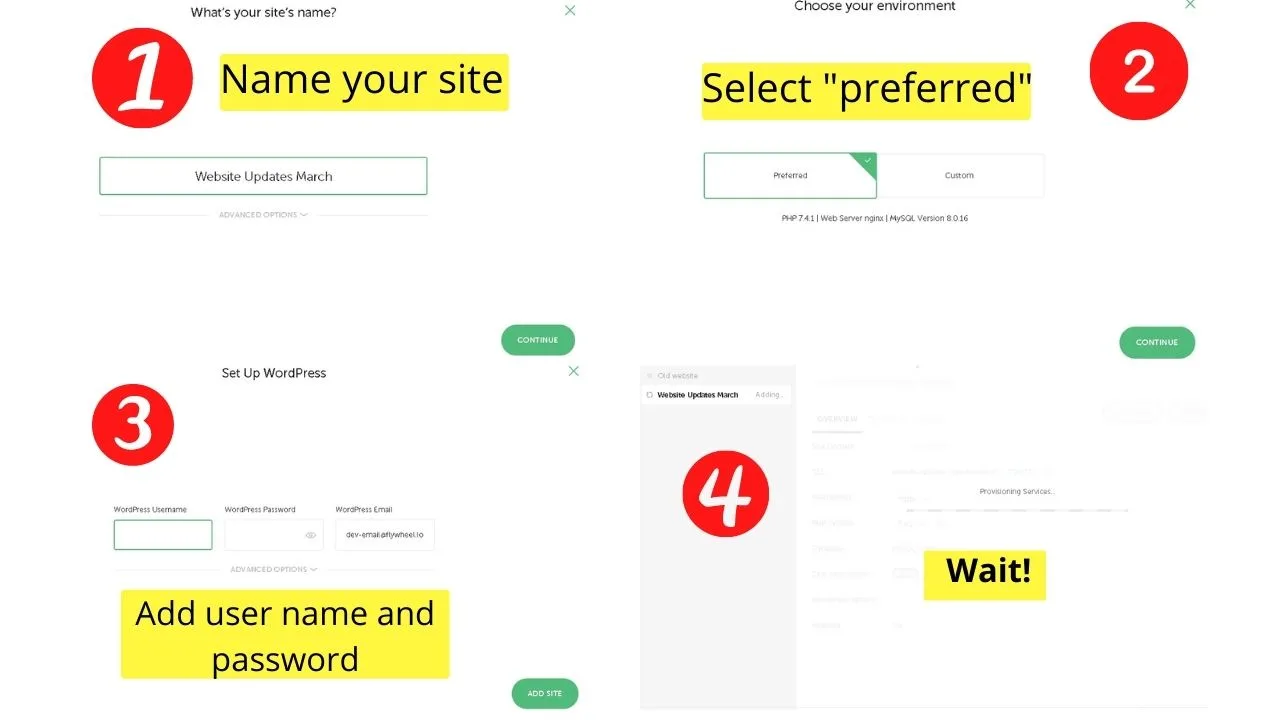
It will take a few minutes to install WordPress locally.
To create a copy of the live site now, a WordPress migration is needed. This involves exporting the existing website files, folder, and database from the WordPress hosting server to install copies on the local server.


Step 2: Export a copy of your SQL database and WP contents
WordPress plugins make migrating websites easy. The process can be tedious without a plugin, as it requires downloading copies of your database, WordPress files, plugins, and folders.
The All-in-One WP Migration plugin handles all of this.
1. Go to your plugins menu, select “Add new,” then type “all-in-one wp migration”

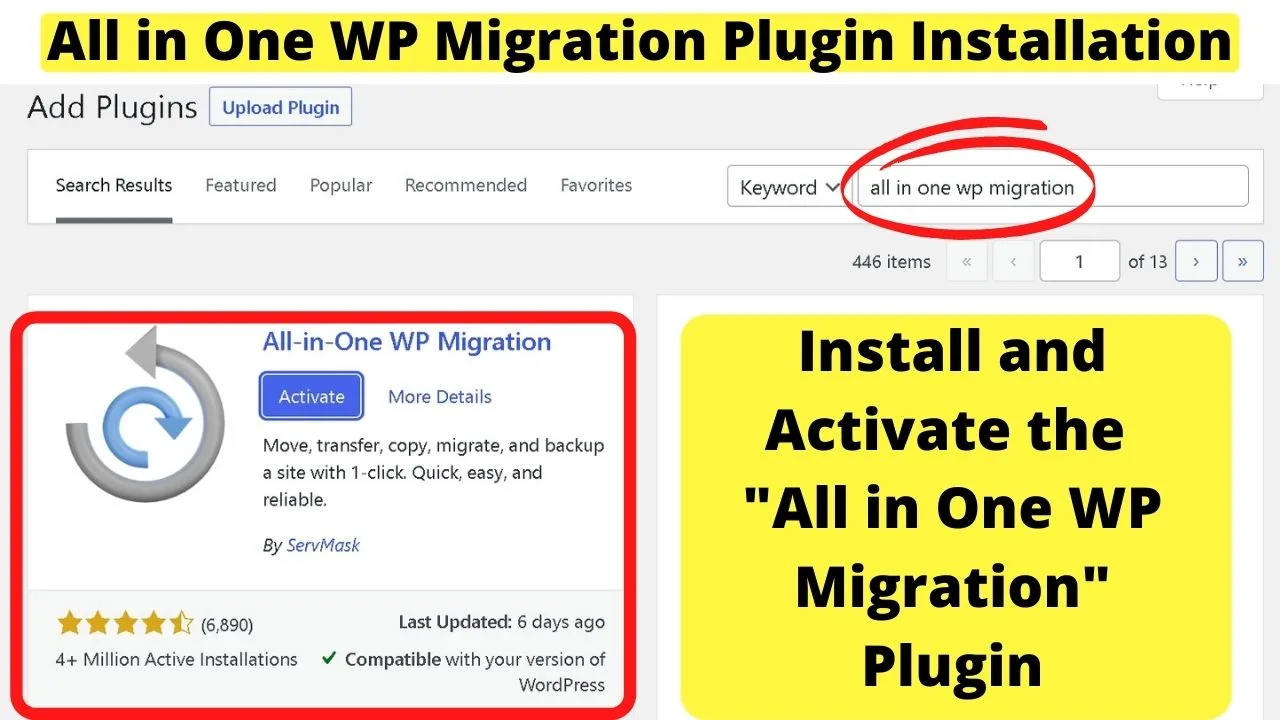
2. Click install, then click activate.
Once activated, a new menu item appears on your left sidebar labeled “All in One WP Migration.”
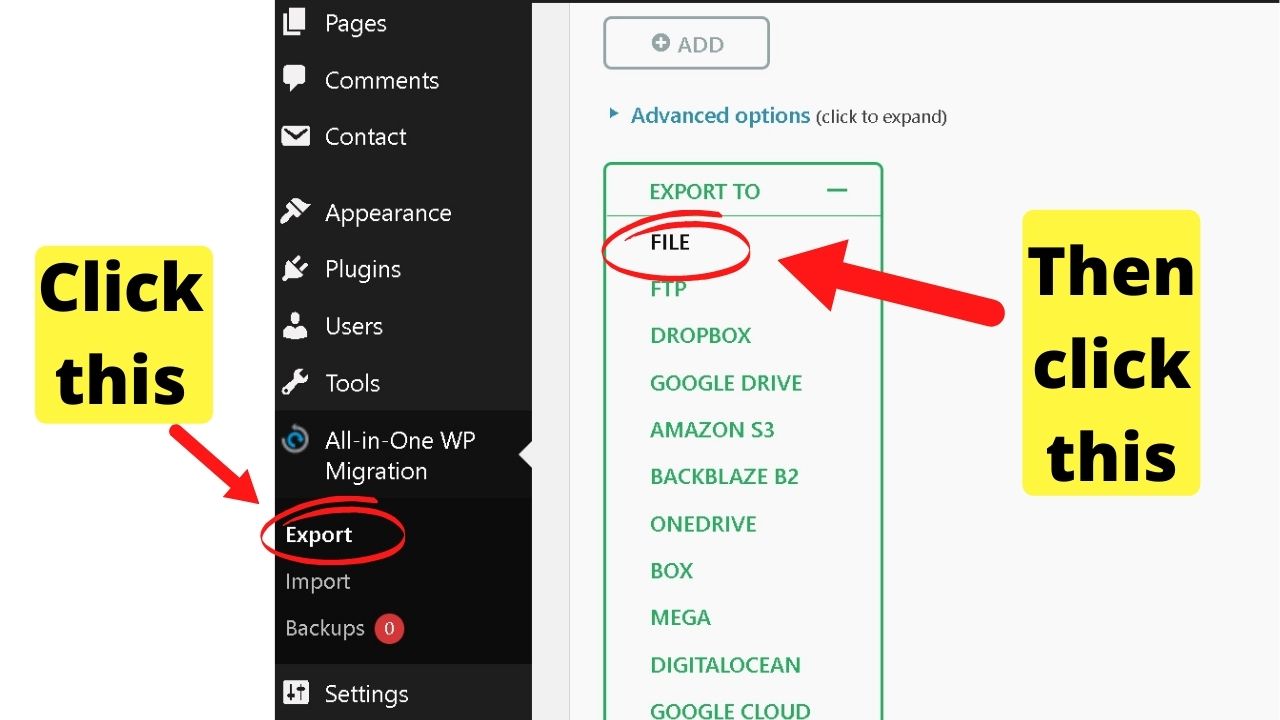
3. Hover the link to expand the second menu, then select the first option to “export”.
4. From here, select the “file” option. All other options are better suited to cloud backups. The “file” option will export all of your WordPress files to your computer.

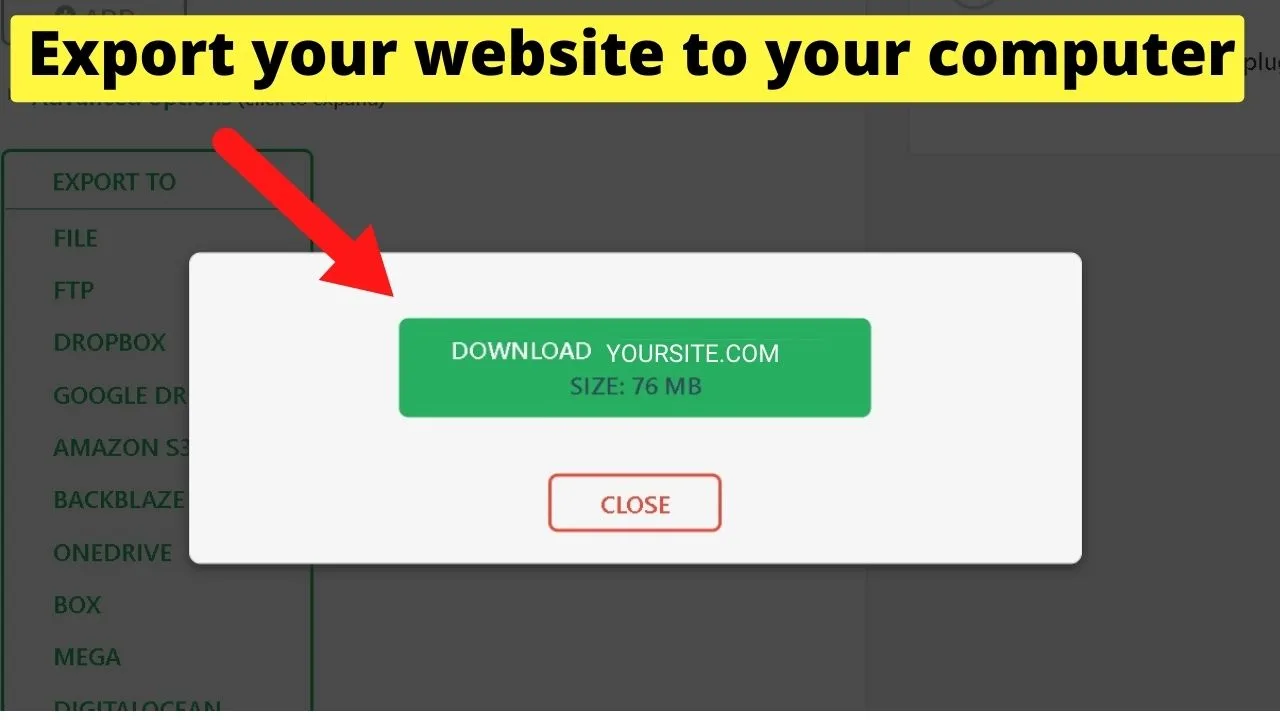
5. It will take a few minutes to gather everything. Once the files are ready, it will show a green button to click titled “download yoursite.com”. Click that and then wait some more.

Step 3: Import the zipped file to LocalWP
Once the file is exported, the next thing is to log into your local website and install the same plugin.
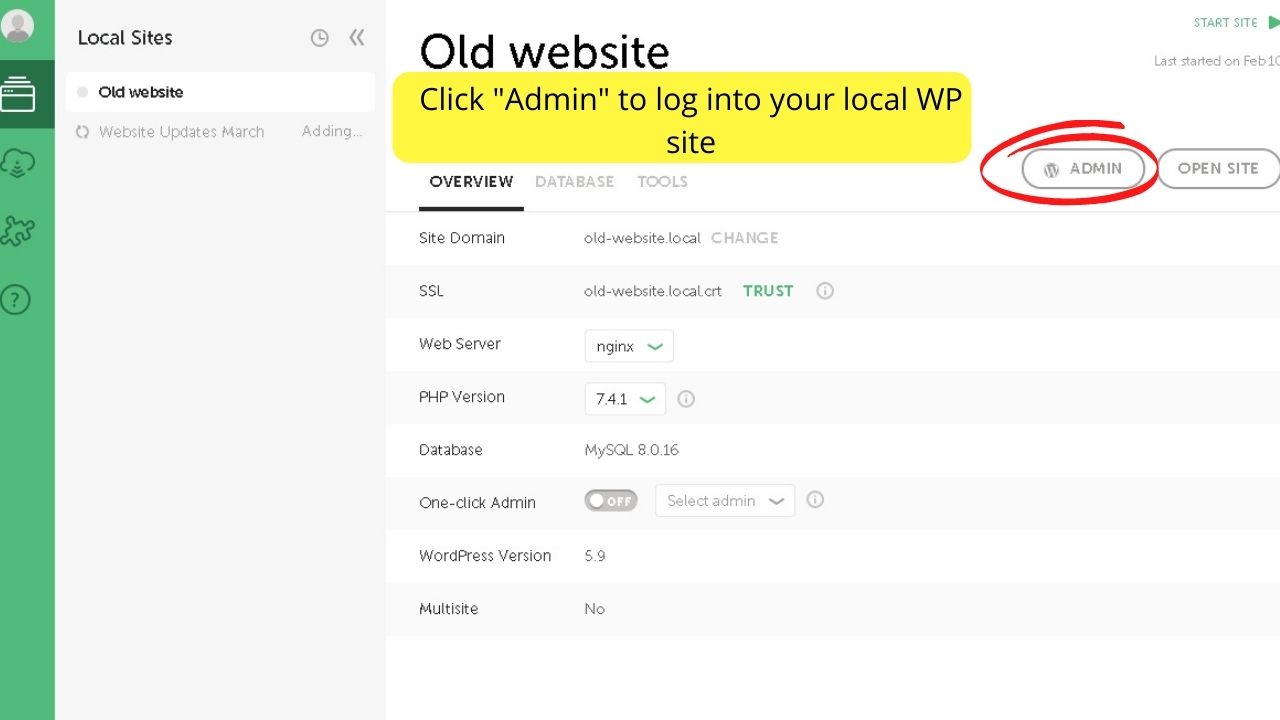
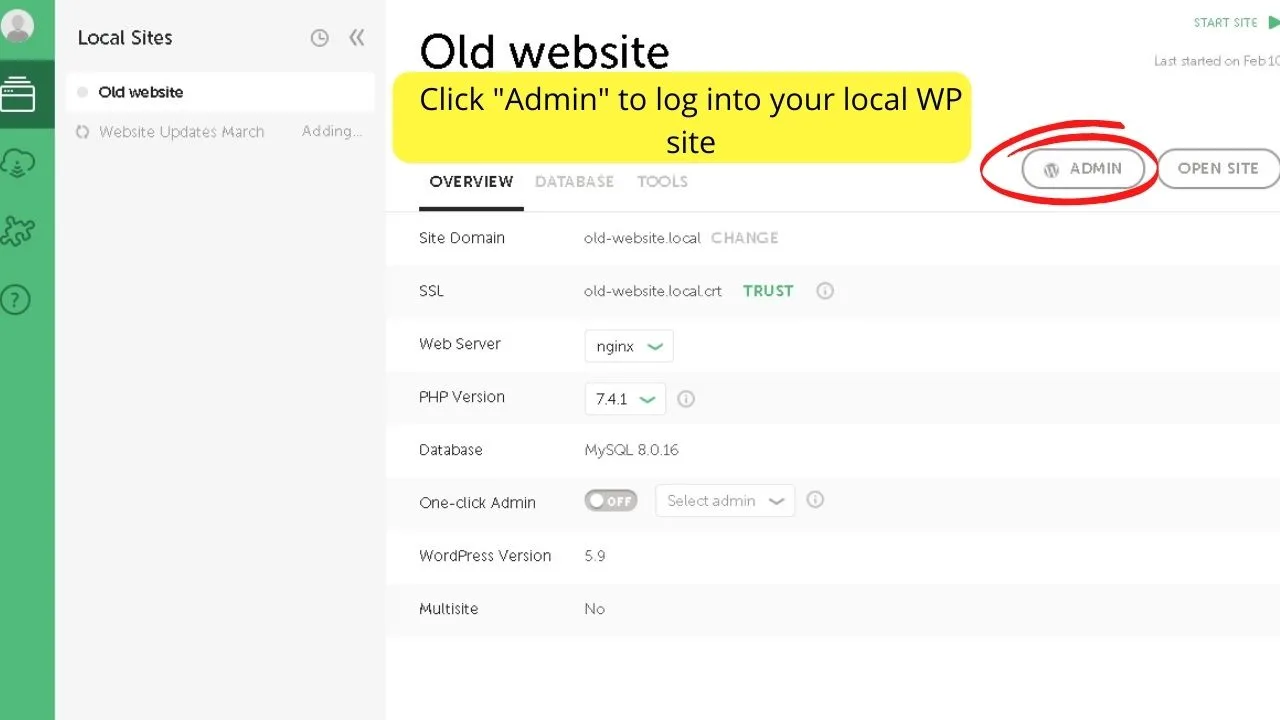
1. Use the Local Server, click the “admin” button (top right of the screen), then log in with your username and password.
2. Go to plugins, select Add New, and install the All-in-One WP Migration plugin on your local website. (This is the same process on your live WordPress website).
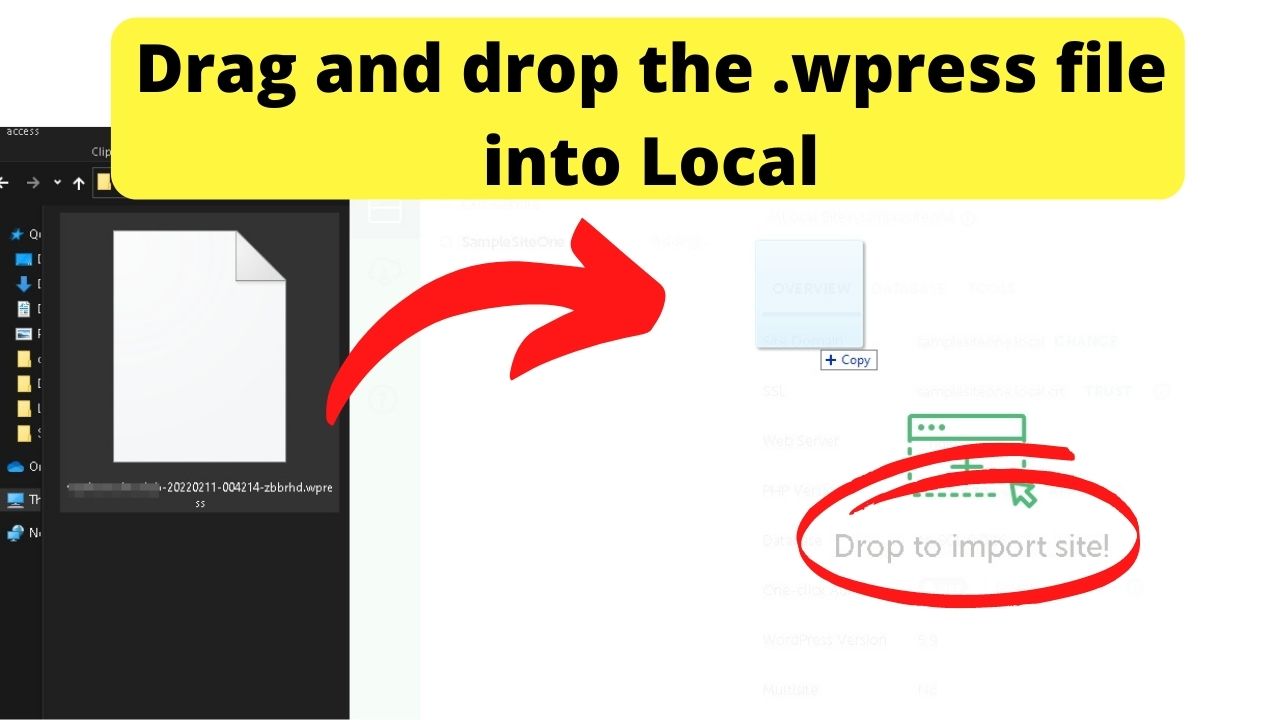
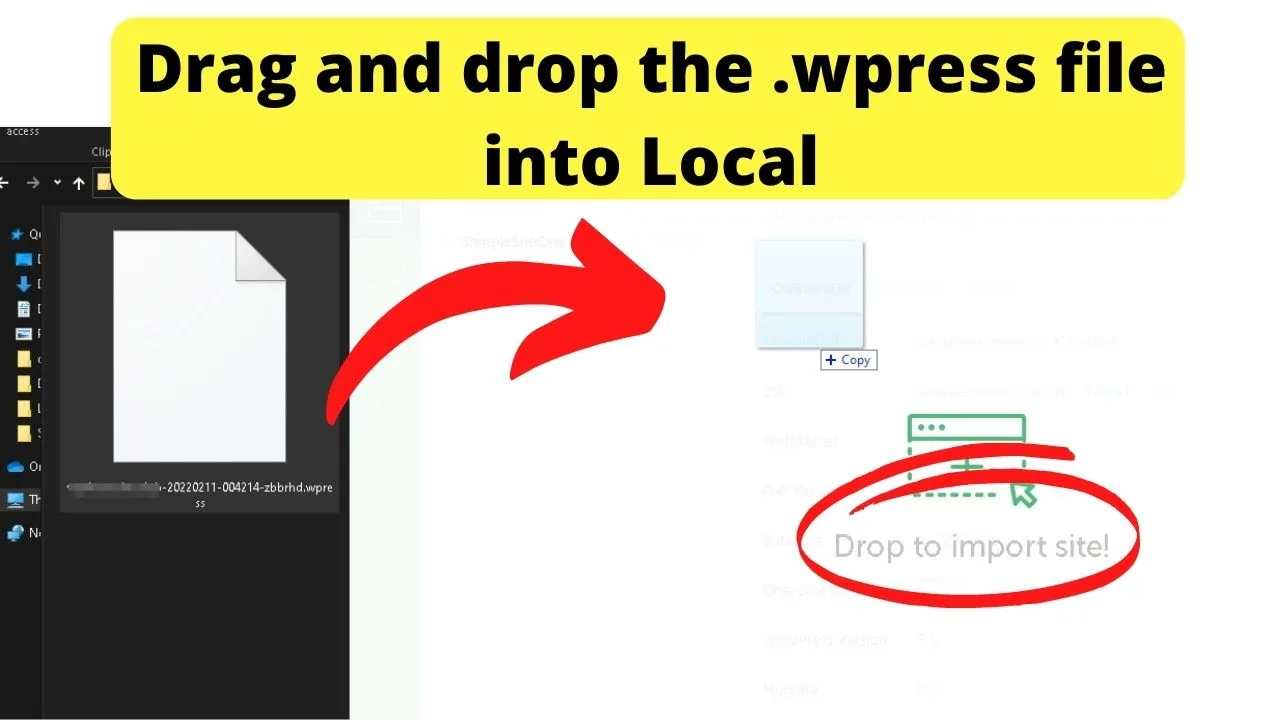
3. This time, instead of the export option done on the live site, select the “import” option.
The files exported from your live website will now be imported to the local site.
4. Drag the folder from your computer into the “import site” area of Local. Wait until you see the message that reads, “Your site has been imported successfully.”
The only other thing that you may need to do is go to the settings and save the permalinks.
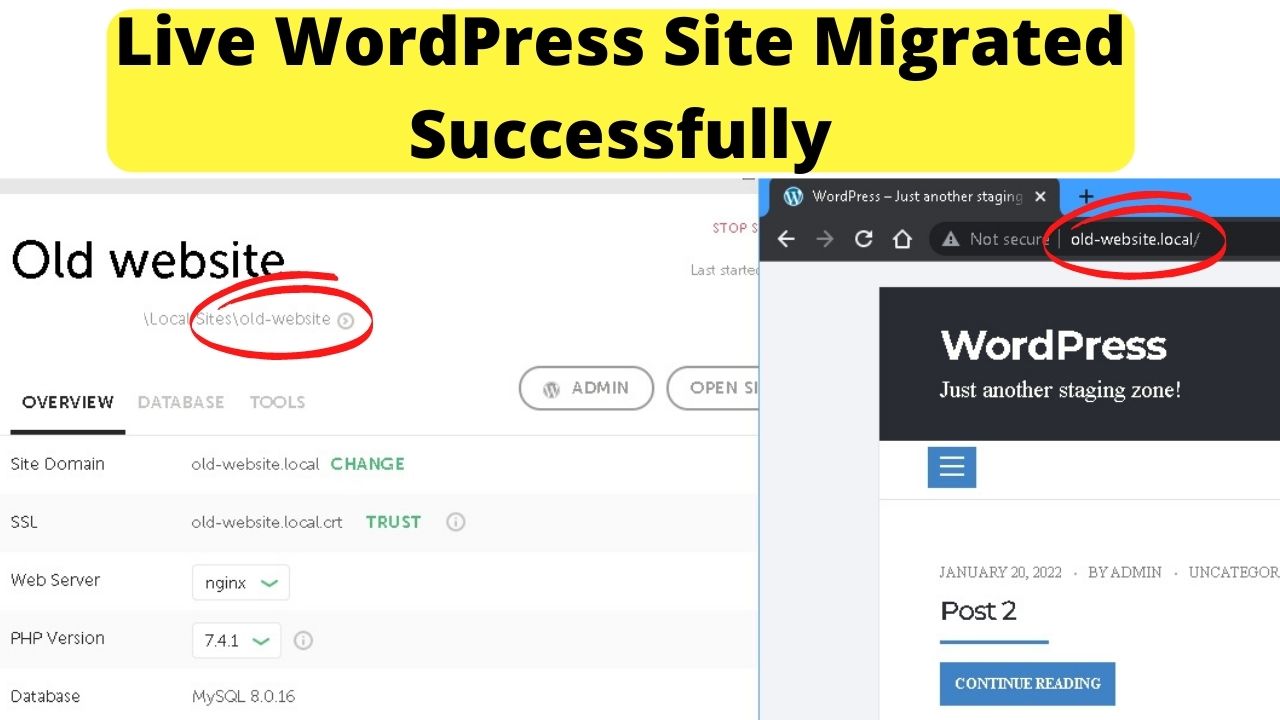
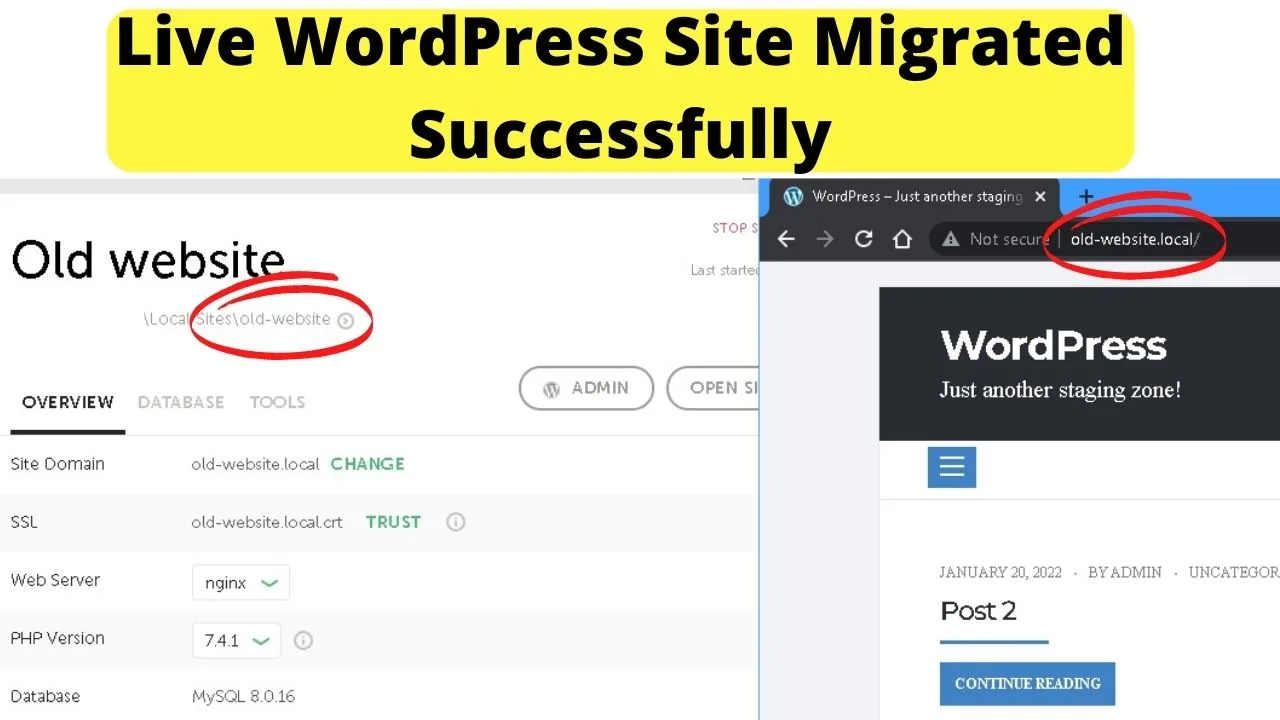
When you click the “visit site” on the top left of your Local dashboard, you should see a local copy of your live site. Both should be the same.
If it looks broken, like the stylesheet is not loading, it is likely a cache error. Empty all caches, then reload your local site, and it should now work.
An alternative: Manually migrate WordPress to Local
Migrating WordPress between servers or hosting providers is technical. Use a WordPress migration plugin if you have no technical experience or confidence in your technical abilities.
The steps in migrating a WordPress website are those used to clone a website with PHP files and a database. You need to copy a bunch of files, folders, and the database is needed for everything to work.
Step 1: Get everything prepared (checklist provided)
Before downloading all of your website files, it will help to organize things first.
1. Start by creating a folder. This will be for your SQL database and the WP content folder.
2. Gather your login details. You will need access to cPanel to get a copy of your database.
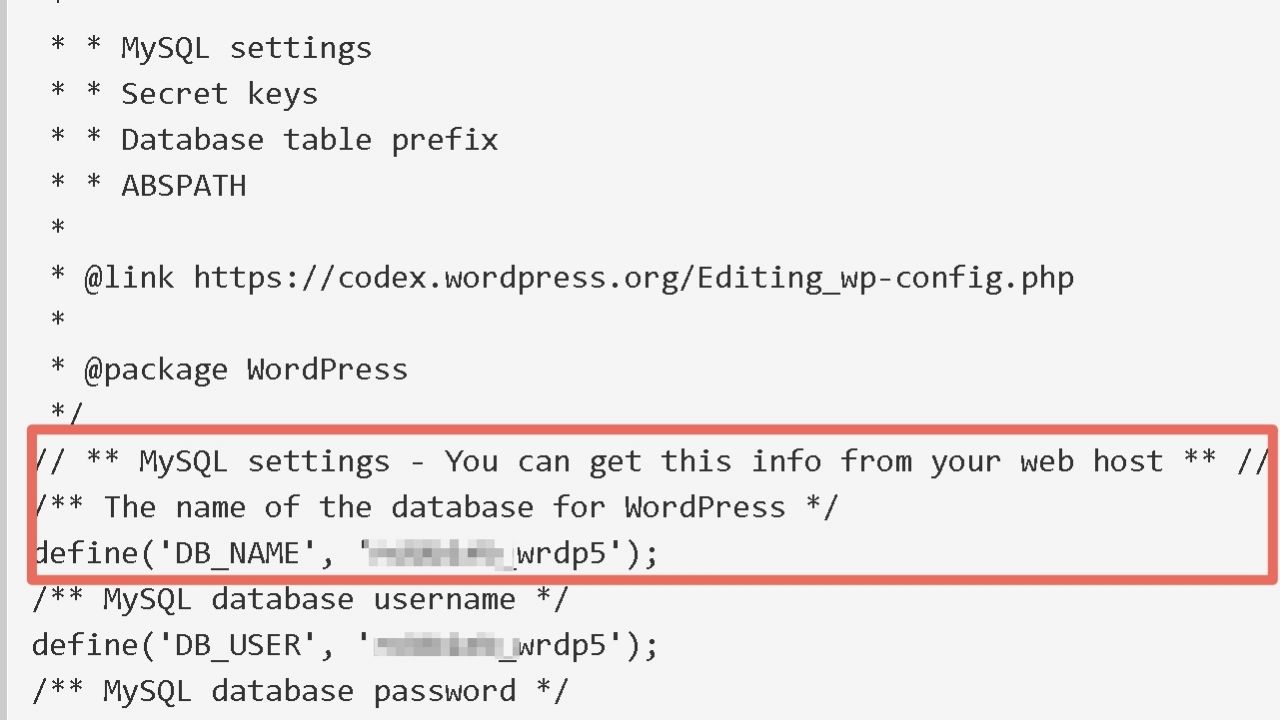
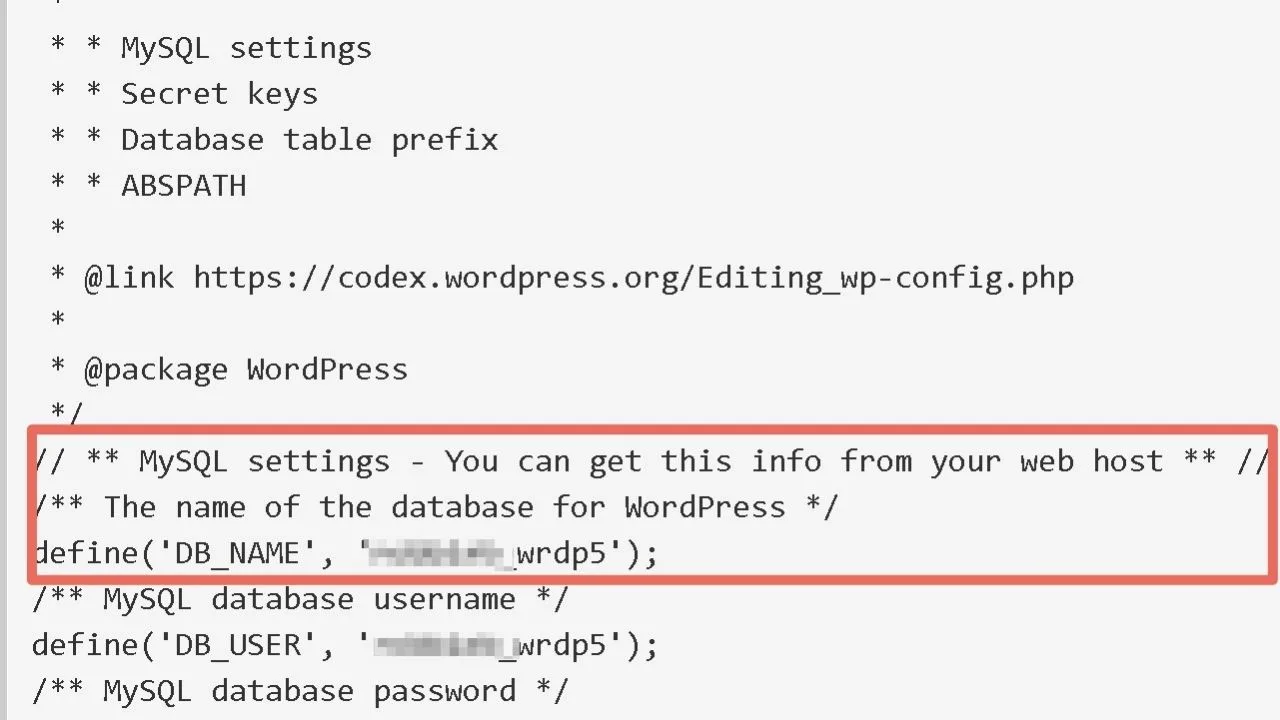
3. If you have more than one website on your hosting account, go to your wp-config.php file for the website you want to move to a local server to find the database name.
The only other folder you need a copy of is the WP content folder for the website that will be moved.
This can be done within cPanel using File Manager or with an FTP client such as Filezilla or Core FTP.
If you are going through this step-by-step, take a moment to organize the items you need.
Checklist for WordPress migration:
- A new folder for your files,
- Your hosting login details,
- If you have more than one website, have the name of the database you need to hand so you do not download the wrong one.
Step 2: Download your SQL Database for your live WordPress website using PHPMyAdmin
1. Go to your cPanel (yoursite.com:2083), and select PHPMyAdmin in the databases section.
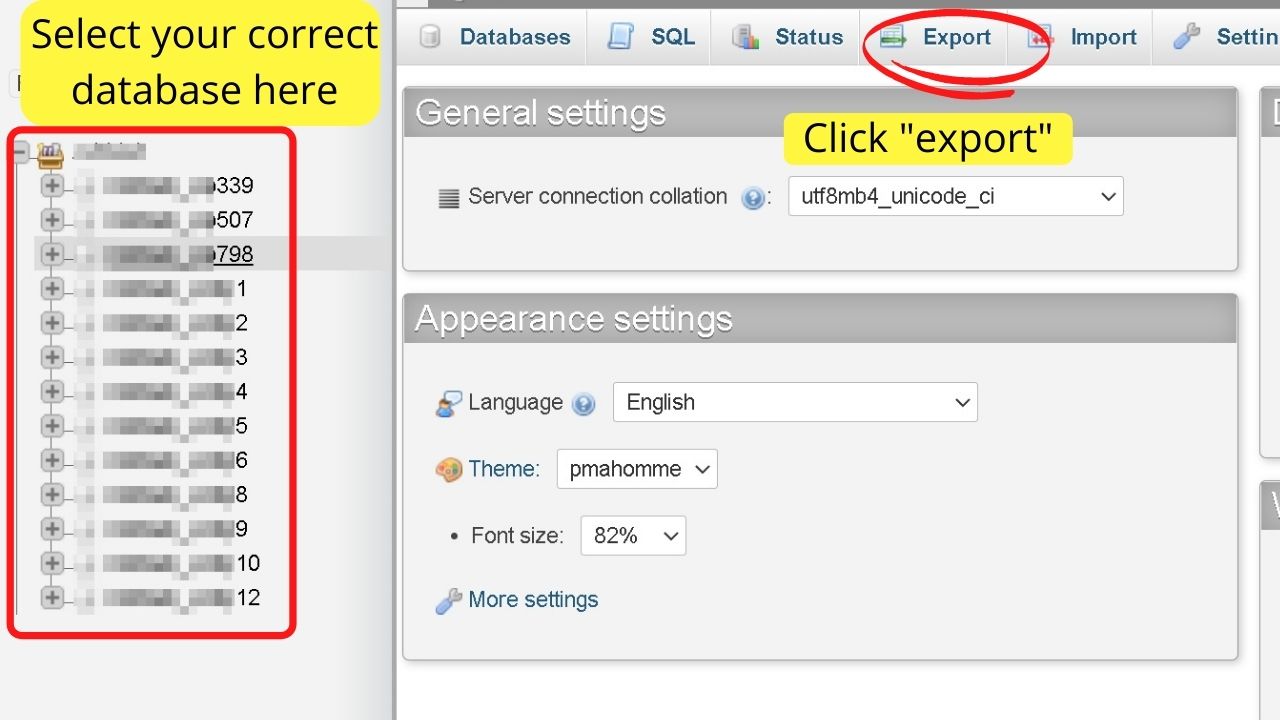
2. Select the database for your live WordPress website on the left sidebar.
3. Along the top toolbar, click the “Export” tab.

4. On the next page, leave the default selection as “Quick – display only the minimal options”, check the format is “SQL”, then click the “Go” button.
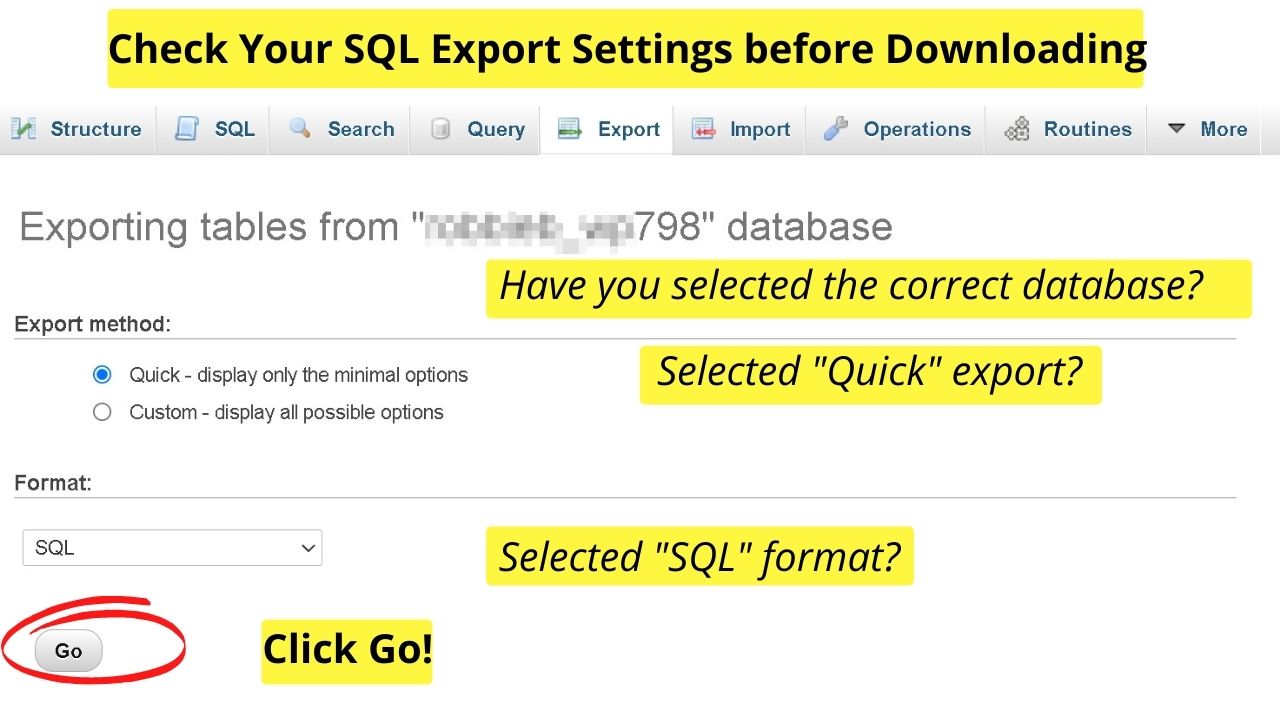

The “save as” prompt will show.
5. Save the database somewhere you will easily find it. As per the advice earlier, it will help to create a designated folder for these files. They will need to be zipped later to import to the local server.
The next phase is to download a copy of your WP content folder.
For this, you can use cPanel > File Manager (see Step 3a) or FTP (see Step 3b).
Step 3a): cPanel instructions to download a copy of your website files
1. Once logged into cPanel, select File Manager, then click into the folder for your domain.
2. Right-click on the WP-Content folder and select “Compress”. A window will open, asking what compression type to use. Select “Zip Archive”, then click the “compress” button.

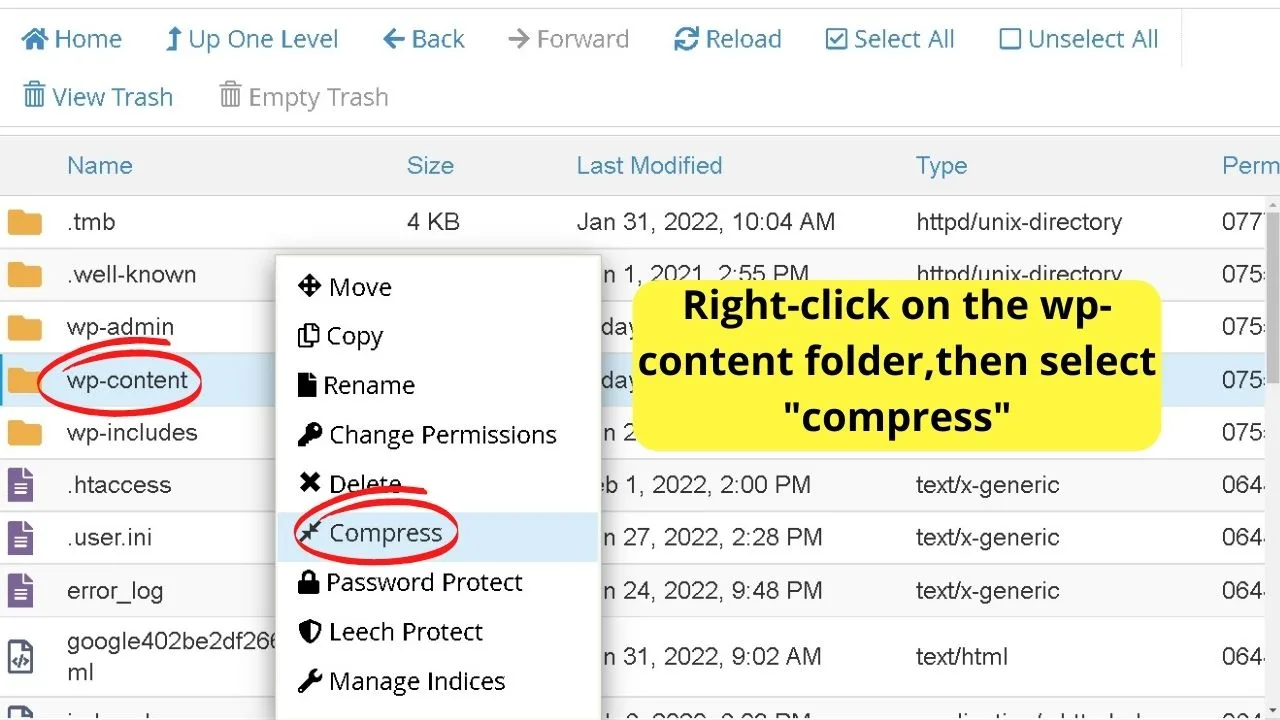
3. Once done, there will be a wp-content.zip folder added to your root directory.
Right-click on the wp-content.zip file, then select download. Save this to the same folder as your SQL database.
4. Once downloaded, the wp-content.zip file can be deleted as it is only a duplicate.
The advantage of deleting the folder now is that when you need to update your staging site (local WordPress site), you can repeat the process of compressing your wp-contents folder, downloading it from cPanel, then uploading to Local.
It keeps things organized so you always know you are working with the latest version of your live site on the local site.
Step 3(b): FTP instructions to download a copy of your website files
1. Log into your website hosting account using an FTP client. You need the host, user name, password, and port number to connect through FTP.
The host is ftp.yoursite.com. The username and password are the same as you use to log in to cPanel. The port for FTP is 21.
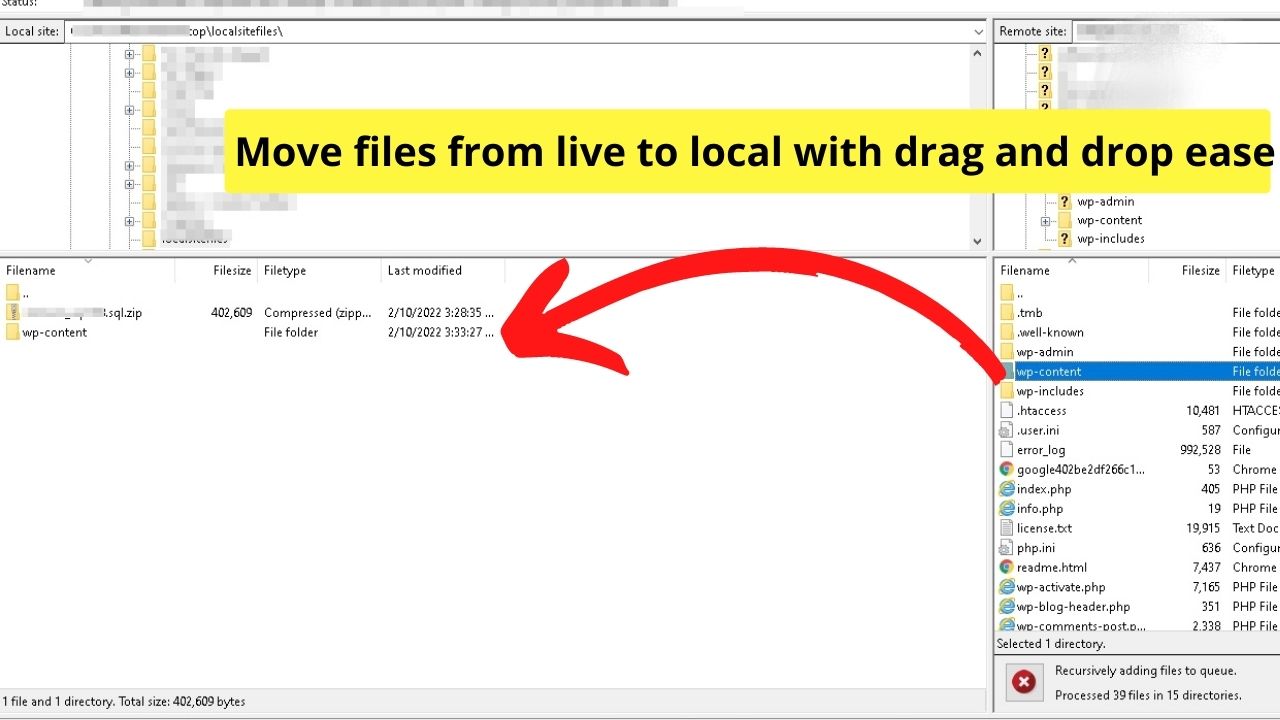
2. Moving files – Once connected, your computer folders are on the left side of the screen; opposite are the folders on your hosting server.
On the left of your screen, select the download destination, e.g. the same folder as your SQL database.
Find your website folder on the top-right pane, then on the lower screen beneath it, click on the wp-content folder, then drag it to the left to copy the WP content folder to your computer.

Step 4: Merge your wp-content and SQL database into one zipped folder
Once your wp-content folder and the SQL database have been downloaded, the next step is to merge them into a zip folder ready to import into Local.
1. Go to the folder that has the two files, select both by holding the shift key, then click on both files to highlight the SQL file (the database) and the wp-content.zip folder.
2. Right-click and select “send to > Compressed (zipped) folder”.
3. For simpler recognition, change the name from wp-content.zip to wp-content-old.zip. Name it something recognizable so you know you are importing the zip file containing the database.
The original wp-content.zip file only contains the WordPress themes, plugins, and uploads. The zip file you create will have the SQL database included too.
Without the database, the migration will not work.
Step 5: Import the new zipped file to your local site
1. Load your Local server. Log in and click the site that was created earlier.
2. Drag the compressed (.zip) wp-content folder that contains the SQL database and the WP content folder into the dashboard of Local.
3. A prompt will show asking you to give the site a name. Call it anything you want, click continue, then wait.
Once the migration is complete, you can click on the “admin” button to go to the login page for your local WordPress site or click the “open site” button to load the local version of your WordPress website in your browser.
How long the import takes depends on the size of the database, the files being imported, and your internet speed.
Once the WordPress migration is complete, you can log in to the local copy of your WordPress website using the same login details as your live website.


Hey guys! It’s me, Marcel, aka Maschi. On MaschiTuts, it’s all about tutorials! No matter the topic of the article, the goal always remains the same: Providing you guys with the most in-depth and helpful tutorials!

