One of the advantages of Adobe Illustrator in comparison to other elite software designed for similar purposes is that you basically get infinite workspace.
Sure, the canvas size dictates the size of your final output, but you can carelessly drag and drop as many photos, objects, vectors and other elements Illustrator operates with and place them inside or around the canvas at will.
This is extremely useful, especially in the initial phases of design, but at some point you’ll want to tidy it all up a bit.
Once you reach that point, knowing how to place your design\object EXACTLY where you want it to be is essential.
Centering it is probably the most common way to do this.
How to center objects in Adobe Illustrator?
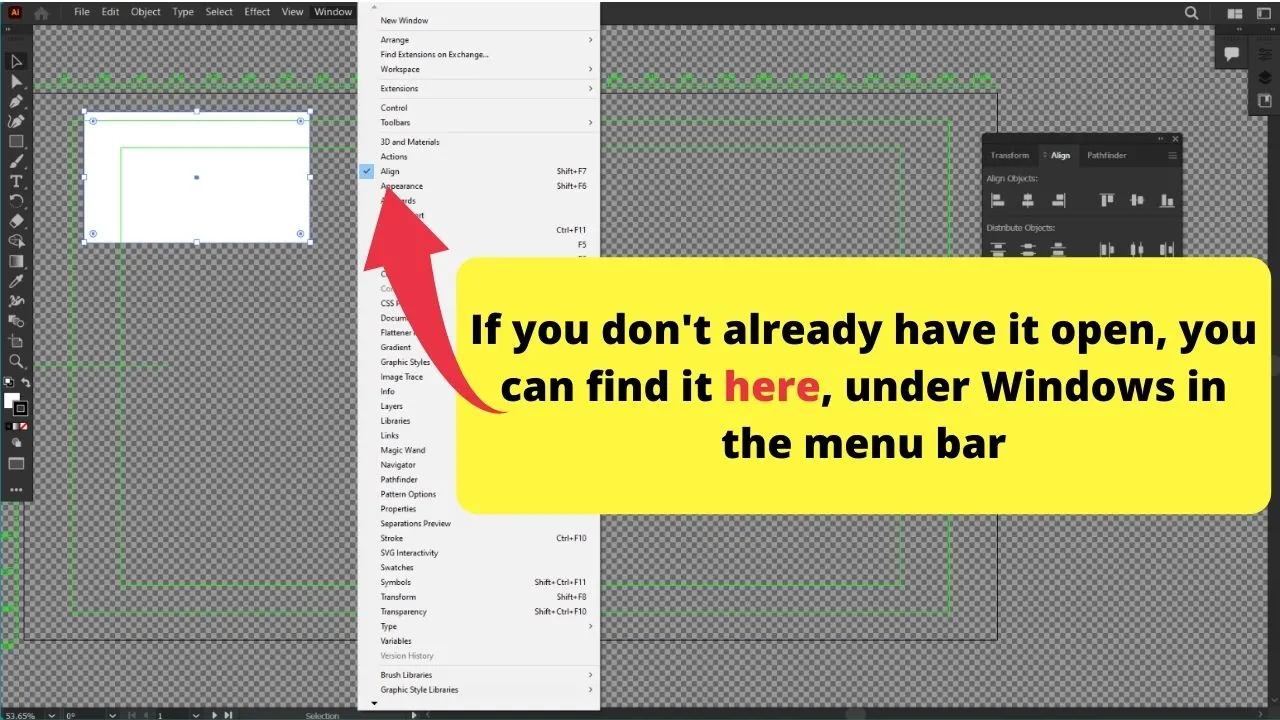
Centering objects in Adobe Illustrator is done through the alignment menu which can be found under “Windows” on the menu bar. From there, to place your object to the center of the canvas, select said object and just click the “center horizontal” and then the “center vertical” option or vice-versa.
How to center objects in Adobe Illustrator in 2 different ways
As is the case with most other operations, Illustrator offers a bunch of ways to align or center your objects.
It’s always useful to have a couple of tricks up your sleeve and here will take a look at two distinct ways to center objects in Adobe Illustrator.
Centering Objects in Illustrator – The Quick Way
This is the ideal approach for saving time when doing relatively simple projects.
What I mean by simple is that you don’t have a bunch of elements or objects you want to align but you really just want to take the one object you have and align it to the center of the canvas, or to the center of another object.
For these purposes, Adobe Illustrator provides us with rulers and guides.
Rulers are the numbers and markings you see at the edge of your canvas, and guides are the lines that appear as you drag your objects across the canvas, once they’ve aligned with something.
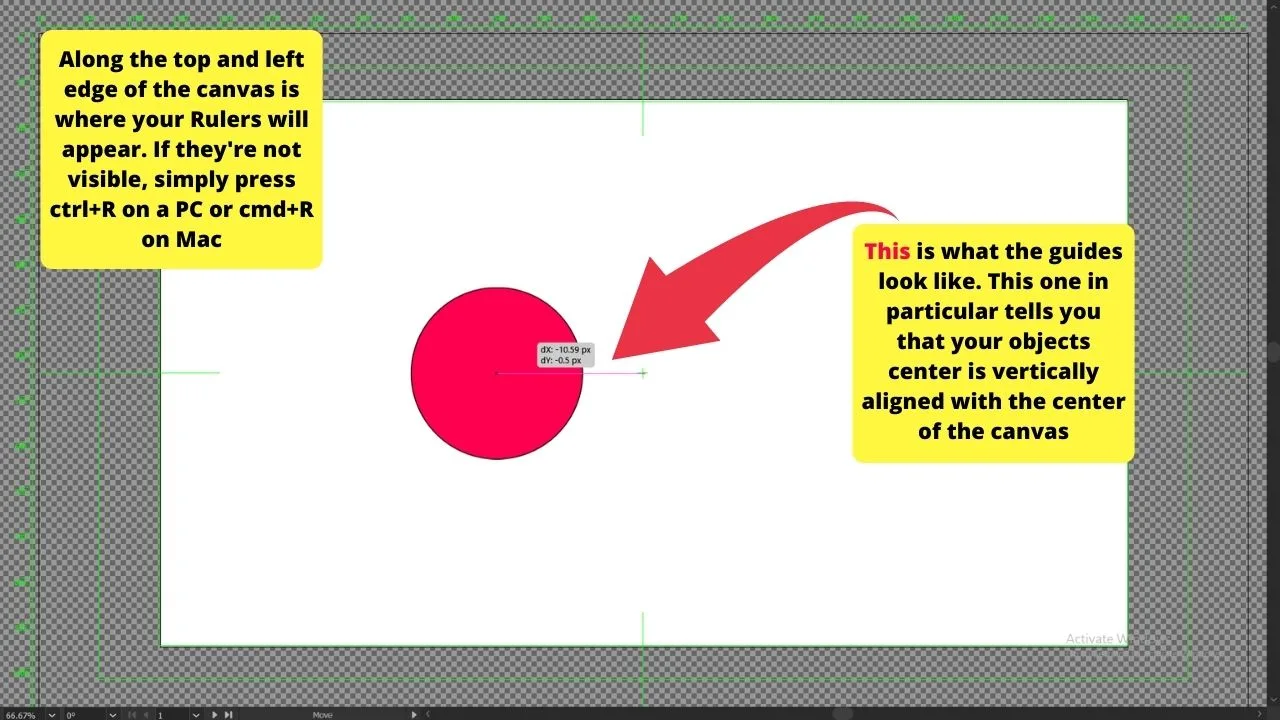
Illustrator also tells you most of the time how the objects are aligned.
To apply this approach, simply select your object and drag it as close to the center of the canvas as you can manage.
You might have to eye-ball it a bit, or use simple math in combination with the aforementioned rulers to figure it out.
Don’t worry about getting it right on the first go, as once you’re close to the center, you can just circle around with your mouse while holding your object ( so, holding the left mouse click all the time ).
The center of your object will tend to be magnetically drawn to the center of the canvas, as Illustrator knows that that’s the most likely location you’d want to place your object.
Once the center of your object is magnetically drawn to the center of the canvas, you’ll be notified, and a small text citing “center” will appear, confirming you’ve done a good job.
Centering Objects in Illustrator – The Precise Way
This is the route to take if you want to have more control over your objects and their alignment. The essence of the precise way is to do it all through the “Align” window.
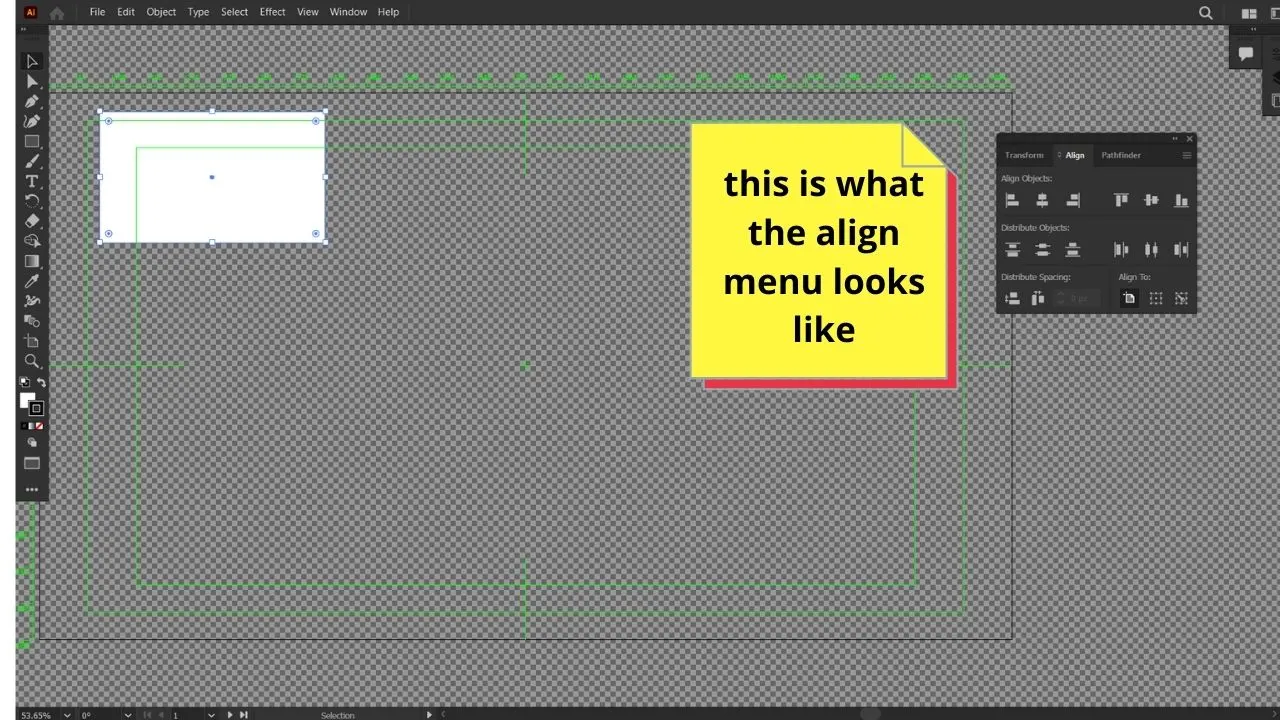
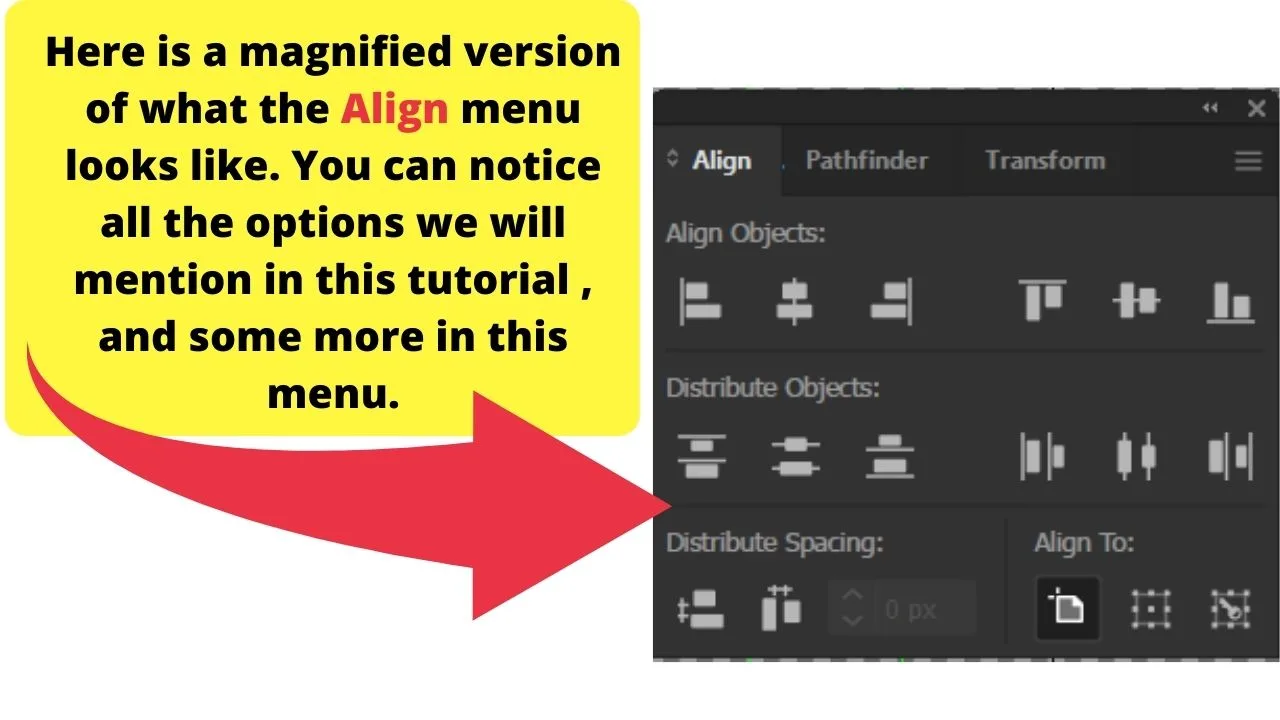
Look for the alignment window on the right side of your Illustrator window.
If it isn’t there yet, simply get it by clicking on “Align” under “Windows” in the menu bar.
Or just hit shift+f7 keys, which is the shortcut for opening the “Align” window.
The simple case :
For the sake of simplicity and clarity, let’s start by doing what we’ve already done the quick way.
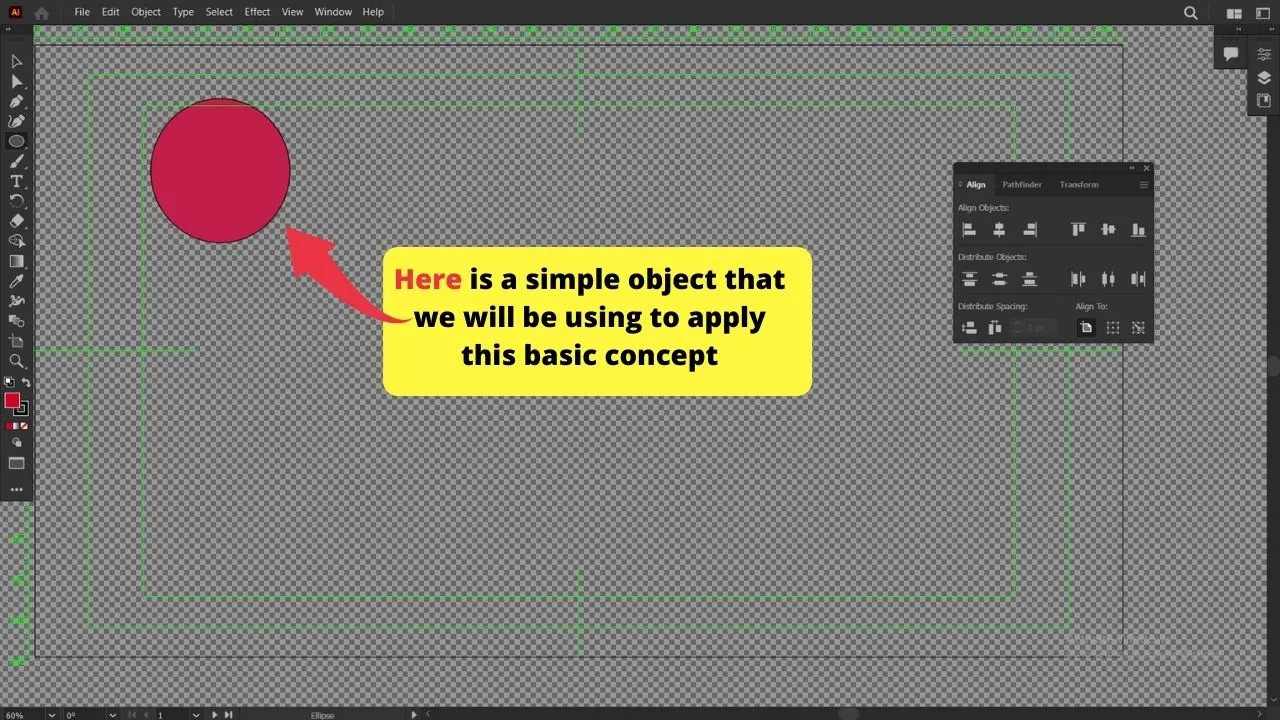
First, select your object.
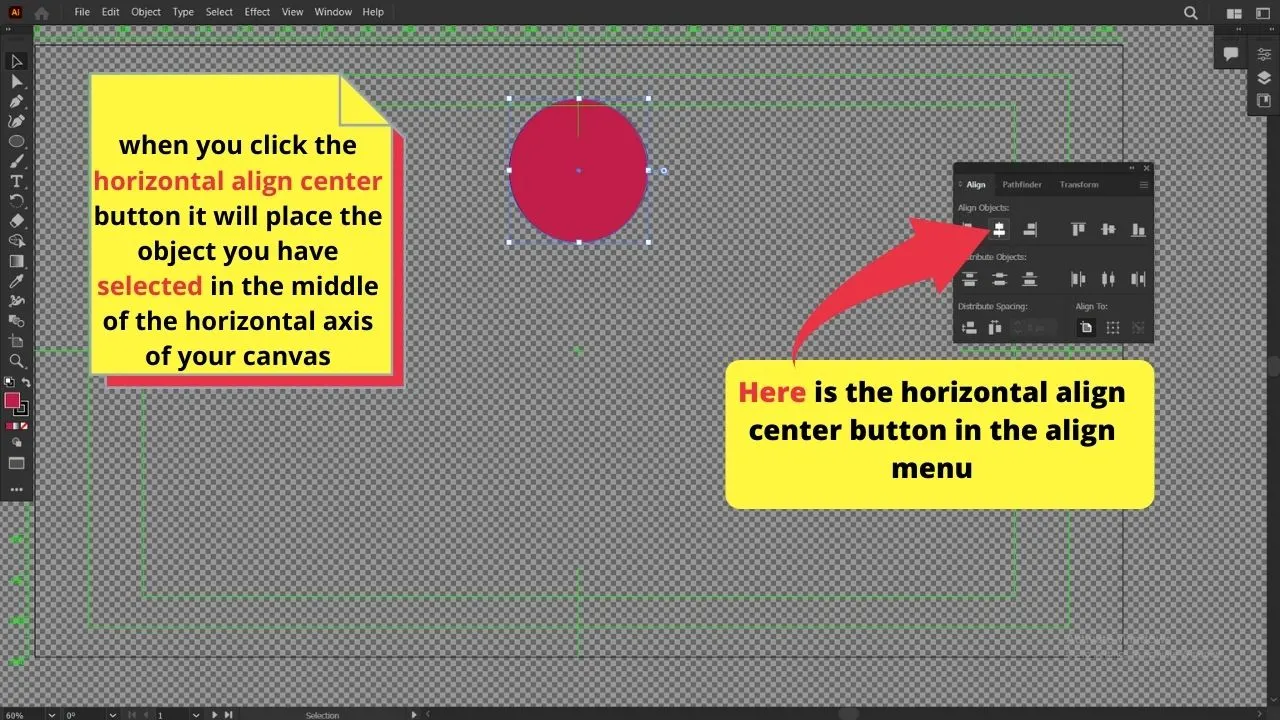
Then, make sure that in the bottom right corner of the “Align” window you have the “Align to artboard” option selected. Then in the “Align” window select the “horizontal align center” and the “vertical align center” both at the top of the “Align” window.
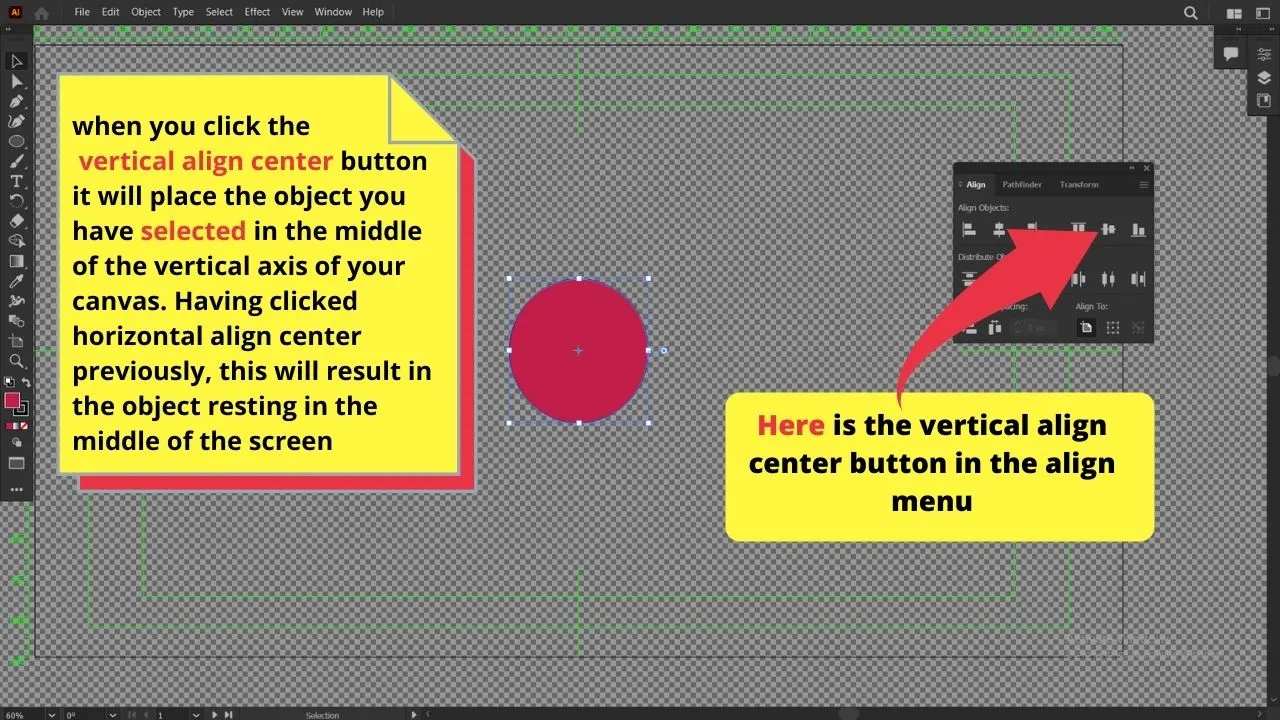
There you go.
Now a slightly more complex situation:
Let’s now try this with multiple objects. I’ve created a circle and 8 triangles which are all rotated by 45 degrees in relation to the previously created one.
We are now going to center them all together.
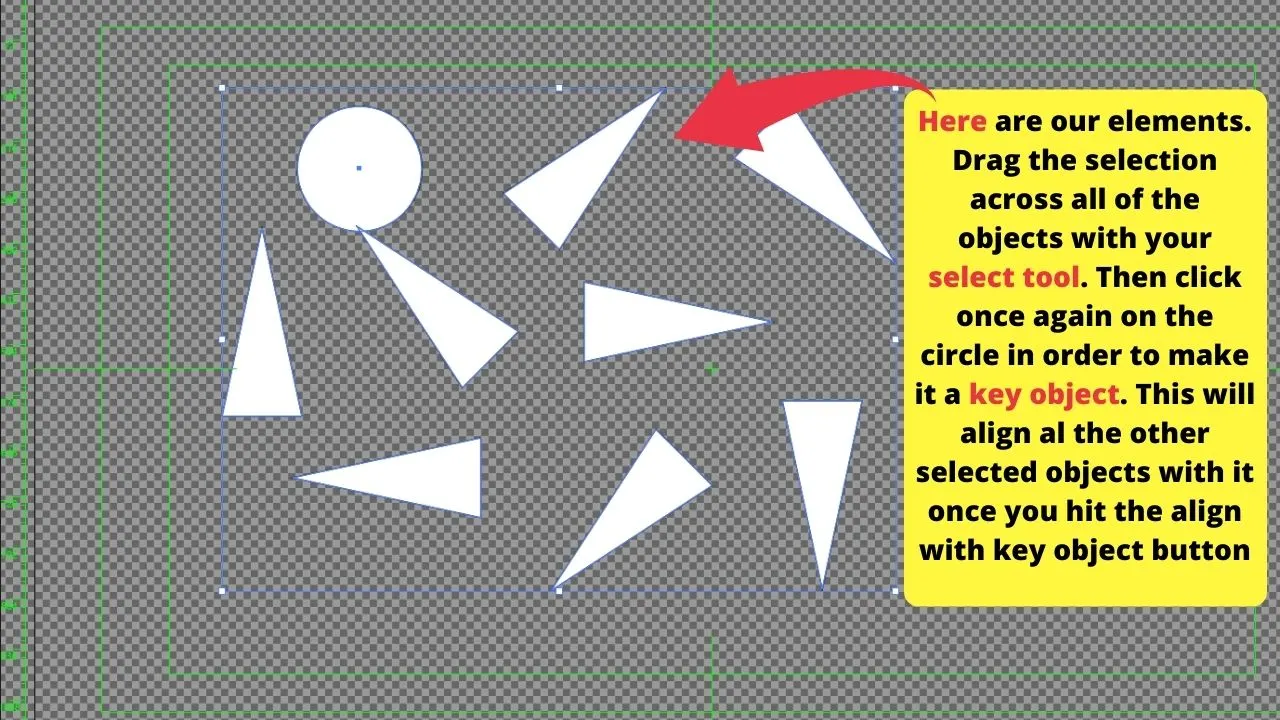
Now, we could simply repeat what we’ve already done and that would center all of our selected objects and place their centers in the center of the canvas.
But let’s say for some reason we want to keep the position of the circle intact.
The way to do this is to first drag the selections across all objects.
After this, simply click on the circle, this will define the circle as the key object.
It will appear distinct from other objects in the selection by a stronger, thicker outline (blue by default).
Bare in mind that you want to have your selection tool selected while doing this.
Now, with all the triangles and the circle selected, and the circle defined as the key object, go down to the bottom right of the align window and select “Align to Key Object”.
This will ensure that the key object, in our case the circle, stays in its predefined position and that all the other elements’ centers will be placed on top of it.
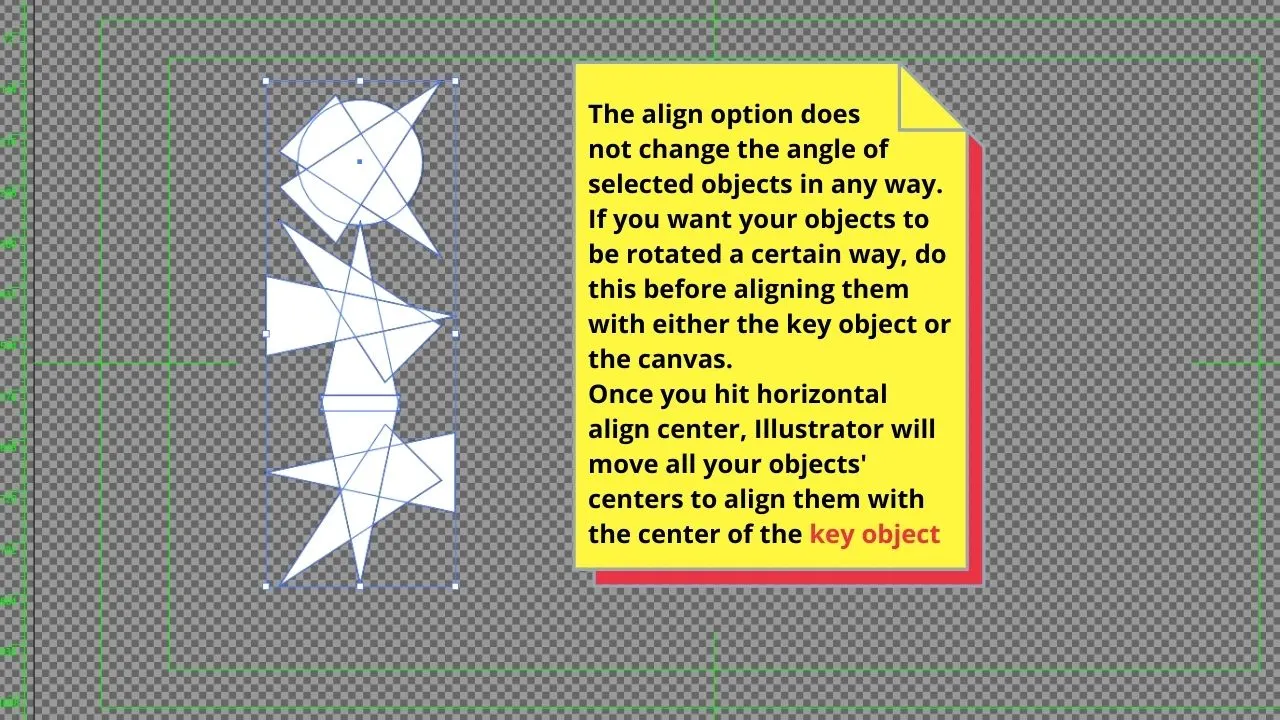
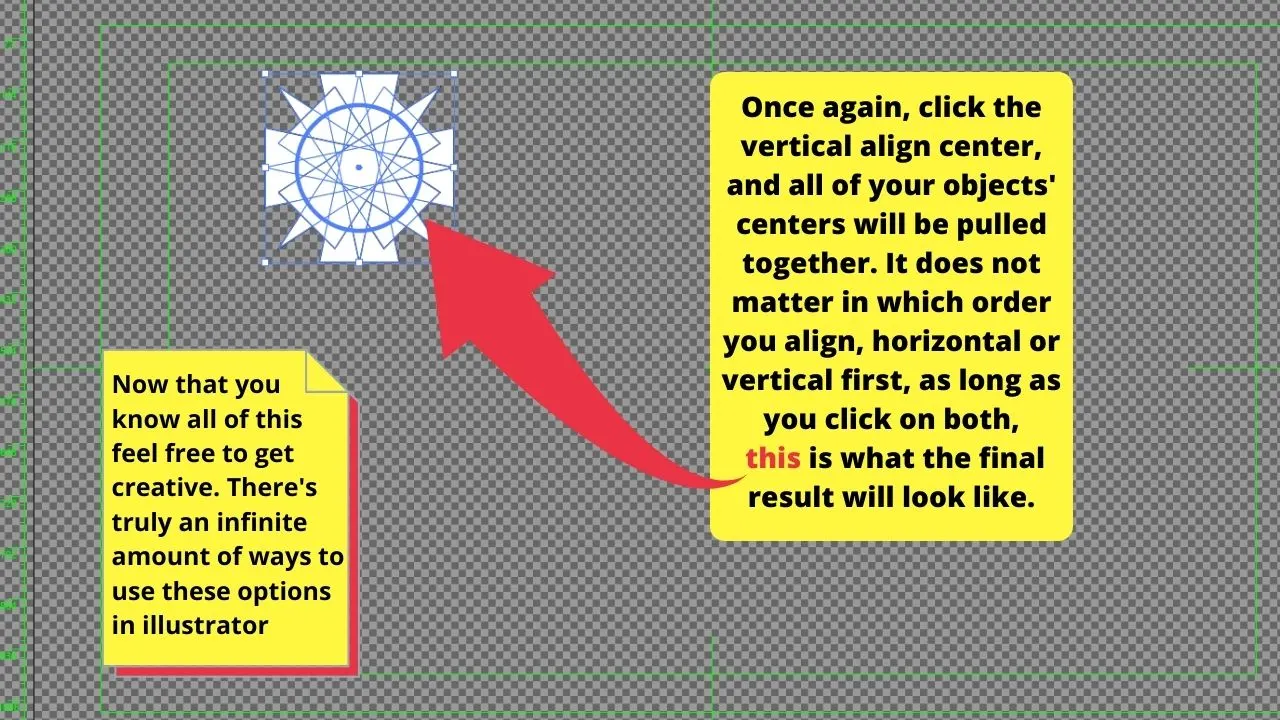
With everything in place, simply go back up to the top of the “Align” window, and hit “Horizontal Align Center” on the top left side of the window and “Vertical Align Center” on the top right side.
And there you go. We’ve centered all the objects to where the center of the circle was placed.
Frequently Asked Questions About Centering Objects in Adobe Illustrator
Is it possible to arrange objects in a different way using the “Align window”?
Yes, the align window has a lot of options including spacing and distancing objects any way you want.
Is it possible to align objects to a path in Illustrator?
Yes, simple use the “key object” approach where you will shift+click the path to select it as a key object.

Hey guys! It’s me, Marcel, aka Maschi. On MaschiTuts, it’s all about tutorials! No matter the topic of the article, the goal always remains the same: Providing you guys with the most in-depth and helpful tutorials!


