Instagram is known as a highly-engaging social media platform. After all, Instagram focuses on giving its users the best visual experience through photos, videos, and reels.
Hence, you start uploading images to Instagram. But, you noticed that the photos don’t take up the entire space of the post. It even looks like they’re cropped.
With that, you then search for ways to fit a whole picture on Instagram.
How to Fit the Whole Picture on Instagram
One way to fit the whole picture on Instagram is by tapping the gray “Expand” icon on the preview window’s lower left. You can also pinch your fingers outward to achieve the same feat. If not, resize the picture using a third-party photo resizer before uploading it on Instagram.
By default, Instagram uses the 4:5 aspect ratio for both landscape and portrait posts. This is to prevent tall images from blocking other posts in the feed.
While this feature is nifty, it can make vertical photos or even videos difficult to post without affecting how they look. Worst, the photos look awkwardly cropped.
If you don’t want to use third-party photo resizers, then follow these easy steps to fit a whole picture on Instagram:
Step 1: Tap the “+” button on the home page
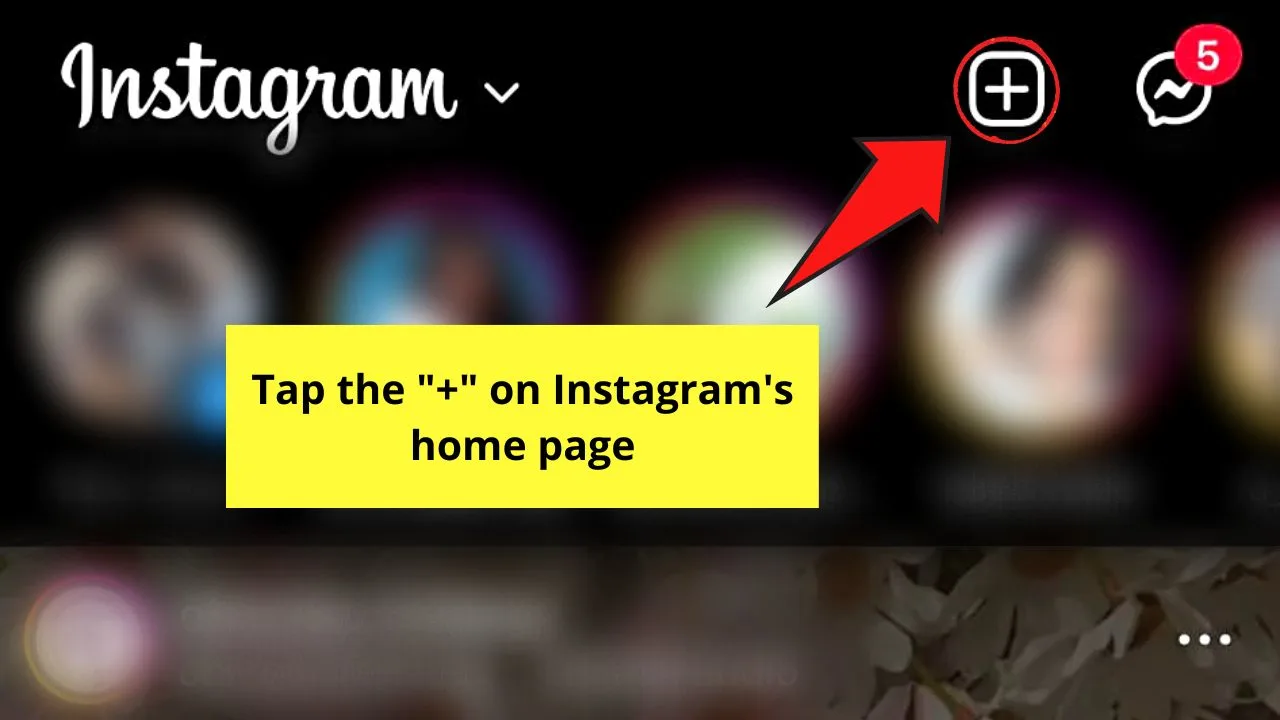
This button can be found to the right of the “Messenger” icon.
Step 2: Press the “Post” option
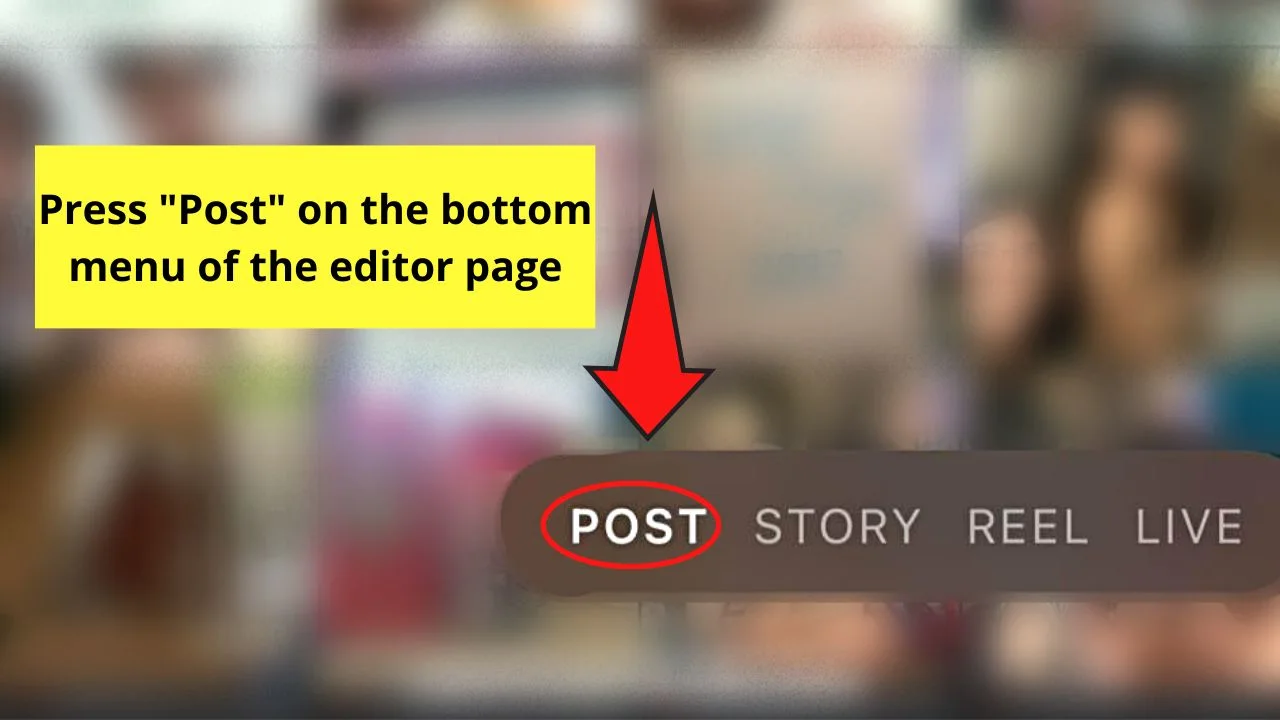
You can also choose to tap the “Reel” option if you want to upload the reel you created in Canva to Instagram.
Step 3: Choose an image from the “Gallery”
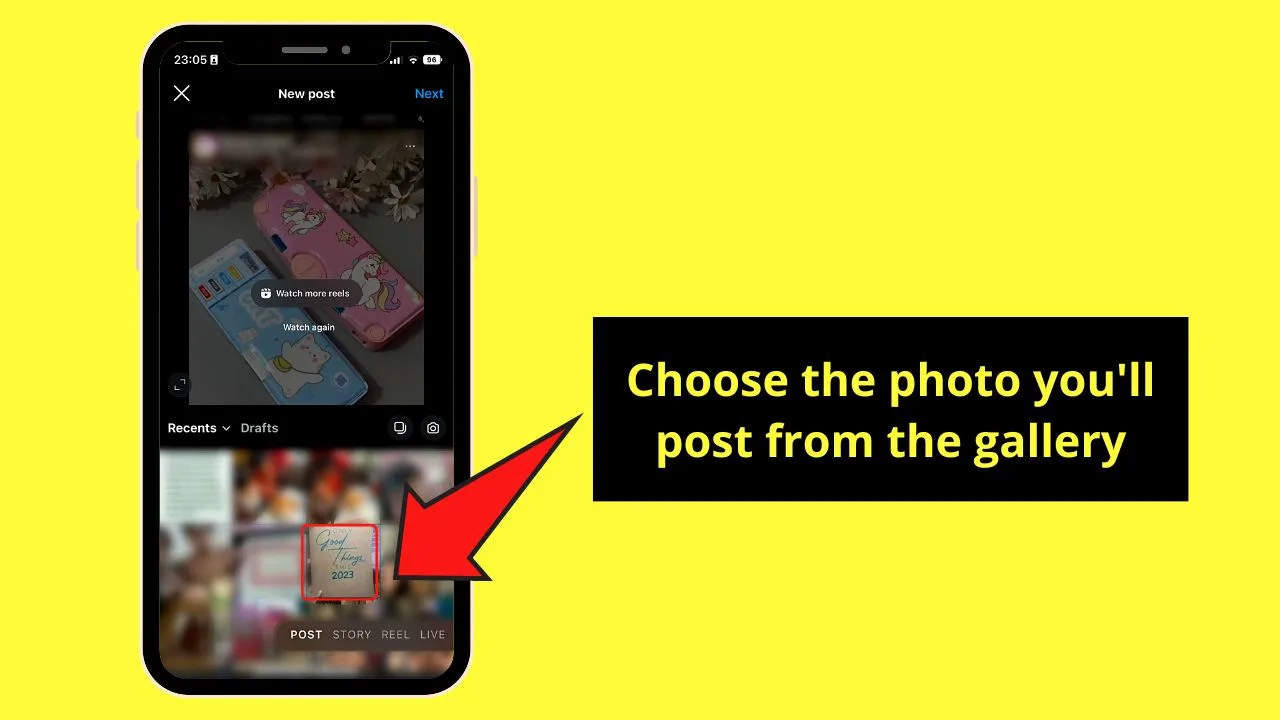
Simply tap an image from the photos shown to make it appear on the preview window.
Step 4: Zoom the photo
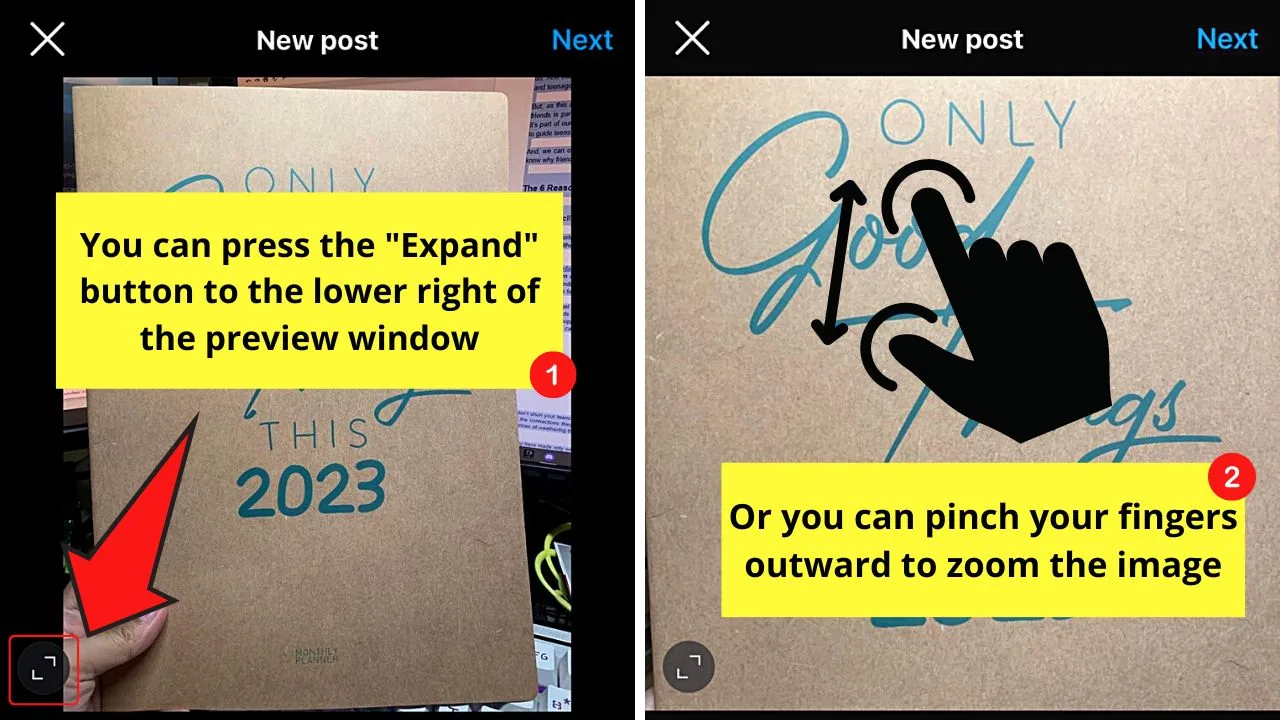
There are 2 ways to do this. One is to tap the “Expand” button on the preview window’s lower left.
You won’t miss this icon as it has 2 arrowheads pointing in opposite directions inside a gray circle.
The other way is to pinch your fingers outward. This works similarly to how you zoom images on Instagram Android.
Step 5: Press the “Next” (iOS) or “→” (Android) button
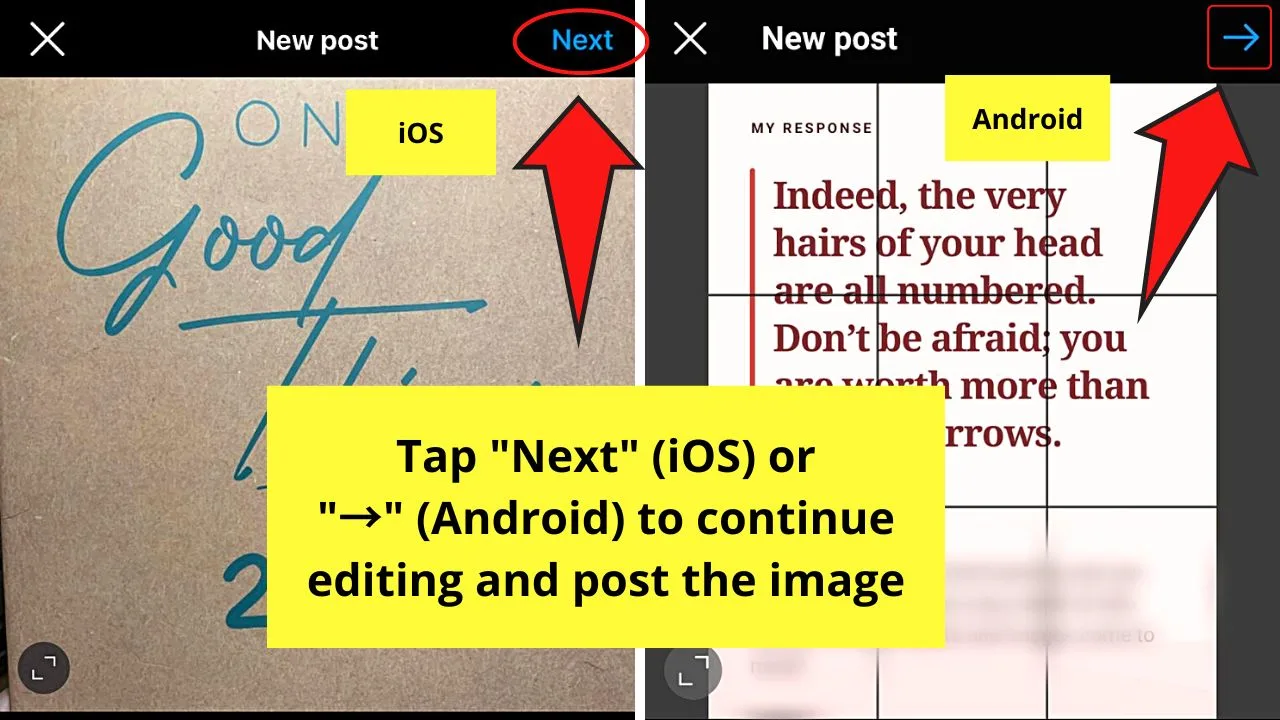
This will allow you to continue editing the image before posting it to Instagram.
Usually, this method of making the whole picture fit on Instagram works.
But, if it makes the image look awkward, then you need to resize the photo first using photo resizing tools.
How to Fit the Whole Picture on Instagram Using Photo Resizing Tools
It may be a bit of a hassle, but third-party photo resizing tools can help you make your images look better on Instagram.
This is especially true if the photo you’re posting exceeds the 4:5 aspect ratio set by the app.
There are lots of photo resizing tools you can use, but Kapwing is deemed as the most ideal for Instagram posts. This is because it can add white space to the sides of the photo, making it fit Instagram’s aspect ratio requirements.
The good news is, it’s an online resizing tool, so no need to download it on your phone.
Step 1: Tap “Create New Project” after opening Kapwing on your browser
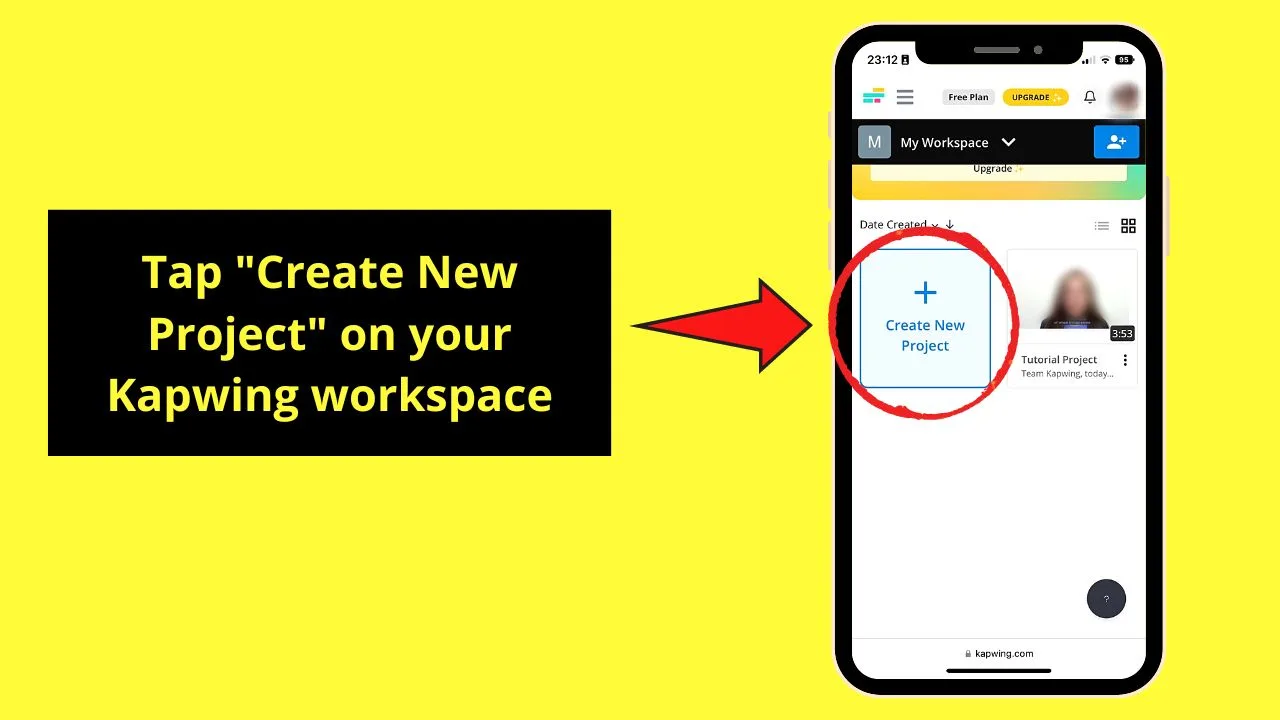
On Android devices, Google Chrome is the default browser. If you’re using an iPhone, you can use Safari or download Google Chrome as your backup browser.
But, if you’re not yet signed into your account in Kapwing, press “Get Started” instead.
Step 2: Press the “4:5” aspect ratio option
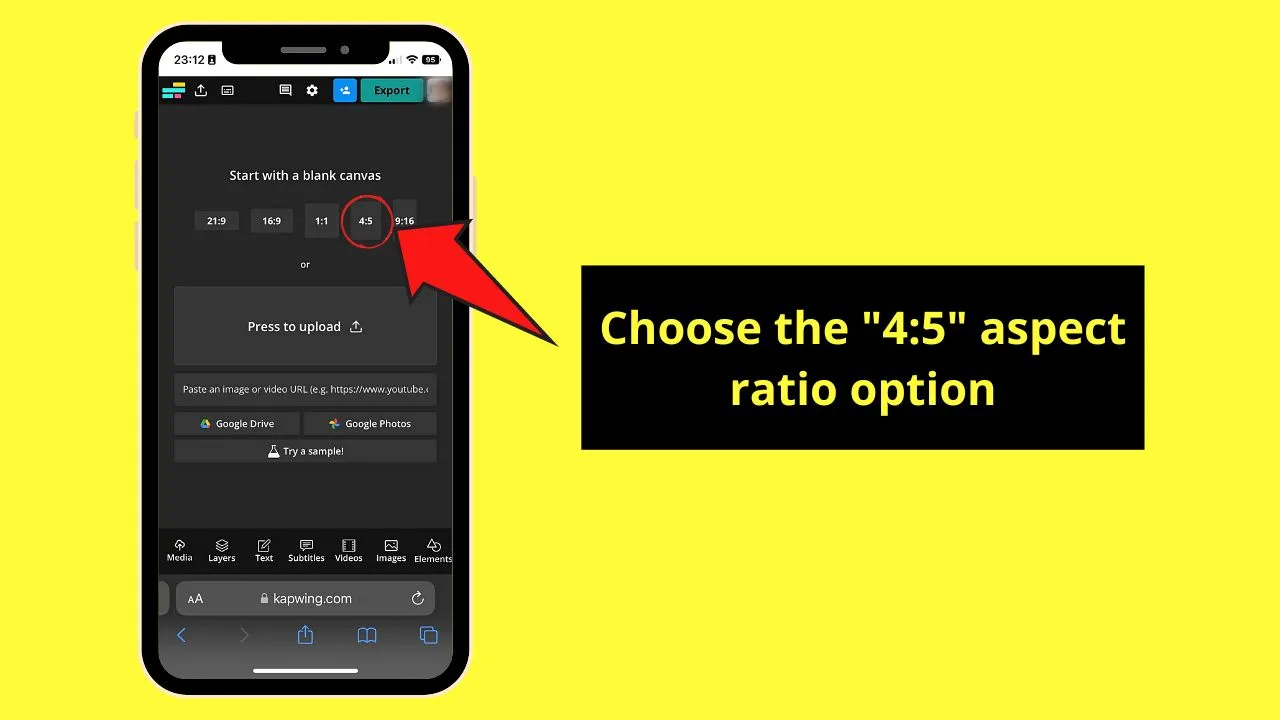
Choosing this aspect ratio will allow you to fit the whole picture you’re posting on Instagram
The editor page will then appear, where you’ll see 4:5 blank canvas.
Step 3: Tap “Upload”
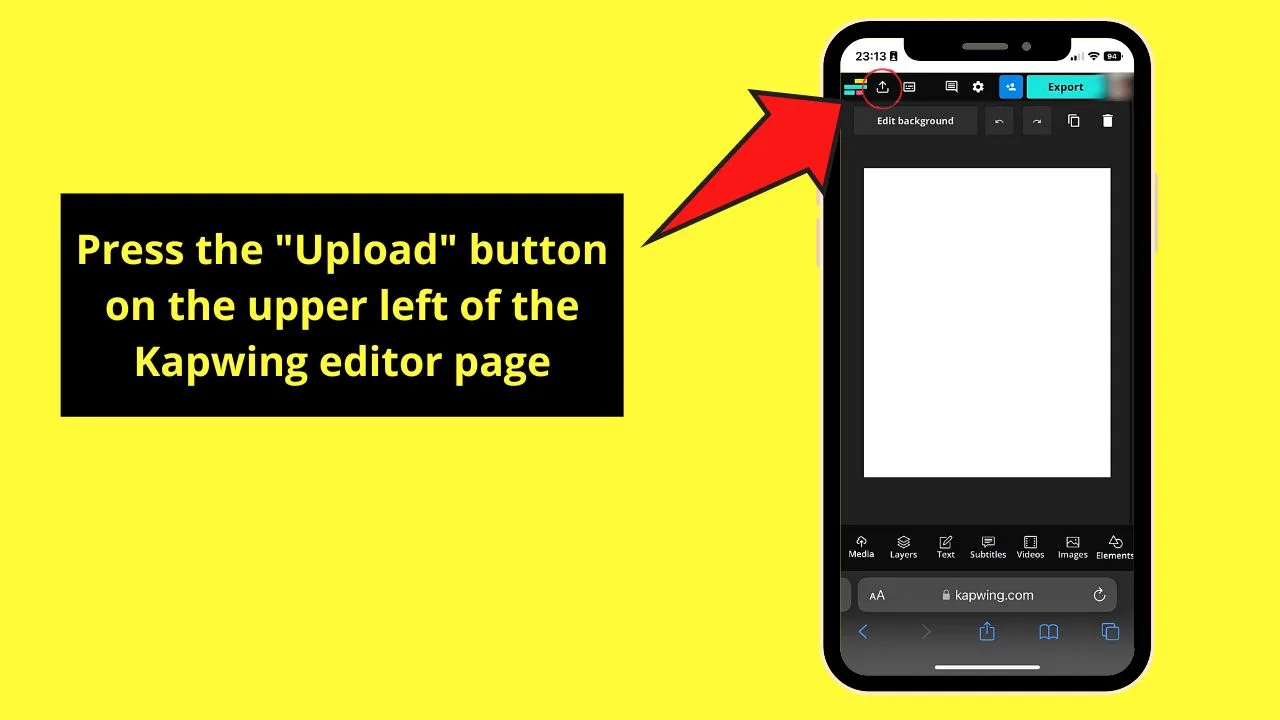
This button appears as an upward-pointing arrow to the right of the Kapwing logo.
Step 4: Choose the “Press to Upload” button
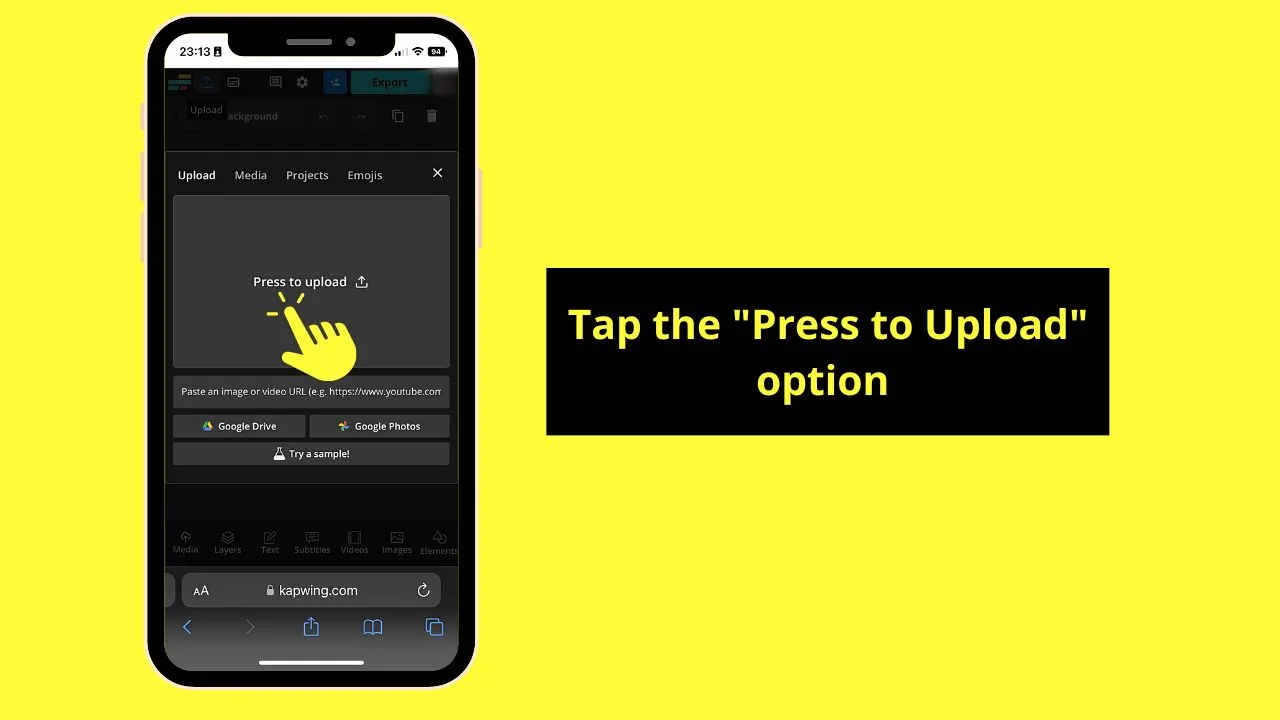
You won’t miss this option as this is the largest box from the option list.
You also have to option to upload images from Google “Photos” or “Drive.”
Otherwise, you can use a sample photo by tapping “Try a sample!”
Step 5: Tap the location of the image you’ll upload
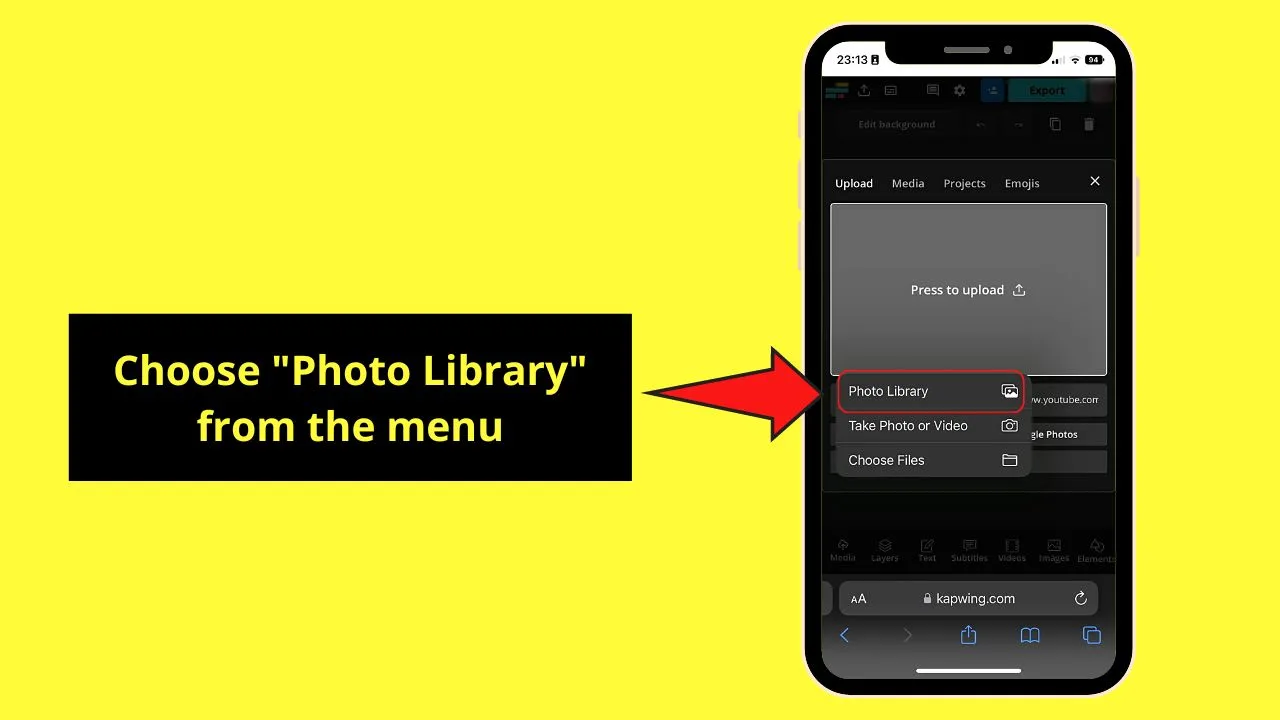
There are 3 options available: “Photo Library,” “Take Photo or Video,” or “Choose Files.”
Since the image I’ll use is in my phone’s gallery, I’ll tap Photo Library.”
Step 6: Swipe up the gallery and press the picture you’ll use
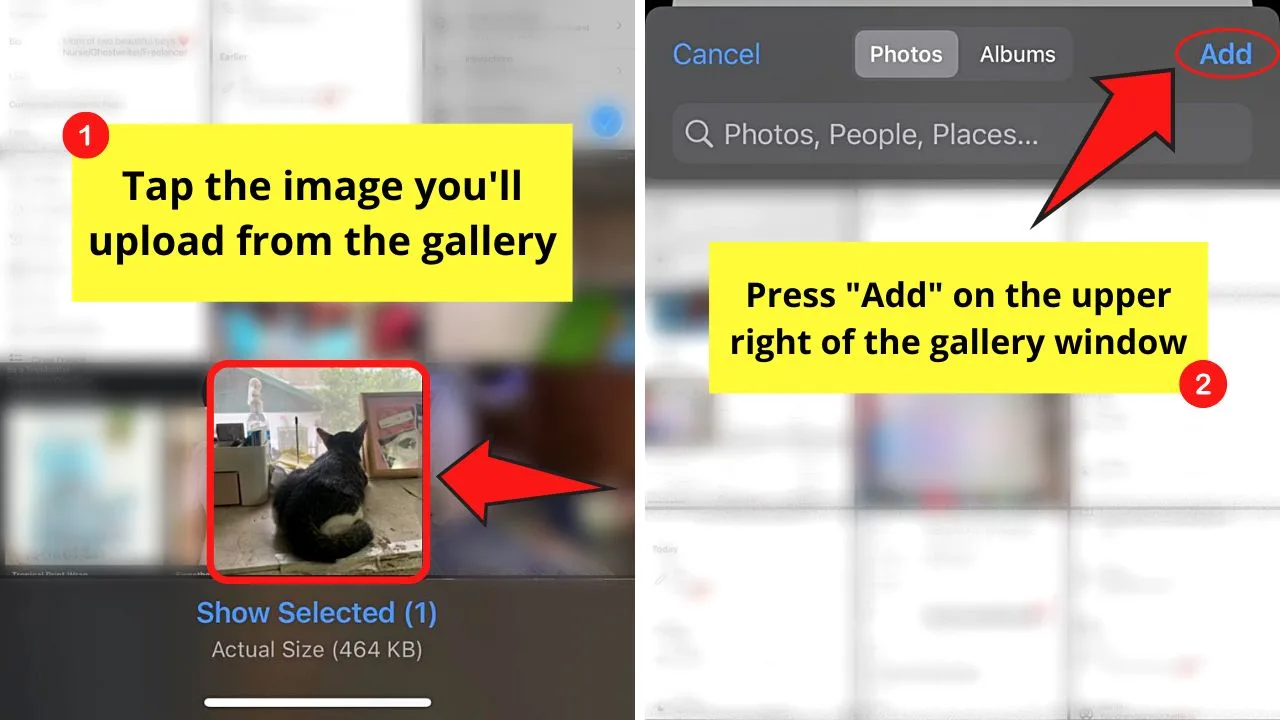
Press the “Add” button on the upper right to continue editing.
Step 7: Tap and drag the crop marks
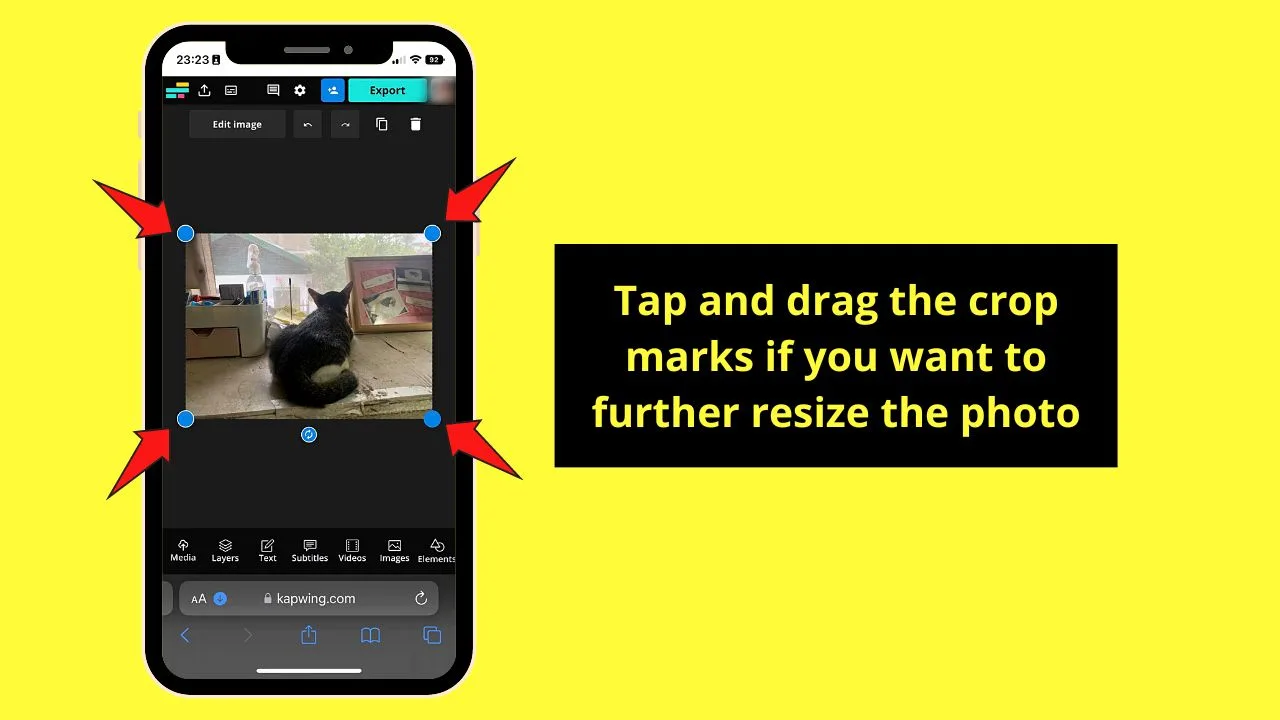
Doing so will resize the image to your liking. But you usually don’t need this step as the photo automatically assumes the 4:5 size whether it is in portrait or landscape.
You can always do this though if how the picture looks isn’t to your liking.
If you’re uploading a portrait photo, you’ll see white borders on its sides. If it’s landscape, either the whole image fits the canvas or the same white borders appear above and below it.
Step 8: Press “Export”
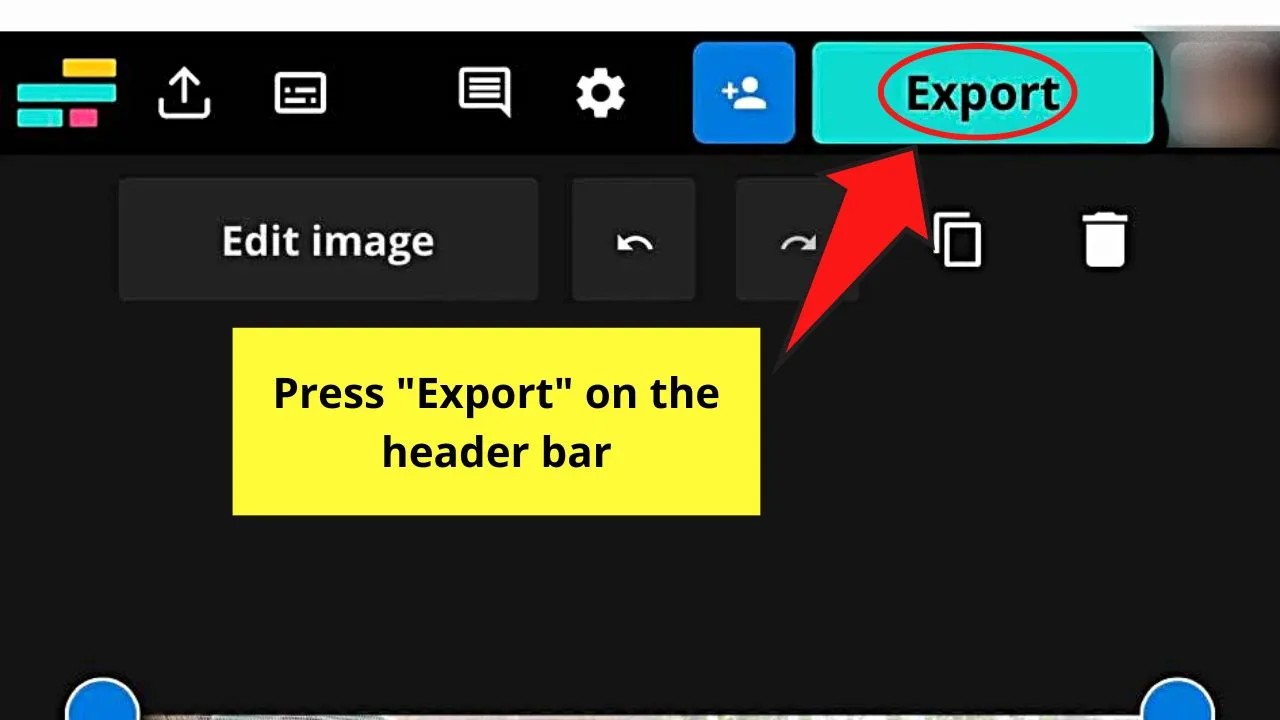
You’ll find this button as an aqua-green rectangle on the upper right of the editor page.
Step 9: Press “Export as JPEG”
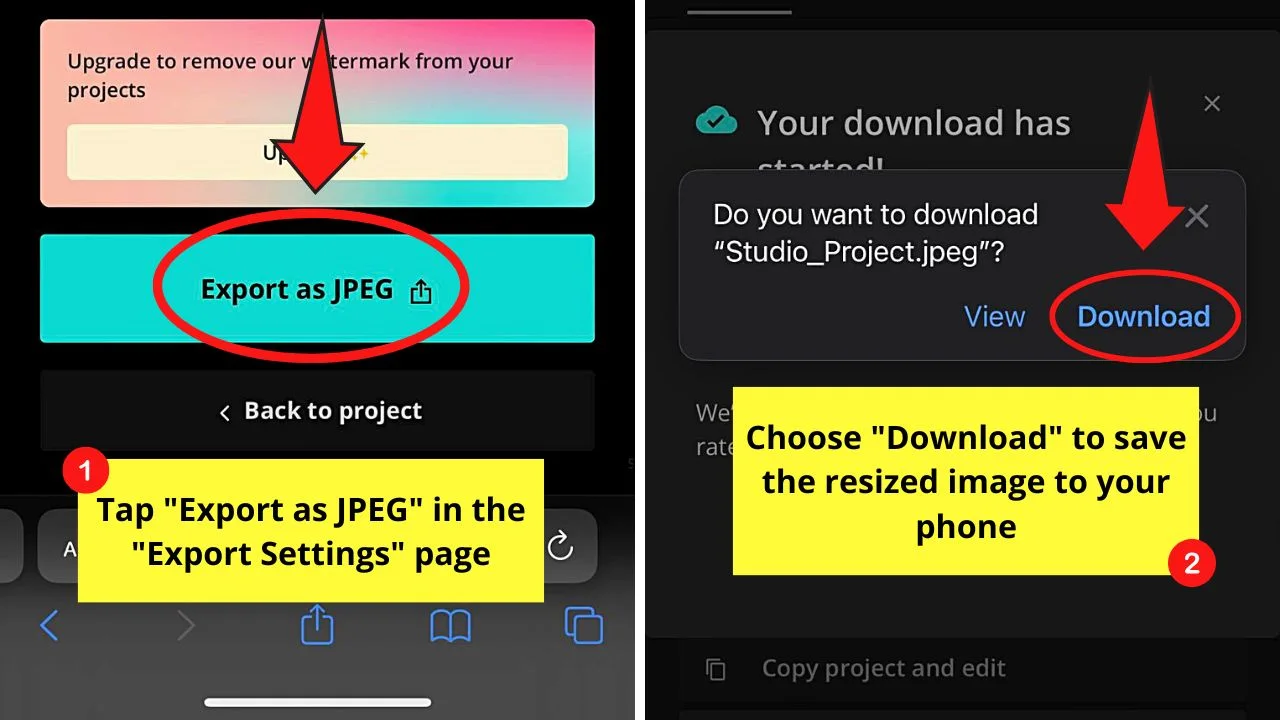
A notification window will then appear, asking you if you want to download the image. Tap “Download” to proceed.
If not, you can press “View” first to have a look at the preview of the picture first before saving it.
A “Your download has started” notification will then appear once the download process has started.
Step 10: Go back to Instagram and tap the “+” button
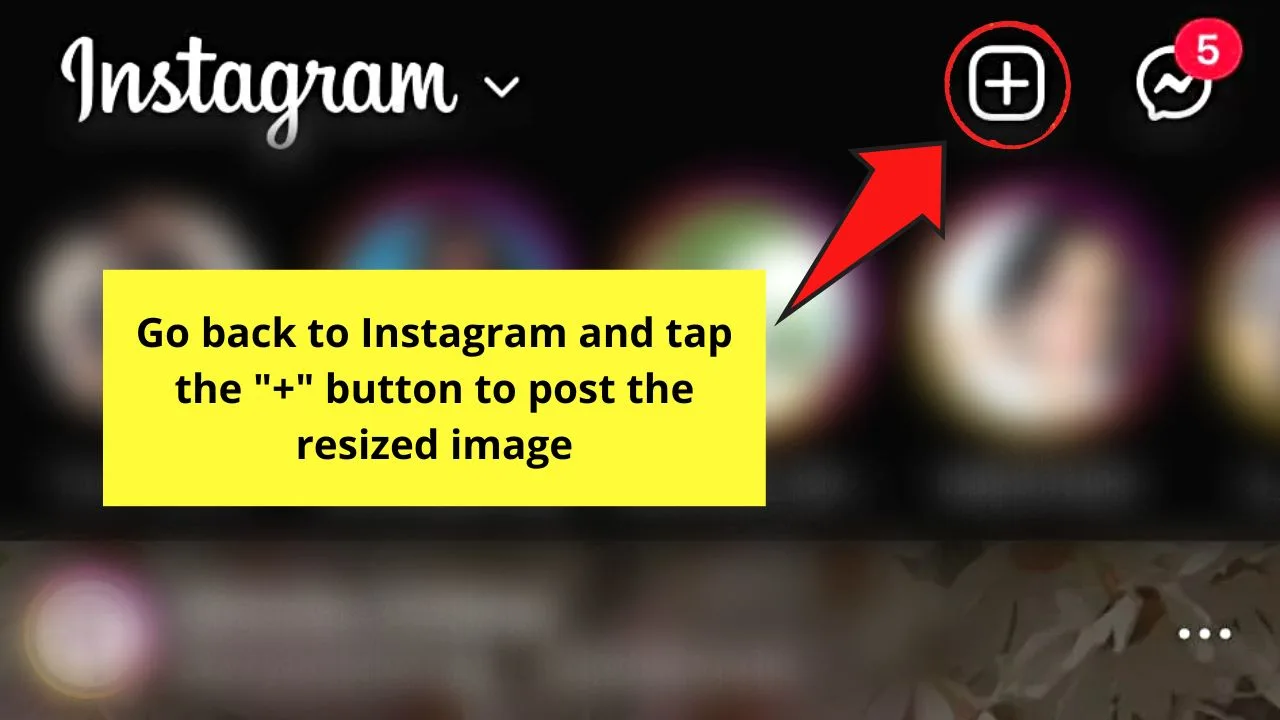
Choose “Post” so you can continue uploading the newly-downloaded image from your phone.
Then follow the steps in the previous section (except the zooming of the photo) to post your resized photo on Instagram.
Frequently Asked Questions about How to Fit the Whole Picture on Instagram
What is the best aspect ratio for uploading images on Instagram?
By default, Instagram crops the images you post into a square with a ratio of 4:5. Hence, the best aspect ratio for posting photos on Instagram is 4:5. Refrain from using a 1:1 ratio as it will only make Instagram automatically crop the picture into its default setting.
Do I still need to zoom the photo on Instagram if I have already cropped it on Kapwing?
You don’t have to zoom the photo on Instagram through its “Expand” button if you already used Kapwing to resize it. This is because you already have selected the 4:5 aspect ratio for the image, which is the one used by Instagram.
How do I upload multiple images on Instagram?
After pressing the “+” button on Instagram’s home page, tap an image from the gallery. Then press “Select Multiple” to choose more pictures. Once you’ve reached the 10-images limit, press either the “Next” (iOS) or “→” (Android) button to continue posting them.
I see Kapwing’s watermark on the image I downloaded from the tool. How do I remove it?
Seeing Kapwing’s watermark on the image means you’re using a free account. Upgrade to “Premium” to remove the watermark. But, if you don’t want to, place a white rectangle above it in a photo editing tool to cover the watermark before posting on Instagram.
How do I remove the borders for the images posted on Instagram?
As Instagram has set the aspect ratio for posts to 4:5, it will automatically cut off or crop the images or videos once they exceed the said size. It is a limit that Instagram has imposed, so you can’t remove the borders on the picture or video.

Hey guys! It’s me, Marcel, aka Maschi. On MaschiTuts, it’s all about tutorials! No matter the topic of the article, the goal always remains the same: Providing you guys with the most in-depth and helpful tutorials!


