

Images are supposed to beautify your website. Blurry pictures do the opposite.
When your WordPress images are blurry, a fix needs found, and fast. Until it does, your users will be disappearing in droves.
Numerous instances can result in image blurriness but rarely is it only to do with the default settings in WordPress.
Often, it is because the original image size was smaller than it ought to be.
On any online Content Management System, image sizes are changed to match the screen size of the user.
The picture quality problem occurs on desktop more than it does on mobile.
The reason is that the bigger screen sizes on desktop view allow the tiniest of pictures to be blown up to the full size of the screen.
When you notice your images are blurry, switch to mobile view, and you will likely see that it is not as blurry. It is the downside of responsive web design.
WordPress images are blurry
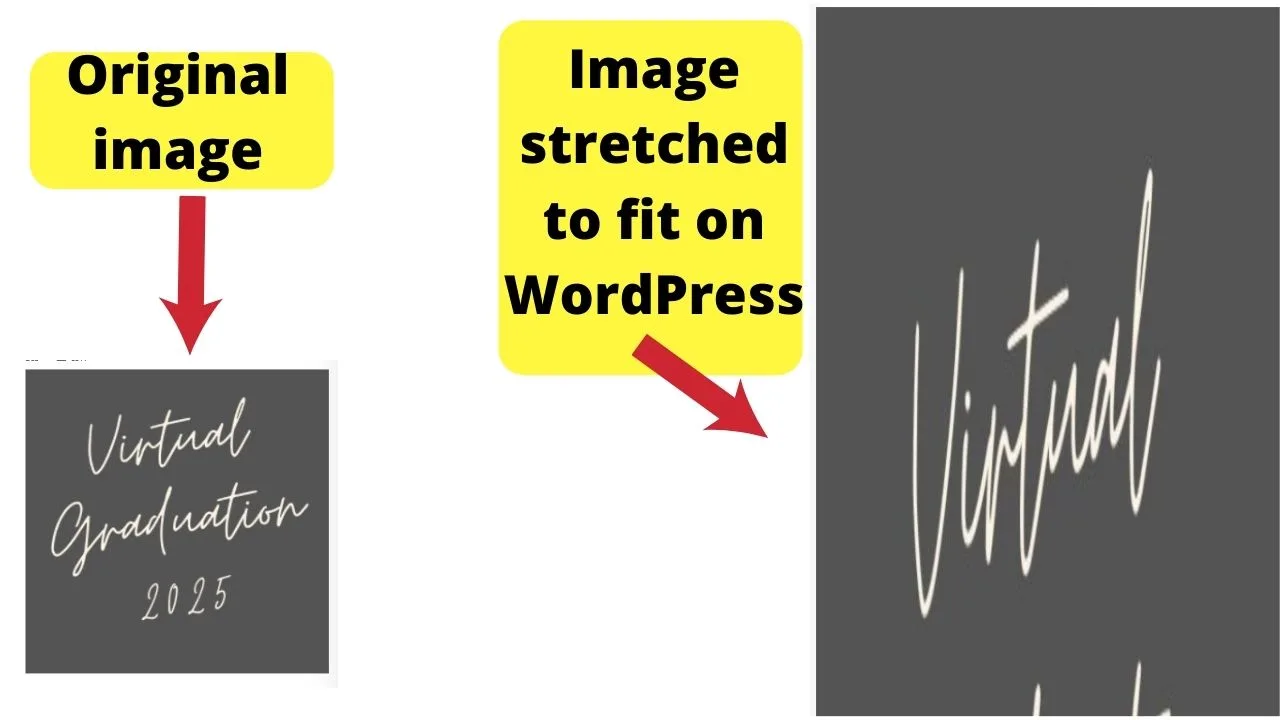
Two common causes of poor-quality images on WP are uploading media files that have not been edited for quality or uploading a different size from what your theme can display. Without image editing, the tiniest discrepancy is amplified when the image is stretched to fit larger screens.
Find your theme’s default sizes
Every WordPress theme has default sizing rules coded into the functions.php file.
Go into your theme editor, open the functions.php file, and look for the code for custom image sizes.
The code to look for is ‘add image size’.
It will look like this
if ( function_exists( 'add_image_size' ) ) {
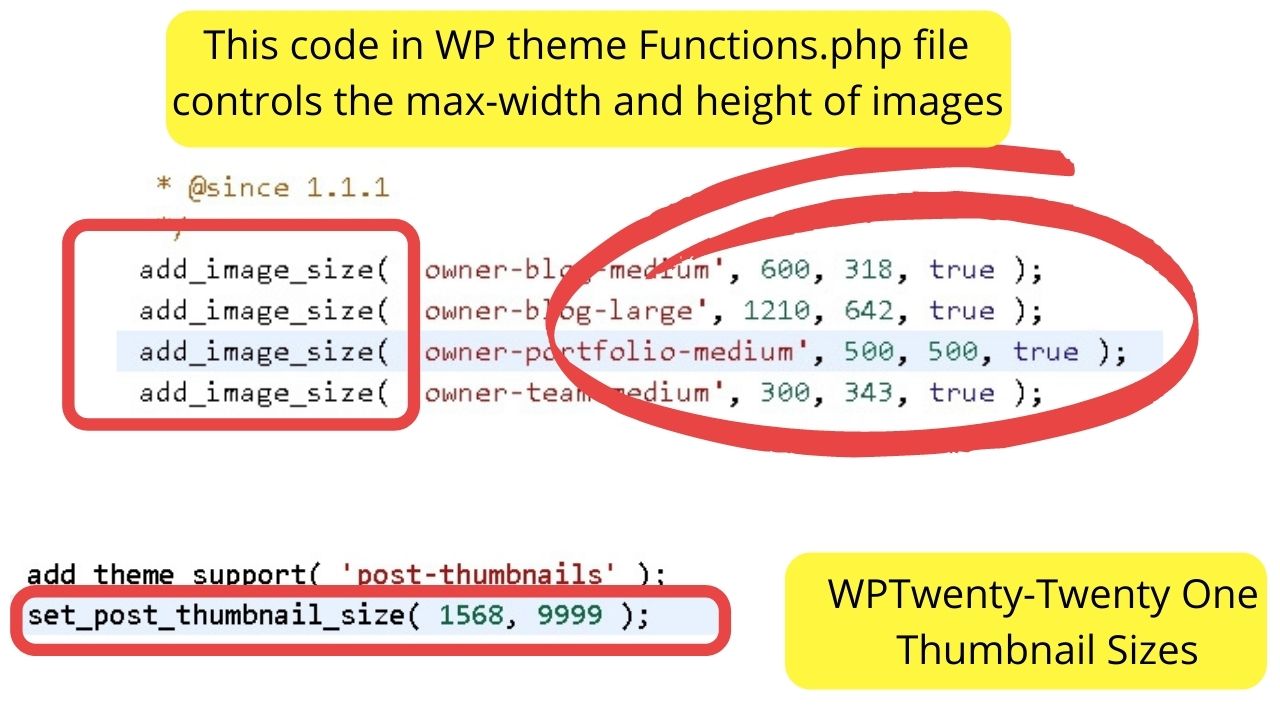
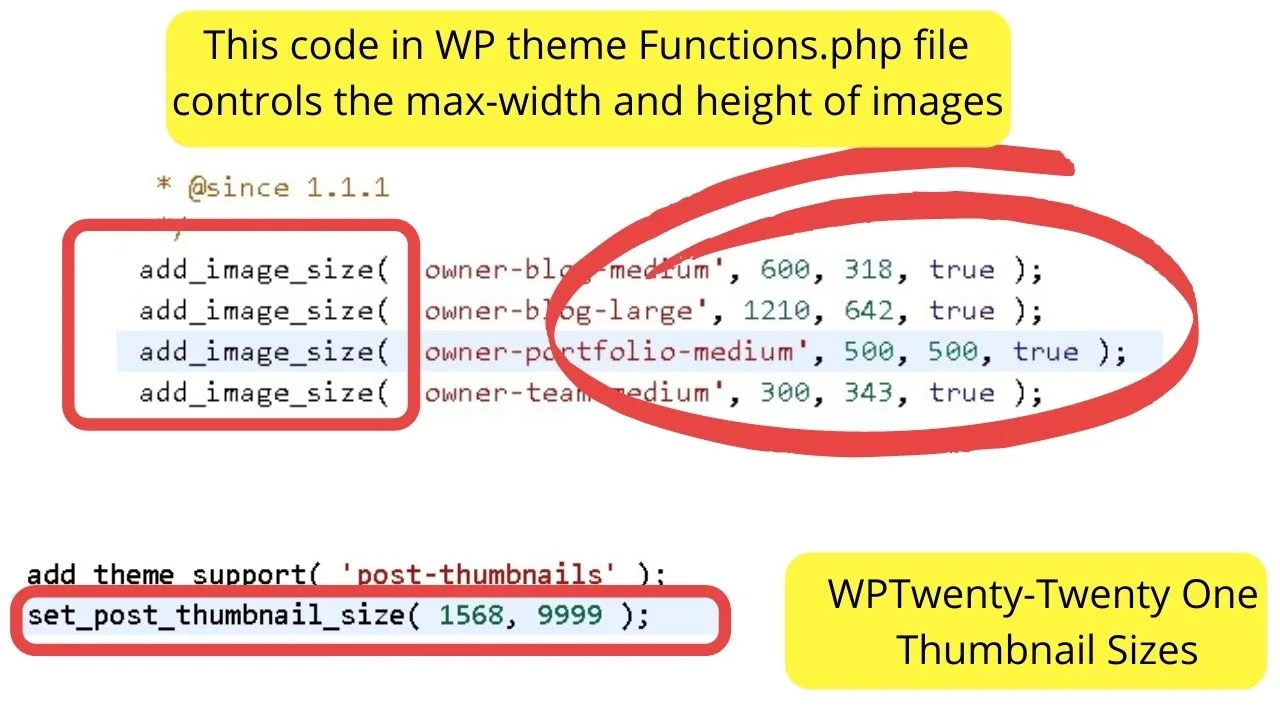
add_image_size( 'gridme-1222w-autoh-image', 1222, 9999, false );
add_image_size( 'gridme-922w-autoh-image', 922, 9999, false );
add_image_size( 'gridme-480w-360h-image', 480, 360, true );
}
In the sample code above, it shows three image sizes, two of which are set to false, and the final one set as ‘480, 360, true’.
Having the image sizes set as ‘false’ means those sizes will not be applied. Setting image sizes to ‘true’ will apply the resizing rules.
When the size rules are set to stretch either height or width, the result is blurriness.

If your theme is auto-enlarging image sizes, change ‘true’ to ‘false’ in your themes functions.php file to disable that action.
The vast majority of WP themes no longer do this because of responsive web design.
In the pre-2012 era, prior to mobile web design turning somewhat mainstream, these auto-size rules became obsolete in the WP developer community.


Still, on older themes, it is possible that your theme code is out-of-date for current web development standards. When that is the case, set the auto-size rules to ‘false’.
Best tip
Avoid blurry images by uploading the exact size. If that is not possible, upload the largest image file and let WordPress shrink it.
Blurring happens when images uploaded are smaller than the size that they are displayed. It is better to shrink an image than enlarge it.
When you enlarge a small image file, that is when images become blurred on WordPress. It makes pixelation on a small scale, bigger. Thus, more obvious.
WordPress images are now blurry after changing the theme
All WordPress themes are coded differently. Each has various breakpoints for the images. What you set in your image gallery settings does not always reflect in a WordPress functions.php file.
As a side note: a breakpoint is an image size beyond the maximum width or height that can be displayed on a user’s screen.
When you switch themes, the max image sizes will (usually) change.
For example, on the Owner Blog Theme, the max size for full-size images is 1210px by 642px. On the WordPress Twenty-Twenty One theme, images will be displayed as the size they are uploaded unless you set size rules using HTML.
The default for “post-thumbnails” is huge though. Those are set to 1568, 9999… in other words, as big as the image you upload.
This is intentional because the Twenty-Twenty-One theme is a minimalist WordPress theme.
The thumbnail shows as if it is the blog post header, followed by the body content using a single column layout without a navigation sidebar.
Images inserted within posts will be shown either as the sizes you upload or resized using the WordPress defaults, which are set in your media library.
A neat WP trick to override image attachment defaults
WordPress has a hidden page that is not shown in your admin sidebar. It is found by going to yoursite.com/wp-admin/options.php.
You must be logged as a site administrator to access the page. Once the page loads, a message shows telling you
“Warning: This page allows direct access to your site settings. You can break things here. Please be cautious!”
That is correct. Take heed. The only setting to change here for images are the settings below:


Changing the image default size to “full-size” will make every image you upload to your media library show in your posts as full-size.
Other options will be available, but you will not have to set it manually for every image you insert into posts or pages. No shrinking or stretching images to fit screens!
Photography error
It is possible that images were blurry before they were uploaded to WordPress.
Typically, it is better to upload an original photo from a smartphone to an online editor, or a desktop, clean up the image file, then upload it to WordPress.
The problem with smartphone cameras is the images look decent on small screens, but put on WordPress and shown at full-size on a larger screen, the imperfections become obvious.
For all the food bloggers out there, slow shutter speeds cause motion blur and that leads to blurry pictures. Increase the shutter speed, and edit photos before uploading to WordPress.
The WordPress CMS is only for displaying images. There are plugins available to add image editing functionality.
If you do go down that rabbit hole, be aware of site speed issues. They can slow your website down.
On the topic of WordPress plugins for images, the only essential is an image compression plugin. Regardless of the size of your file, image compression saves on bandwidth.
Then again, if you are selling or giving away printables from a WordPress website, compression will decrease the image quality.
What is the right image size to upload to WordPress to avoid blurriness?
The image size is dependent on the content width of your pages and posts.
To find out what your WP theme uses, use your browser inspector tool. Most work similarly – right-click, then select inspect.
Look for the part of code labeled as ‘main body content’, or something similar. Clicking the sections in the inspector highlights the element on the page.

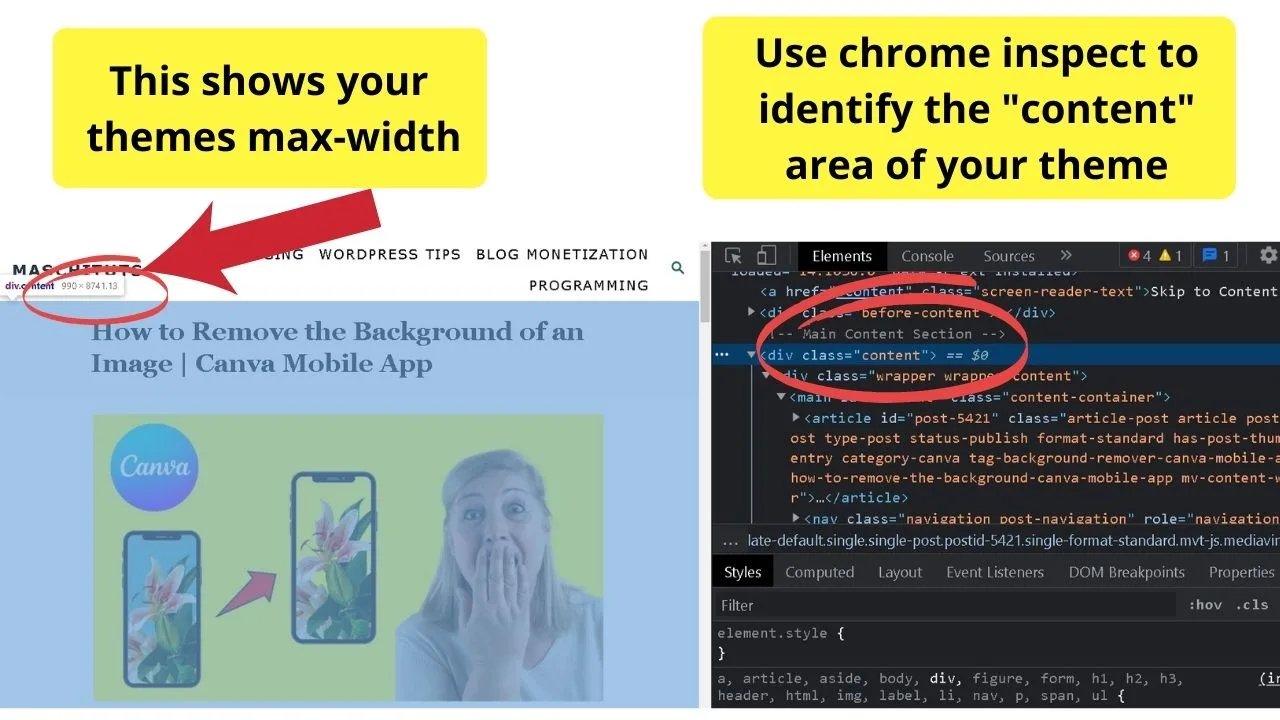
On your webpage, while in inspect mode, the top of the page will show two numbers. The first is the width, the second is the height. Pay no attention to the height as that will be massive. That is why you have to scroll down a webpage.
Your width is limited. On this theme, the page width is 990px. Keep in mind that this is for the content area excluding the sidebar.
If you have custom pages with no sidebars, the content area will be wider.
When you know the max-width of the widest page your theme has, use that width as your maximum image size before uploading.
How to resize images to fit your theme
On Windows systems, you can use the photos app, or Paint. On Mac systems, you can resize photos using Preview, or Photos. Chromebook users can resize images with Google Photos.
If you are limited to a smartphone, online image editing tools are your saving grace. A few popular choices are pic monkey, image resizer, and, of course, Canva.
Canva is the better choice because you can create a free account, make a custom size image, the settings will be saved in your account, then you can upload your media to their cloud, drop it into a custom-sized image, and drag it to resize so it fits perfect.
Download the jpg, or png, then upload that to WordPress.
If the image is blurry in an image editor on your desktop, or an online editor, it will be blurry on WordPress. Fix the blurriness by editing the image before uploading.
Once a blurry image is on your server, it is useless.
Delete the blurry image, edit the original to increase sharpness, resize to the max-width that your theme can display, or the max-width your photo will increase to without degrading the quality.
Upload the edited image and the blurriness will be gone.


Hey guys! It’s me, Marcel, aka Maschi. On MaschiTuts, it’s all about tutorials! No matter the topic of the article, the goal always remains the same: Providing you guys with the most in-depth and helpful tutorials!

