

The “Leave a Reply” text on WordPress is the default prompt that’s displayed on every post and page with comments enabled.
Disabling the comments eliminates the prompt.
If you want to have comments enabled but without the default “Leave a Reply” message, there are easy ways to hide, remove, or edit the text that’s displayed.
Also, please be aware that WordPress, by default, will close comments on posts older than 14 days and will display “WordPress Comments Closed” in case you don’t adjust this by yourself.
Anyway, let us know have a closer look on the “Leave a Reply” problem, shall we?
WordPress: How to Remove “Leave a Reply”
Disabling comments on WordPress removes the “Leave a Reply” prompt. Installing the “Say What?” plugin is an easy way to edit the text. You can also hide comments with custom CSS. The “Disable Comments” plugin works on all post types including custom post types and attachments.
1. Remove “leave a reply” from published posts and pages
The “leave a reply” text in WordPress is controlled by the comments template. The text will only show when you have comments open.
If you don’t want comments, you can disable these across your site from your WordPress admin dashboard.
Go to your “posts” menu, select “all posts”
Check the first box in the posts nav menu to select all posts. From the “bulk actions” dropdown menu, select edit, then click apply.
Where it reads “comments” change that to “do not allow”.
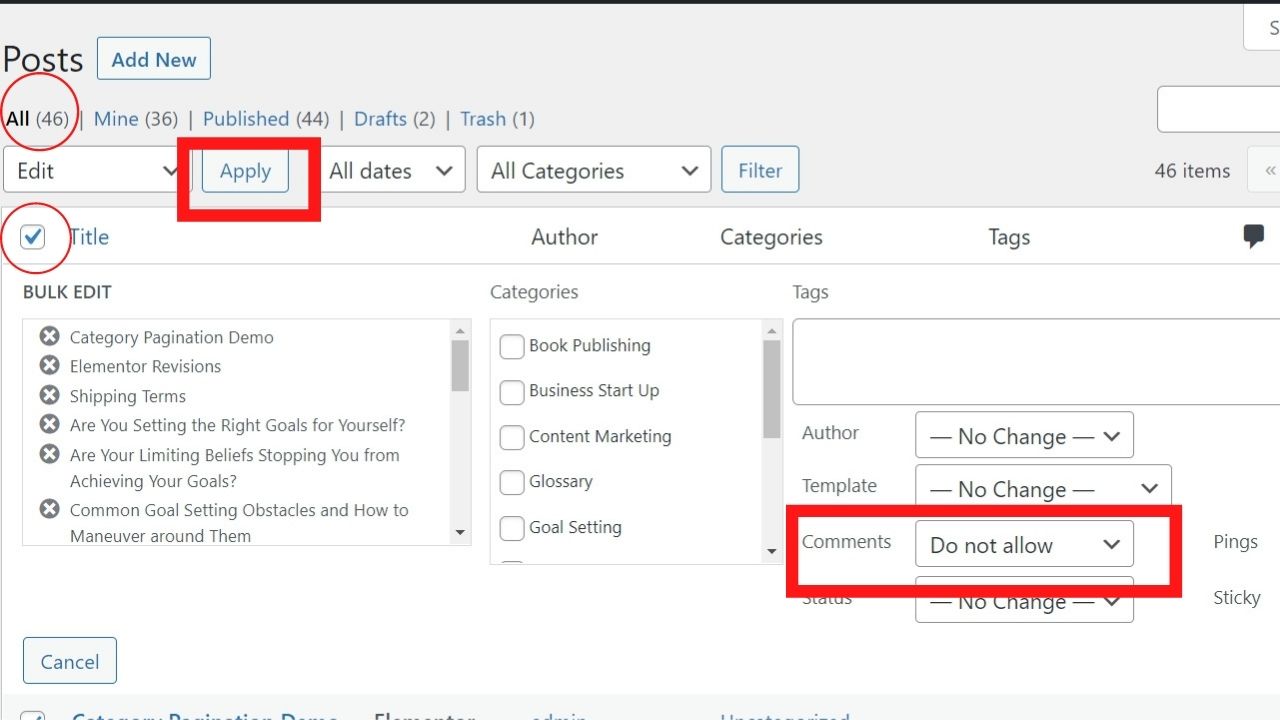
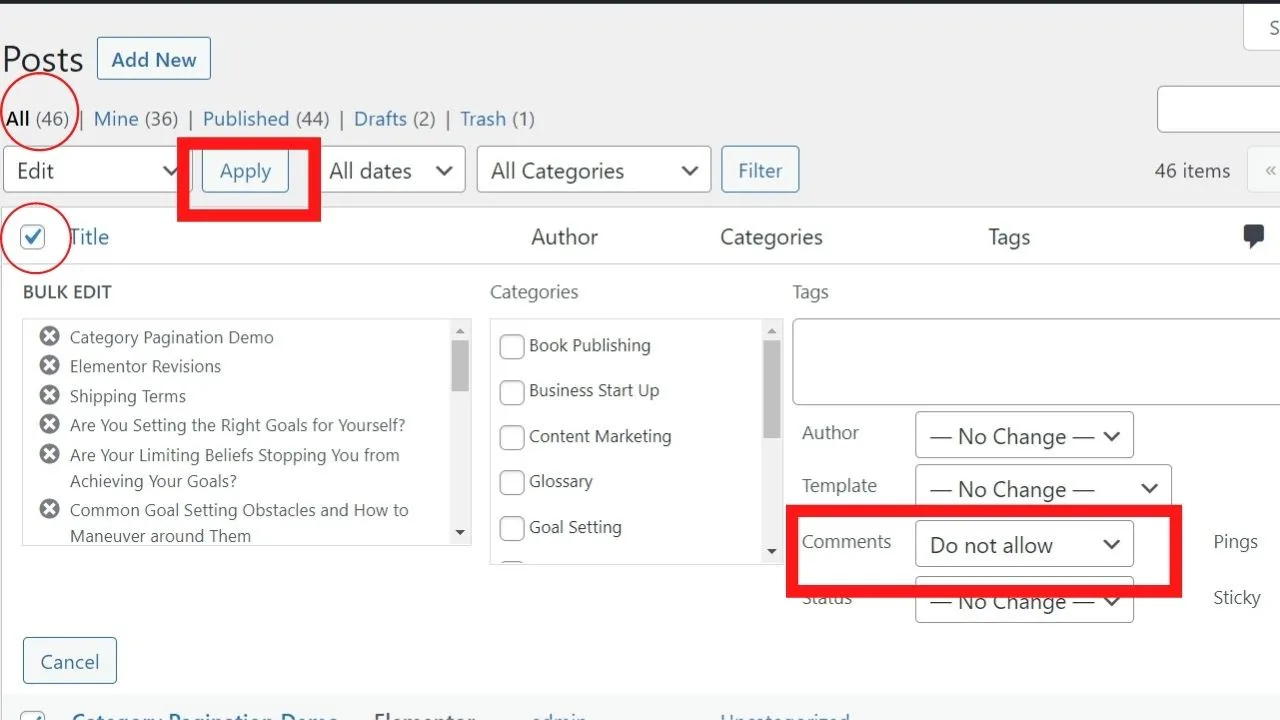
Click the Update button and then all those posts will have the comments disabled.
To apply the same changes to all your pages, do the same from your pages menu.
Pages > All Pages > Select All, > Edit > Apply > change comments from “no change” to “do not allow”.
You can use these settings on single posts and pages too in case there are some pages you want people to “leave a reply”.
2. Disable comments on a single page or post via the discussion panel
If you want to enable or disable the “leave a reply” message on a single post or page, then that’s done from your post editor.
In the block editor (Gutenberg) it’s under the “post” menu labeled “discussion”.

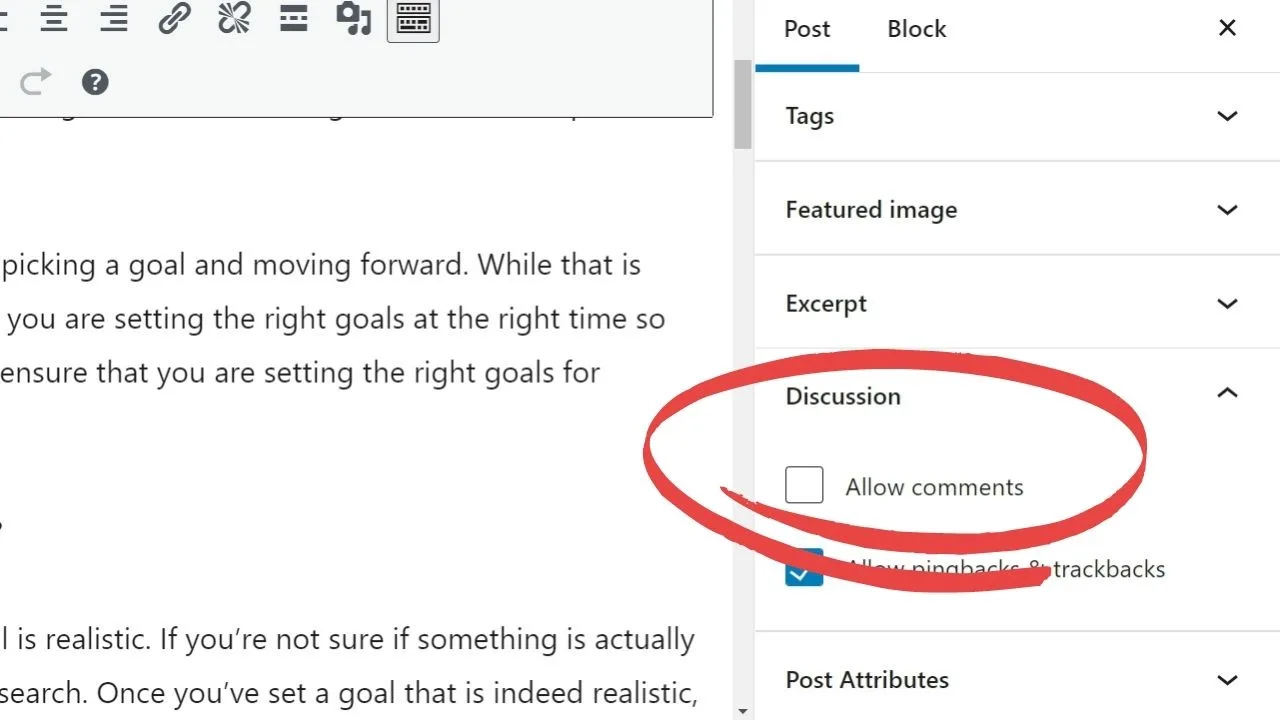
If you have the comments disabled by default, you’ll need to manually enable comments in the discussion tab for it to appear.


If you haven’t disabled comments by default, unchecking the “allow comments” box will remove the comments section, thus, you won’t see the option to “leave a reply”
If you’re using the “classic editor”, the “discussion” panel is only shown in the “quick edit” option, not on your main WP editor screen.
Save to draft first, go to your post, and instead of clicking edit, select the “quick edit” option then change the comments field from “no change” to “do not allow” for comments.
3. Use a plugin to disable all comment fields
When you’re certain that you have absolutely no advantages to having comments open, you can disable them by installing a plugin called “Disable Comments”.
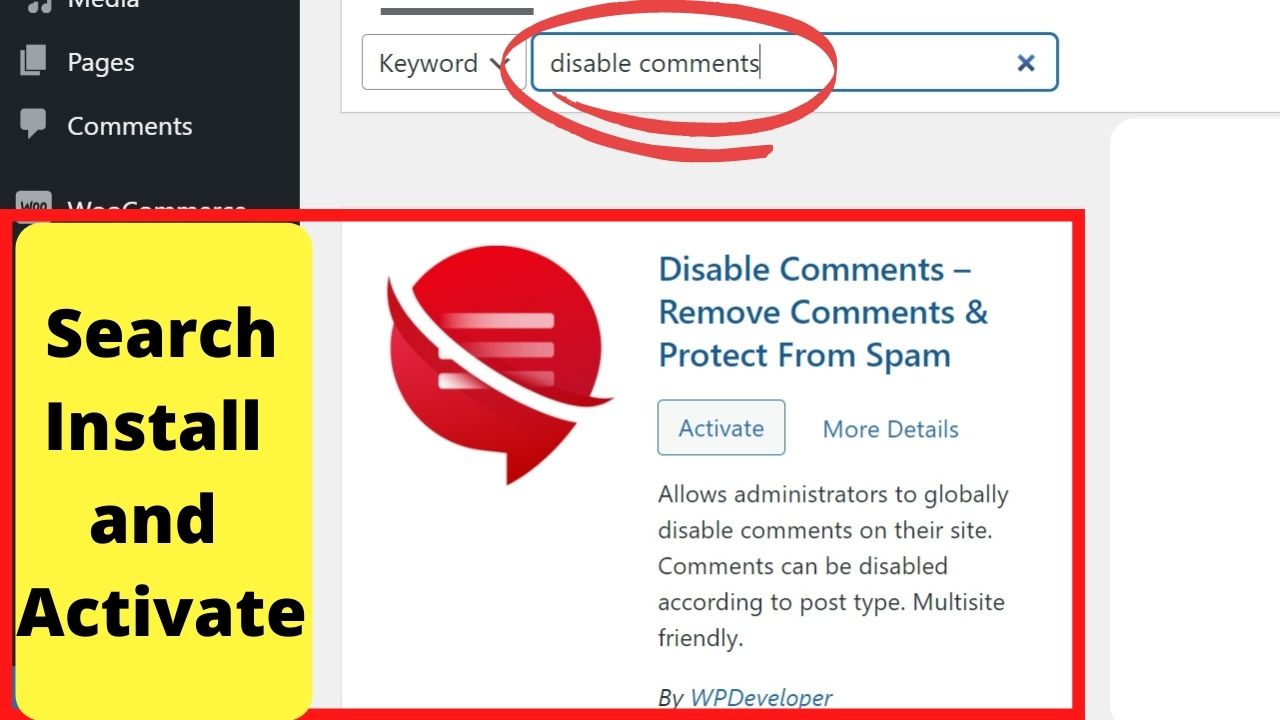

This takes the hassle out of editing your theme files to remove or edit the comments.php file.
Effectively, all the changes you would make by editing your theme files get done by a single plugin from within your WP admin dashboard.
What’s more is that if you have any image attachments showing with comment fields, it lets you disable those too.
And, it can be used for your custom post types too, like removing the “leave a reply” from your WooCommerce products pages.
This will be needed if you want to install another feedback plugin to collect and show user reviews instead of comments.
4. Hide comments with custom CSS
Rather than disabling comments, you can tweak your CSS to hide the comments.
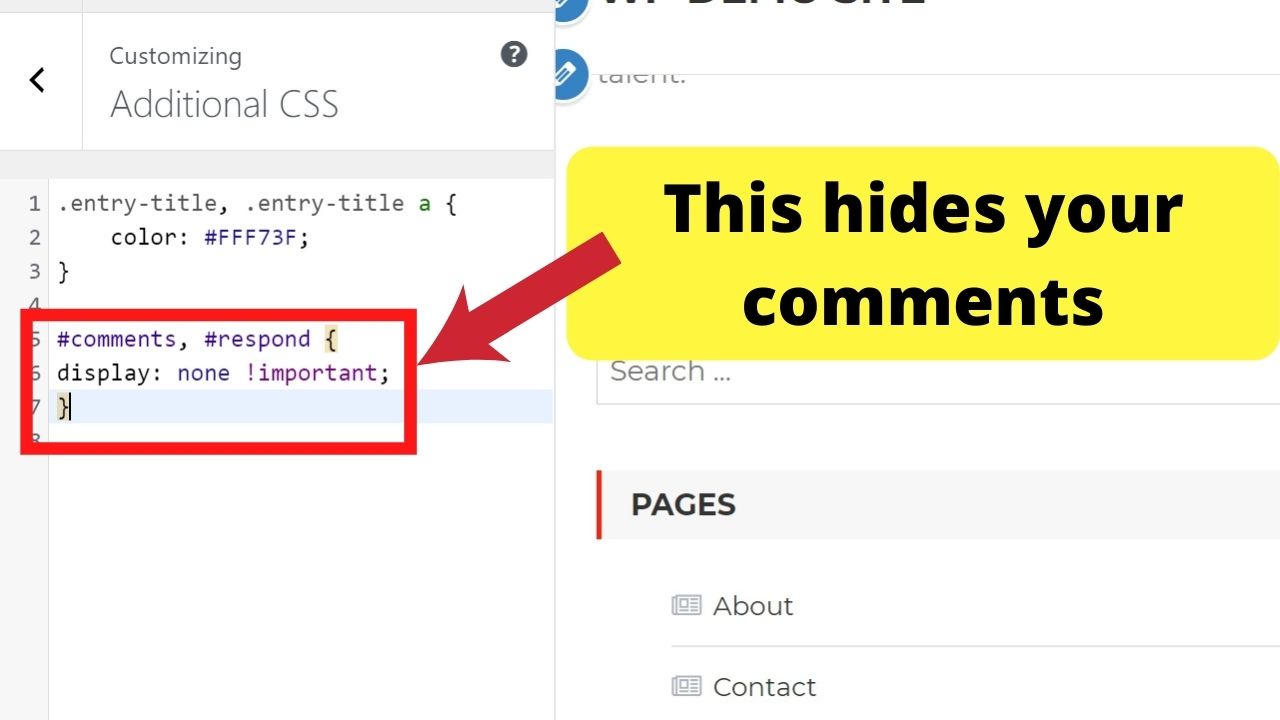
Go to “Appearance > Customize > Additional CSS”.
Paste the following
#comments, #respond {
display: none !important;
}

An alternative method is to use the “visibility: hidden” tag instead of “display: none”.
The display: none CSS hides the content visually. It will still be read by screen readers such as JAWS and NVDA (NonVisual Desktop Access) software.
For accessibility with screen readers, use the “visibility: hidden” CSS tag to hide elements with CSS both visually and to be ignored by screen readers.
If you only want to hide comments on individual posts, include the article ID. That’s shown in your browser address bar when you’re editing the post.
The post ID is the number following the question mark in the browser address URL, such as “post=297&action=edit”. In this example, “297” is the post ID.
To hide the comments on this post only, add “.post-id-297” before the CSS to hide the comments fields.
Then, when you want to turn it back on, remove the CSS.
It’s a handy CSS trick for posts or pages that’s riddled with comment spam.
You can hide them from public view with CSS until you get a chance to moderate your comments, then show them once they’re cleaned up.
5. Edit the Leave a Reply message
You can easily tweak various strings with a plugin called “Say What”. One example is when you want to tweak the prompt to use a stronger call to action.
This can be done by editing your theme files, however, finding the template to edit isn’t always straightforward.
If it was, it’d always be in the comments.php file.
When it’s not there, you need to go hunting for the right file to edit, or the easier method is to use this plugin.
Say What?

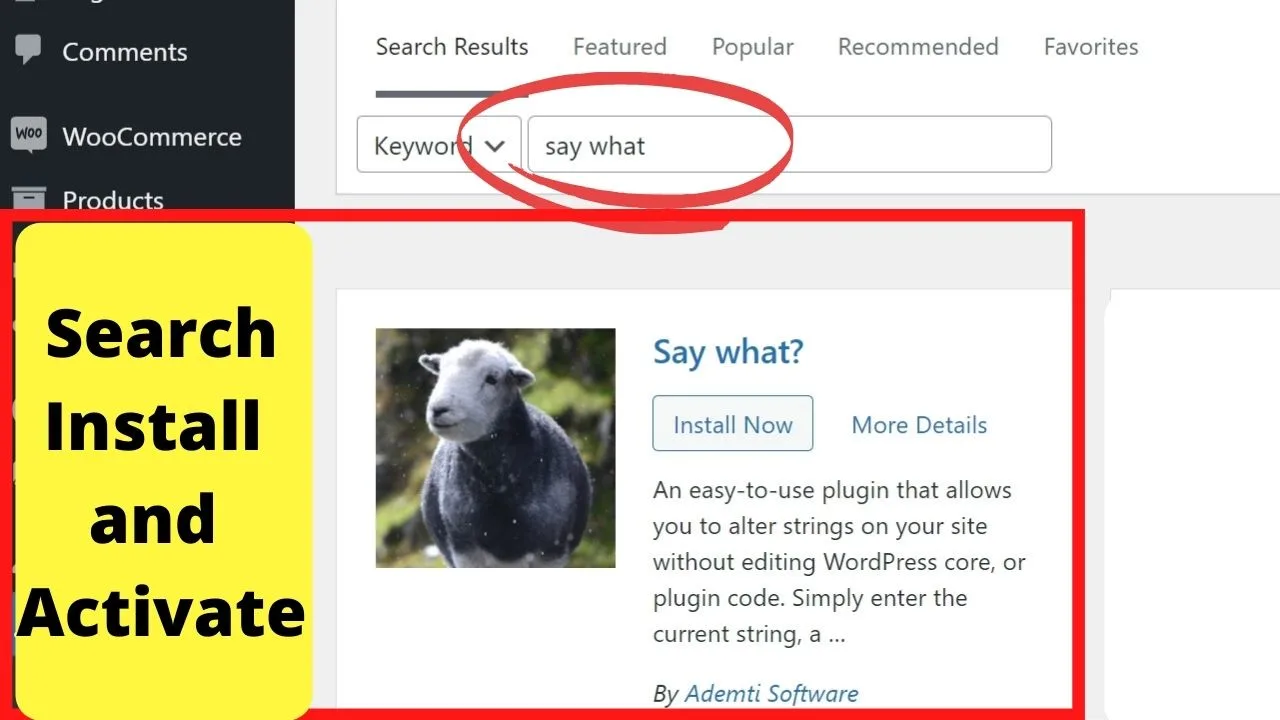
Once the plugin’s installed, you just need to click the “text changes”, and select “add new”.
Type in “Leave a Reply” in the “Original String” field and what you want it to be changed to… type that into the “replacement string” field.

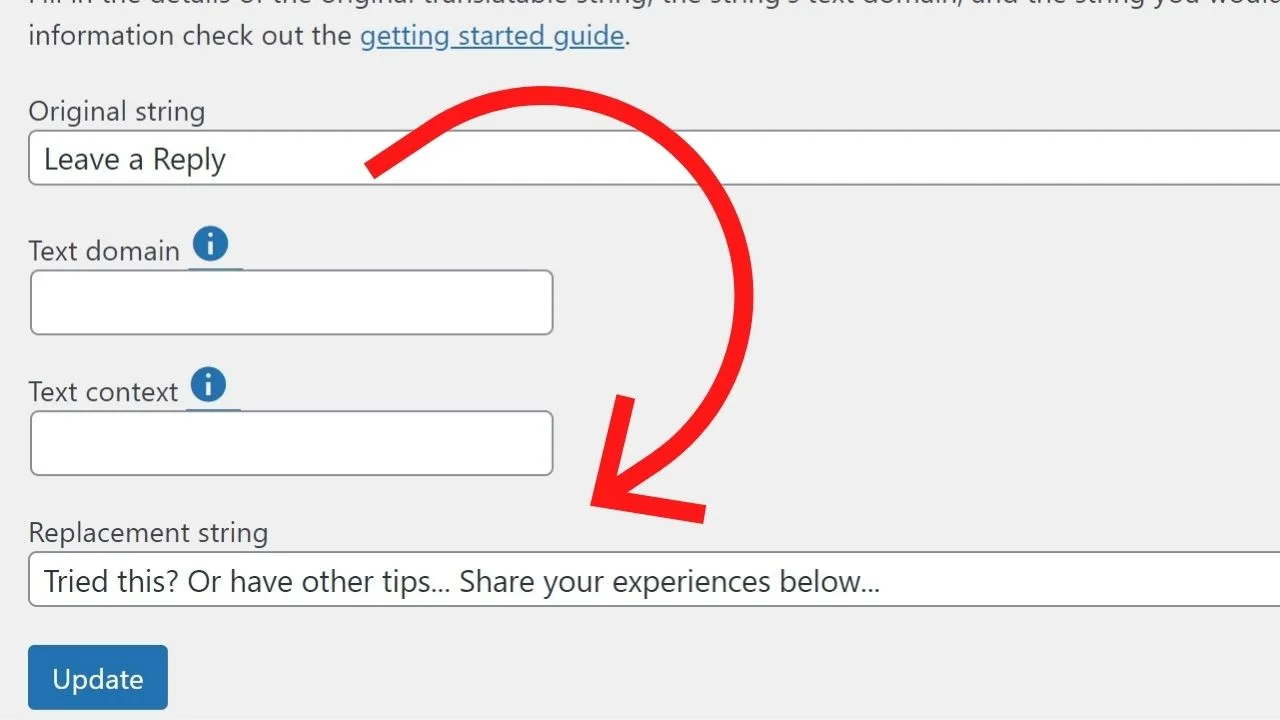
Once that’s done, you’ll then see your comments field has a different text.
This is the simplest way to alter your Call to Action to encourage visitors to engage in the comments of your blog.
It can be made much more effective than your typical “Leave a Reply” prompt.
The added benefit is that scrapers (blog comment spamming software) are often programmed to find blogs with comments open using standard “leave a reply” fields.
Having a custom string instead can help avoid spam scrapers plaguing your website.
This is the same with “post comment”, “submit” and similar text on buttons for user-generated content.
You can use the Say What? plugin to change the codes in your file templates, without needing to edit coding directly.


Hey guys! It’s me, Marcel, aka Maschi. On MaschiTuts, it’s all about tutorials! No matter the topic of the article, the goal always remains the same: Providing you guys with the most in-depth and helpful tutorials!

