
Are you sick of seeing the “File size exceeds the upload_max_filesize directive in php.ini” error message?
Search for solutions, and you will be in a tailspin trying to figure out the location of PHP ini in WordPress.
Continue reading below to discover how to locate your server PHP.ini file so you can make the changes you want without breaking a sweat.
Where is the PHP ini in WordPress?
PHP ini is stored on the server running your WordPress software. If your server uses CGI, you should have a local PHP ini file in the root directory in cPanel, File Manager. Servers running Apache have .htaccess files that can change your server configuration. If not, use MutiPHP INI Editor.
Why editing the PHP ini may be required
The PHP.ini file is of huge significance for WordPress installs. This file contains the default configuration settings for every website running on the WordPress software.
WordPress uses PHP as the server-side scripting language. It is these scripts that make your website work. When you first install WordPress on your server, it creates a PHP.ini file.
The configuration settings for your WordPress site are controlled by this file. If you want to change any behavior at the server level, you need to edit the php.ini file.
The problem is that you cannot always do that.
Some web hosts will prevent you from accessing the server configuration. Some will let you see it, just not let you do anything with it. This is standard practice on shared hosting plans.
For complete control over your server configuration, you must use a VPS (virtual private server) or a dedicated server.
If you are on a shared hosting plan or have bought your hosting through a reseller, you will not have access to change the PHP.ini file “directly.”
Emphasis on directly because there are some changes you can still do. For example, if your server uses the Apache Module, you can edit the server configuration with the .htaccess file instead.
Before fast-forwarding too much, take a pause to see what you have available to work with, and then you can figure out how to change your server configuration.
How to find the PHP.ini file in WordPress (read-only)
This method lets you read your PHP.ini file. Use this to see the tech specs of your current server setup.
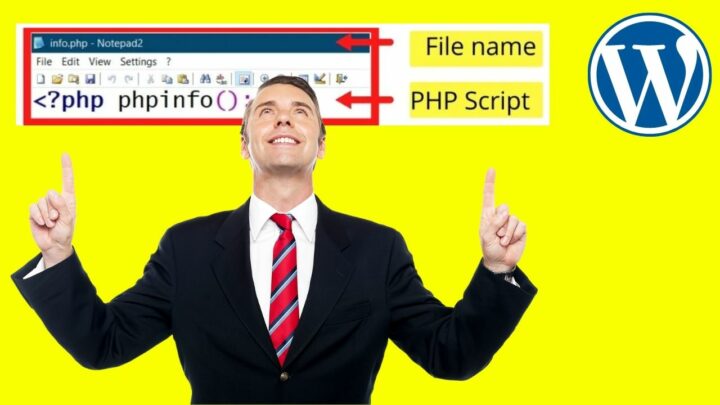
The process involves creating a PHP file in a plain text editor like Notepad.
Paste in the following code:
<?php phpinfo(); ?>
Then save the file as info.php or something similar. The name does not matter. The file type matters. It must be a PHP file.


Because PHP is a server-side scripting language, it needs to be run on a server.
You can learn about how to run a PHP file in Chrome, or the much faster route is to log in to cPanel, open the File Manager, and upload the PHP file to your root directory.
Log into cPanel > Select File Manager > Navigate to the domain folder you want to configure the PHP.ini file for > Click “upload.”
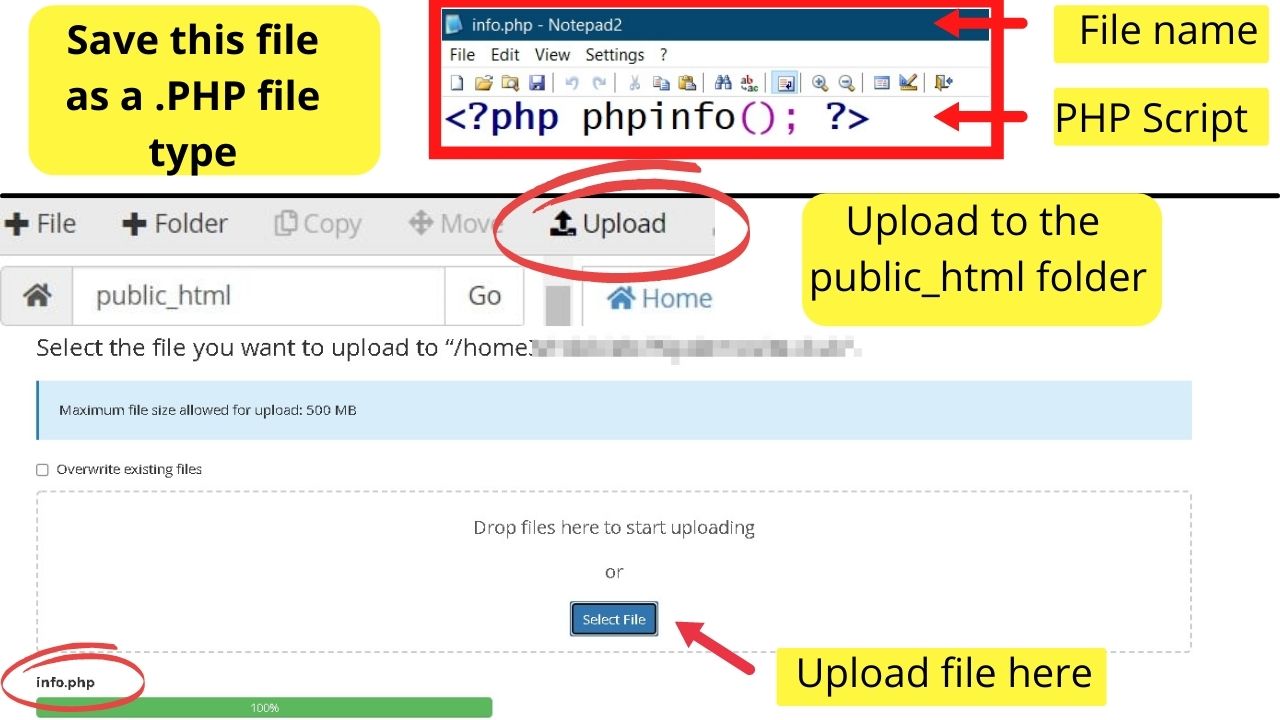
If you have one site, it will be the public_html folder this file is uploaded to. For addon domains, select the folder for the domain, then upload the file to that root directory.
Once it is uploaded, go to yoursite.com/info.php. (replace “info” with whatever name you used when you saved the .PHP file)
The script will run on any browser and show you all the information contained in the PHP.ini file.
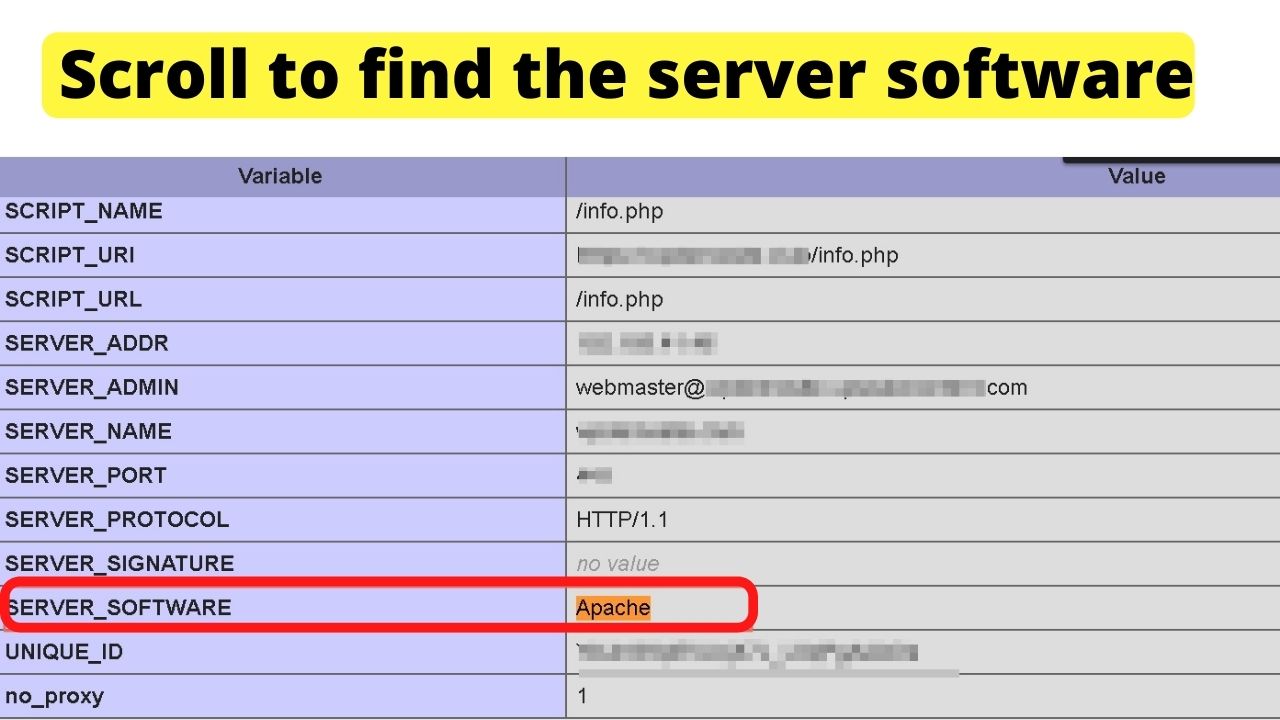
It will look like what is shown in the screenshot below.

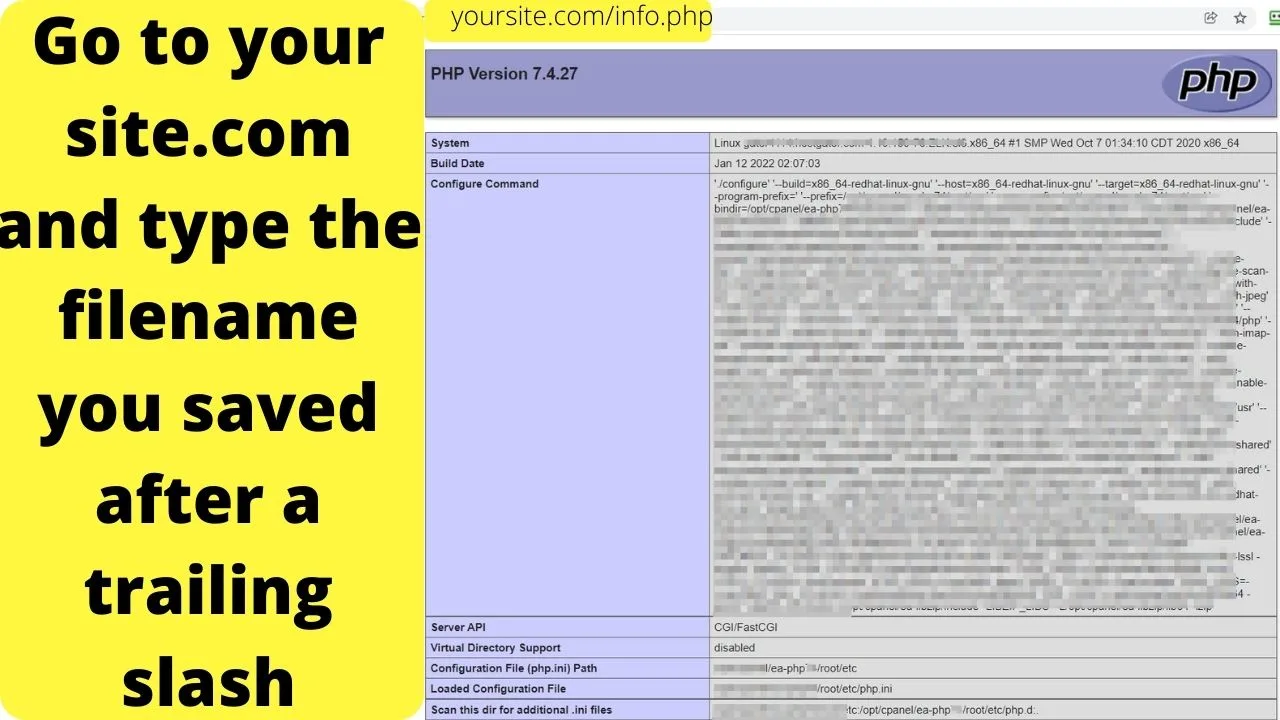
Look at the software section. This will be either CGI or Apache.
If your server uses the CGI software, you will have a local PHP.ini file in the root directory. If that is not there, the server is likely to be running in the Apache module.
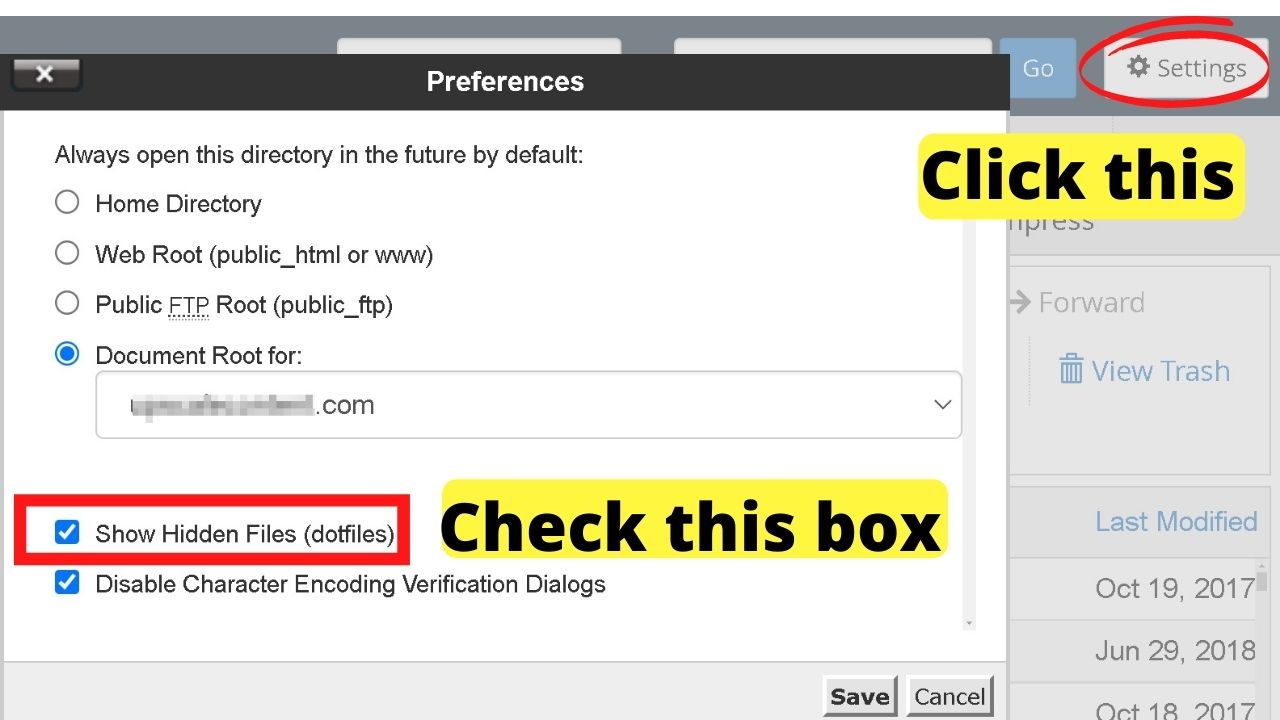
With Apache, you can edit your server configuration with the .htacess file. This is a hidden file.
To view hidden files, open File Manager> Click “Settings” in the top right > Check the box to “Show Hidden Files (dotfiles).

This is where you make the same code changes you would be doing in the PHP.ini file, only in a different format.
Do note that the only changes that can be applied need to be within the policy of your web host or the specifics for your hosting plan.
For example, the max upload limit on Godaddy hosting with cPanel is set to 128 MB. If you chose the Managed WordPress hosting, the max upload limit is 192 MB.
On Bluehost, the max upload is 50 MB until you edit the PHP ini file to increase the file size limit.
Each web host has its limitations. Check the terms of the agreement for the hosting plan you signed up for.
How to edit the PHP.ini file on any hosting plan
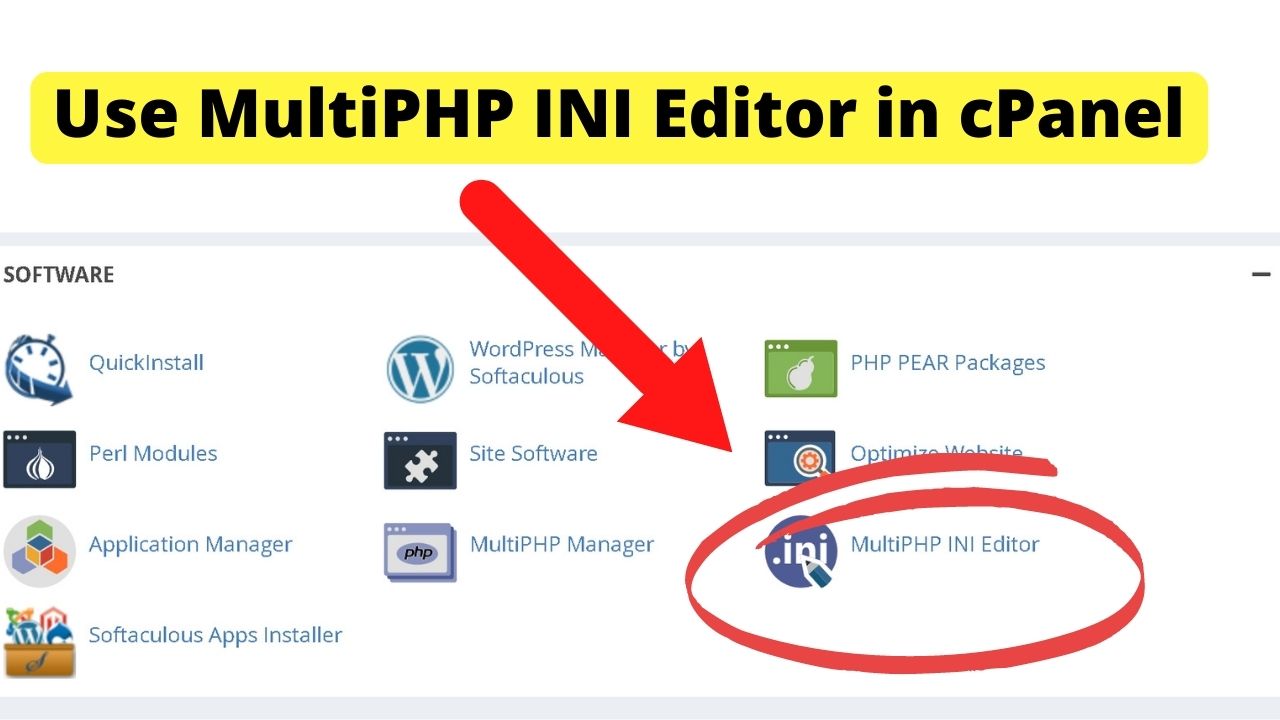
Use the MultiPHP INI Editor software. This writes to the php.ini file, the .htaccess file, and the user.ini file.
If you do not have access to the PHP.ini file, this is the software to make edits:
- Log in to cPanel
- Scroll down to the “Software” section
- Click on “MultiPHP INI Editor.”

From here, if you have more than one domain on your hosting plan, you can select the domain you want to configure from the dropdown menu or apply the changes to your home directory.
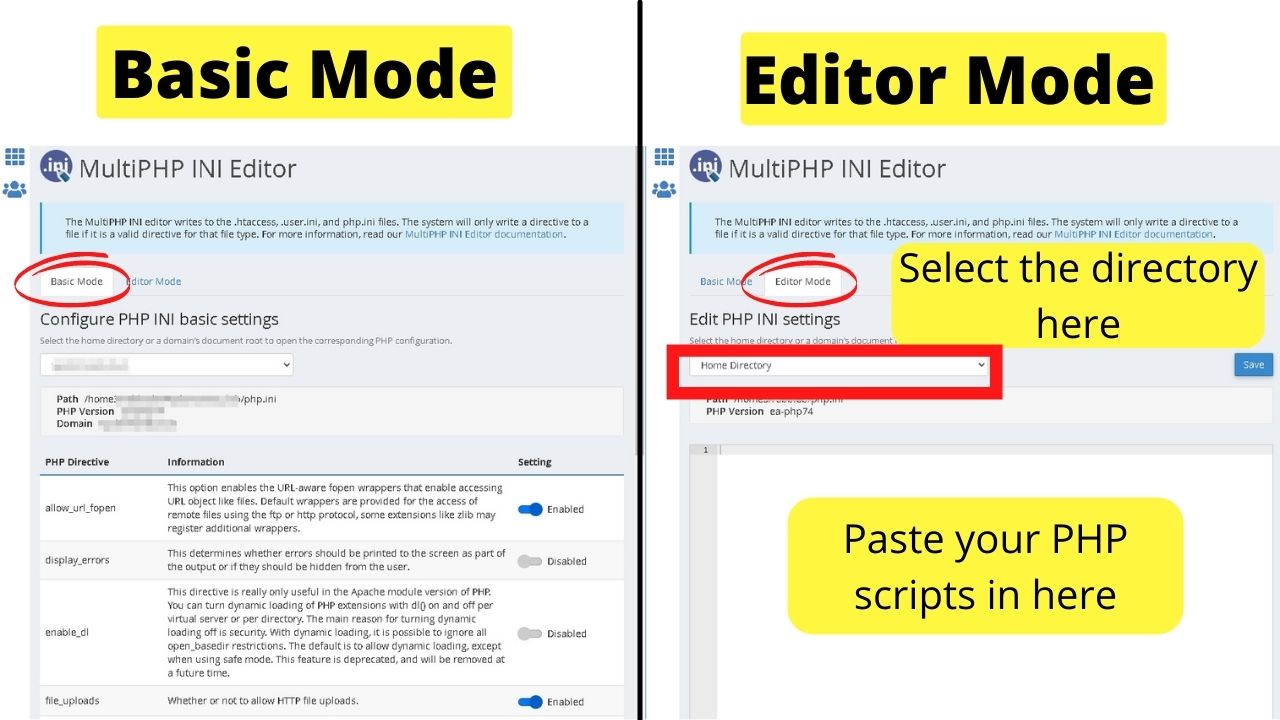
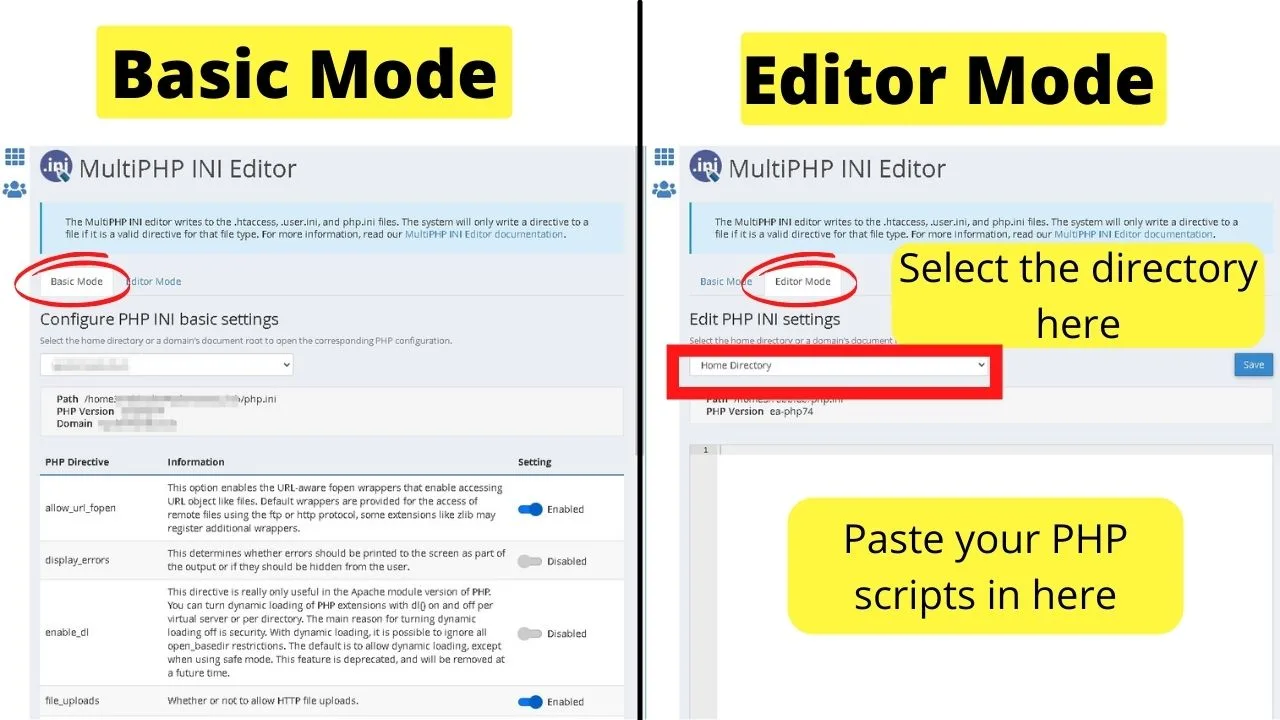
The basic editor lets you change the configuration settings by clicking the appropriate tabs.
If you need to insert lines of code to change values, click the “editor mode” tab and paste your PHP code there.
Keep in mind that you will be restricted by your web hosting provider’s policy. Some do place restrictions on max upload limits and execution times.
Usually, this only applies to shared hosting plans. This is done to make sure that each customer gets an equal share of the bandwidth resources.
What web hosting providers do not want to happen is one customer changing the php.ini file to allow for excess resources, as that would slow the websites down for every other customer on that same server.


Hey guys! It’s me, Marcel, aka Maschi. On MaschiTuts, it’s all about tutorials! No matter the topic of the article, the goal always remains the same: Providing you guys with the most in-depth and helpful tutorials!

