

Technophobes adore WordPress for one reason. Plugins.
Developers code JS files and PHP scripts, beautify some functions with CSS, dump it all into a zip folder and let anyone use their work with the quick install of a plugin.
There are tens of thousands of plugins for WordPress and no limit (apart from the memory limit on your hosting plan) for how many plugins you can install.
The problem with too many plugins is that for each one added, more code is inserted into the functions.php file, HTTP requests increase, and old plugins that do not receive updates pose security vulnerabilities.
The more plugins there are installed on WordPress, not necessarily active, the higher the likelihood something will cause a conflict.
When conflicts arise on WordPress, plugins are the usual culprits. Disabling them is the only way to troubleshoot.
How to disable WordPress plugins
WordPress plugins can be disabled individually or all at once from within your WP admin panel. Should a plugin have broken your website, you can deactivate plugins by changing the file names in cPanel, or connecting to your hosting account with FTP and renaming the plugins folder.
How to disable plugins in WordPress the easy way
Log in as an administrator then on the left sidebar, hover the cursor over “plugins”. From the expanded menu, click on “installed plugins”.
This will show a list of all of the installed plugins.
Along the top, you can change the view from “all” to show only the active plugins, inactive, recently active, must use, updates available, or show the plugins with auto-updates disabled.
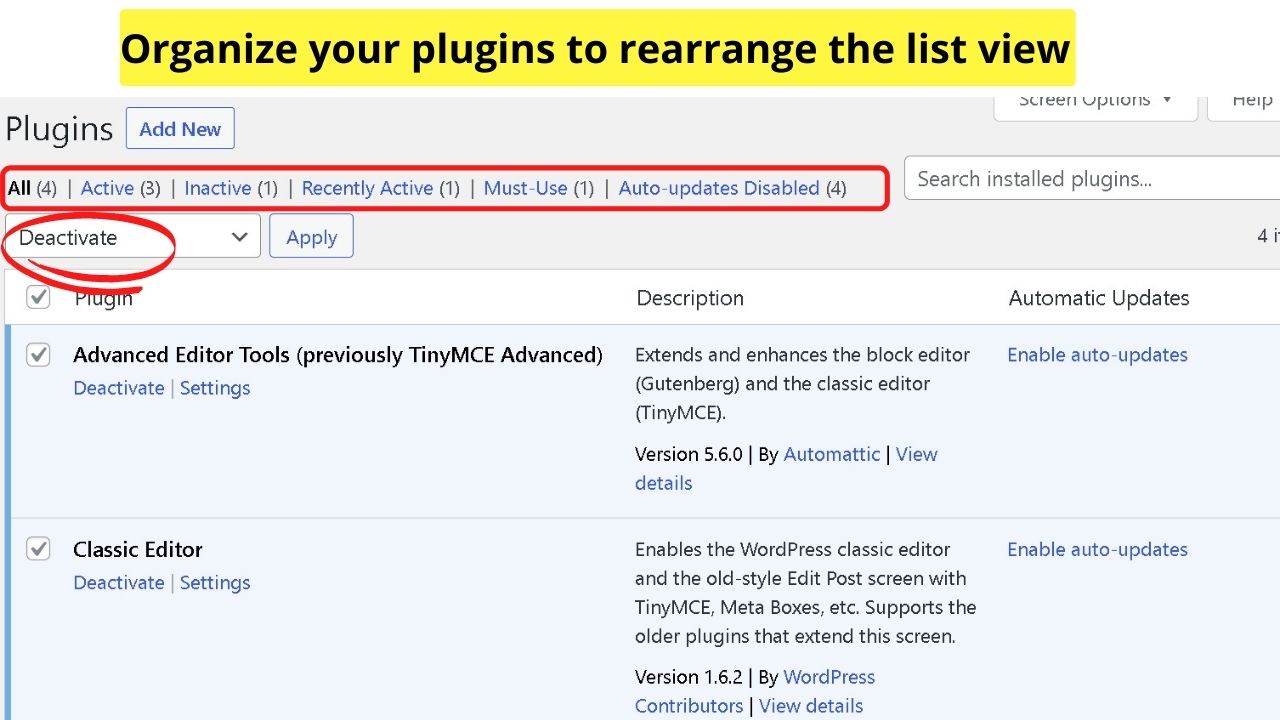

These options can help you hone in on plugins causing problems.
As an example, if something broke after a plugin was recently installed, select recently active, then only the most recent plugins added to the site will be shown.
Likewise, if there are updates available, click that option to apply an update as the update may be a fix or patch the developer has rolled out to fix a known bug.
If updates do not work, deactivating for troubleshooting is the logical next step.
To deactivate individual plugins, find the plugin you want to disable, then under it, click the link that reads “deactivate”.
How to disable multiple plugins in WordPress in the fewest clicks possible
If you have no idea where to start troubleshooting, the best option is to disable every plugin. Then you can reactivate, and refresh your site to find the plugin that is causing difficulties.
To disable multiple plugins, WordPress has a bulk actions function.
Click the arrow at the top of the plugins page where it reads “bulk actions”. That opens a dropdown menu that gives you various options. Select “deactivate”.

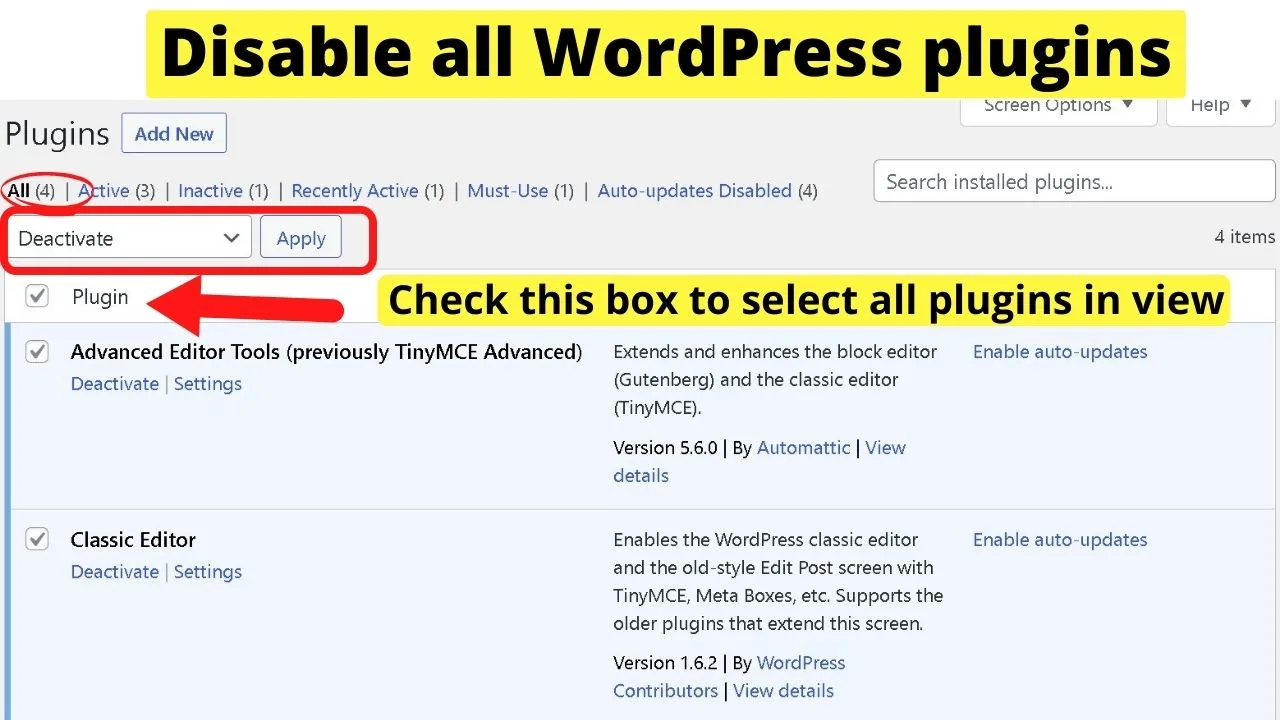


Beside each plugin is a check box. The first check box in the column titled “plugin” will auto-select all plugins in view.
If you only want to disable all recently active plugins, select “recently active” first, then check the box for the entire plugin column.
Once you have selected all the plugins you want disabled, go back to the top of the page, check “deactivate” is selected in the bulk actions menu, then click “apply”.
This will bulk disable every plugin that was selected.
How to disable WordPress plugins with FTP or in cPanel
Not every conflict is a simple fix. A conflict that throws a fatal error can prevent your site from loading.
And this is very likely to happen…sooner or later!
I personally experienced this at least a few dozen times if not more. Reasons for a crash like that can be manyfold.
A single, faulty line of code can crash your whole WordPress website.
Another potential dangers are obviously plugins, especially caching plugins. While it is possible to cache a WordPress website without a caching plugin, most people use complex caching plugins such as W3 Total Cache, WP Rocket and the like.
And while these plugins are great, they have so many so many options and are really technical. So chances are that you will misconfigure the plugin, sooner or later. And when that happens, your site may crash.
With no access to your WP login page, you will need a workaround to disable WordPress plugins.
One certain way to disable plugins is to break them. It sounds counter-intuitive, but it gets the job done.
If you have an FTP client installed on your computer, log in via FTP.
Once connected, navigate to the root folder of your domain (yoursite.com), click to open the “WP content” folder, then right-click on the “plugins” folder and select “rename”.

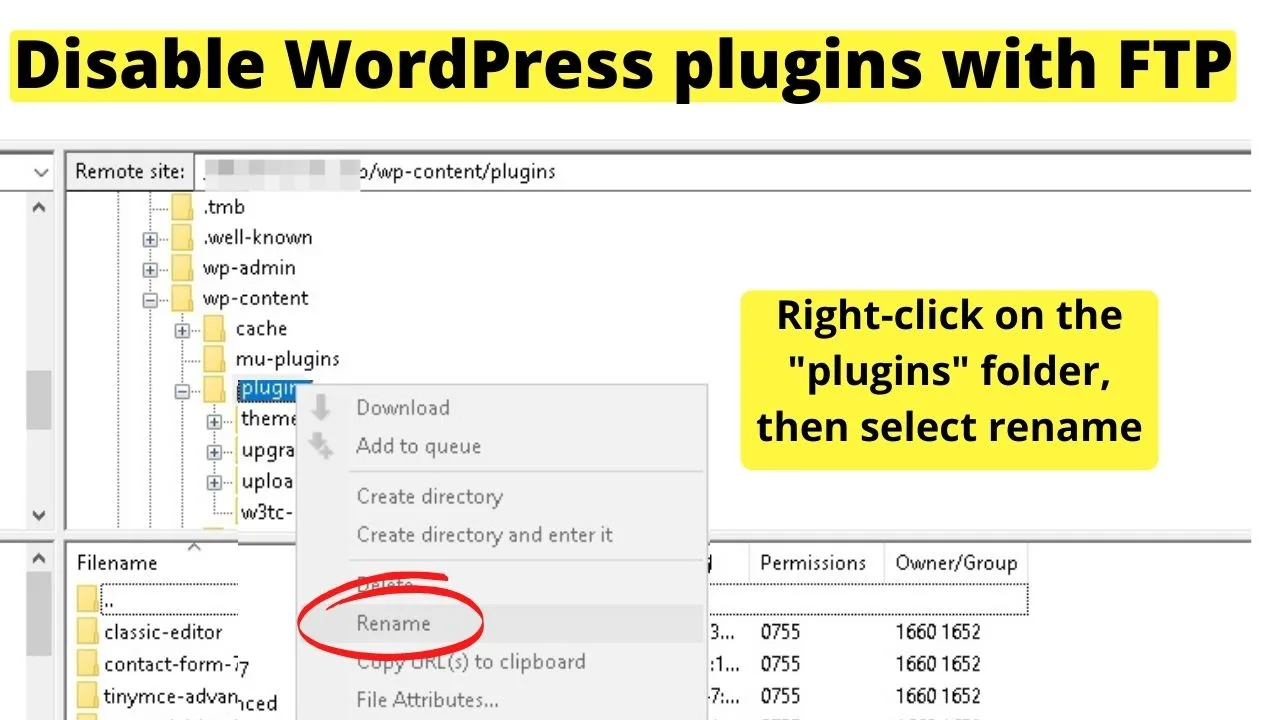
Just add .old to the filename. This breaks the file path so to the WordPress software, the Plugin file does not exist.
In cPanel, the same process can be done just with more clicking around.
Go to cPanel (yoursite.com:2083) and select File Manager, then go to the root folder of your site, open the WP Content folder, and rename the plugins folder.
How to reactivate plugins in WordPress
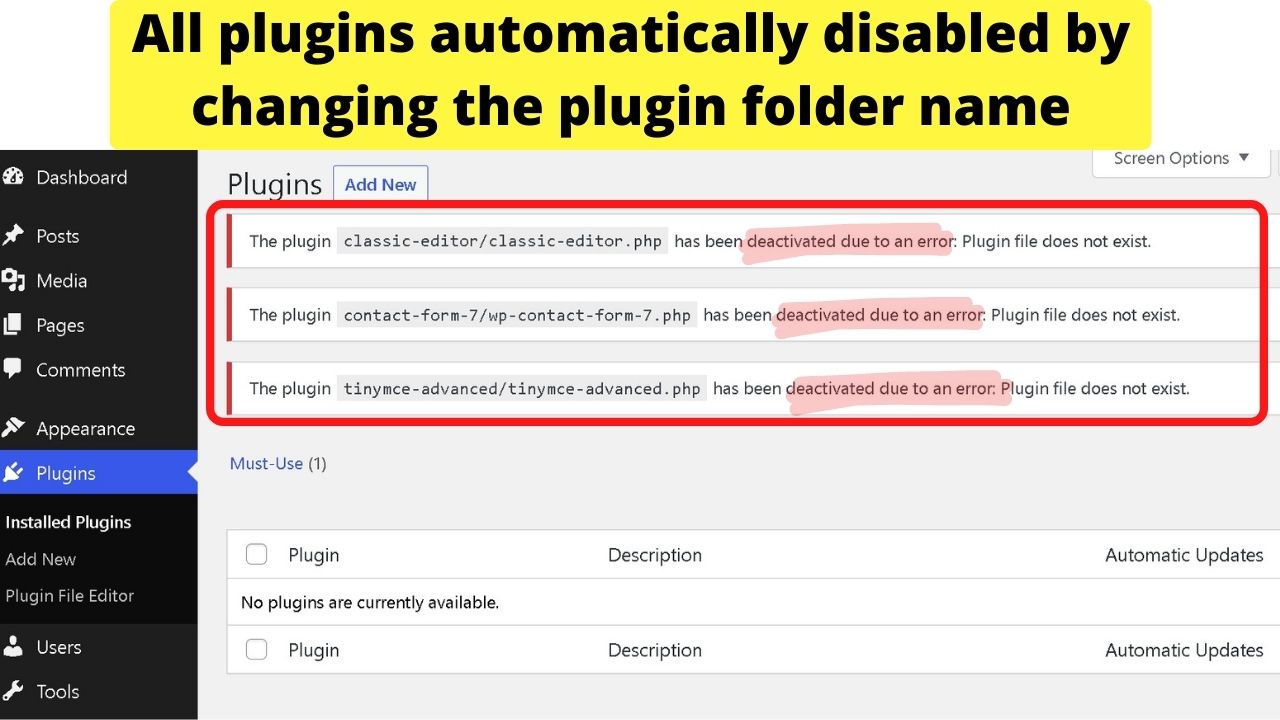
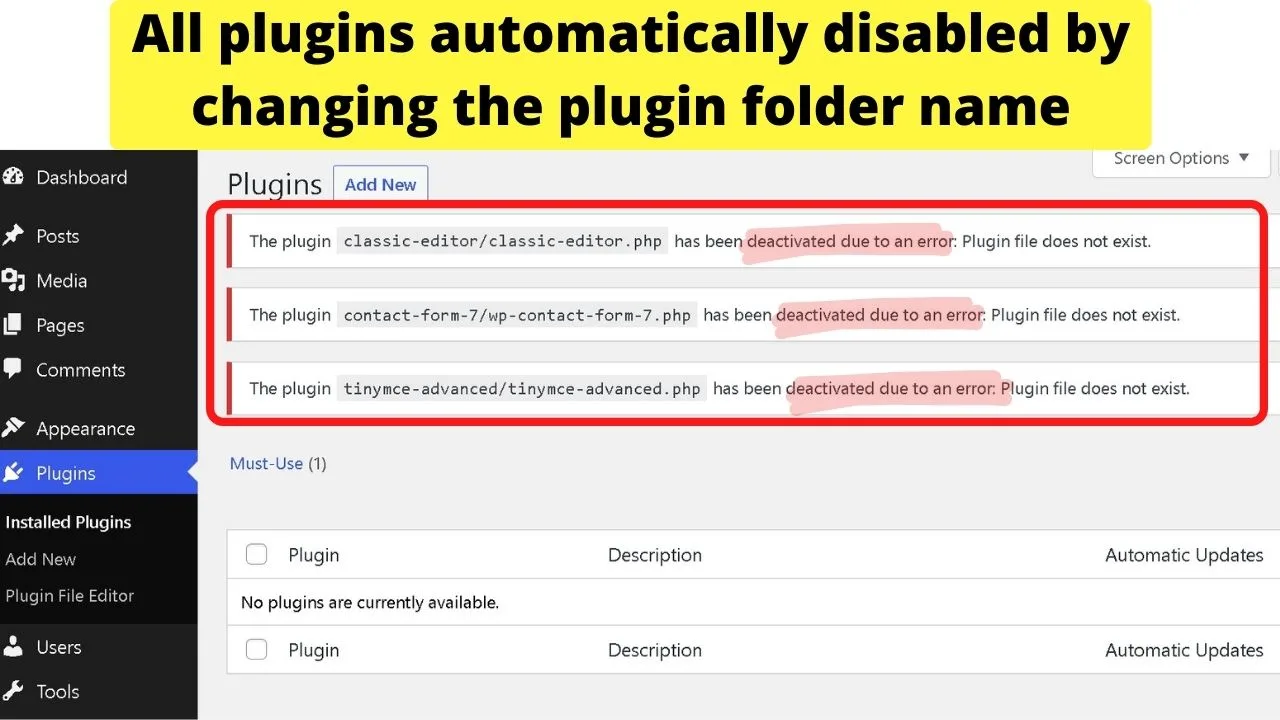
Changing the plugins folder name deactivates all plugins in that folder. Changing it back does not automatically reactivate them.
When you want to reactivate plugins that have been disabled by renaming the plugins folder, use the bulk actions function on the “installed plugins” page of WordPress.
How to disable a single WordPress plugin without access to WP admin
If you know the plugin that is causing problems and can’t get into WordPress to disable plugins, then accessing your hosting server through FTP is the solution.
As an example, if you used the plugin editor to change some code for a plugin that caused a fatal error, you may not be able to log in.
Instead, access your hosting account with FTP or cPanel, navigate to the WP content > plugins folder for your site, then click into the folder and rename a single plugin, such as changing Contact-Form-7 to Contact-Form-7.old.
This would disable the Contact Form 7 plugin but leave all other plugins active.
Reactivating the plugin may cause an error to show that the “file does not exist”. This can happen if you revert the plugin name back to the original without flushing the cache.
If there is a cache version trying to load the .old plugin file name, purge or flush the cache within WordPress, then reactivate the plugin.
As you can see, as useful and amazing as many WordPress plugins are, there are many problems that can arise due to the use of these plugins.
This is also true for WordPress widgets. One problem that you can have with widgets is that they suddenly just don’t show anymore. If that should ever be the case, have a look at our article “WordPress Widgets not showing — Here’s Why.” That should do the trick!


Hey guys! It’s me, Marcel, aka Maschi. On MaschiTuts, it’s all about tutorials! No matter the topic of the article, the goal always remains the same: Providing you guys with the most in-depth and helpful tutorials!

